Difference between revisions of "Service Manager Business Process Workflow"
| (250 intermediate revisions by 8 users not shown) | |||
| Line 1: | Line 1: | ||
| − | {{bluebanner|[[Main Page|Home]] > [[Administration]] > [[Service Manager Administration |Service Manager]] > Business Process Workflow|[[ | + | {{bluebanner|[[Main Page|Home]] > [[Administration]] > [[Service Manager Administration |Service Manager]] > Business Process Workflow|[[:Category:Administration|Index]]}} |
{{IntroAndLinks| | {{IntroAndLinks| | ||
| − | The Service Manager Business Process Workflow is used to automate the processing of the requests that have been raised. This page contains information on the Service Manager | + | The Service Manager Business Process Workflow is used to automate the processing of the requests that have been raised. This page contains information on the Service Manager automated tasks that can be used in the [[Business Process Designer]] to build unique and powerful processes for your requests.| |
:* [[Business Process Designer]] | :* [[Business Process Designer]] | ||
:* [[Request Variables]] | :* [[Request Variables]] | ||
| − | + | :* [[Core Hornbill Automations]] | |
}} | }} | ||
<!-- ******************************************************************************************************************************* --> | <!-- ******************************************************************************************************************************* --> | ||
| Line 32: | Line 32: | ||
==Boards== | ==Boards== | ||
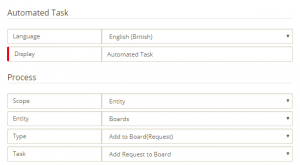
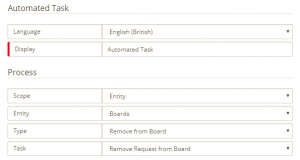
| − | Use the Boards nodes to automatically add, move or remove a Request from an existing Board. Requests can be added to one or multiple Boards in Service Manager, and can be moved between Lists on specified Boards automatically. | + | '''Please Note:''' Service Manager Boards have now been deprecated and replaced with [[Board_Manager|'''Hornbill Board Manager''']]. The available Board Manager business process operations are outlined [[Board_Manager_Business_Process_Workflow|'''here''']]. Use the Boards nodes to automatically add, move or remove a Request from an existing Board. Requests can be added to one or multiple Boards in Service Manager, and can be moved between Lists on specified Boards automatically. |
<!-- ****************************************************************************************************************************** --> | <!-- ****************************************************************************************************************************** --> | ||
<!-- * Add Comment to Board * --> | <!-- * Add Comment to Board * --> | ||
<!-- ****************************************************************************************************************************** --> | <!-- ****************************************************************************************************************************** --> | ||
| − | {{BPMAutomation|AddCommentToBoard | + | {{BPMAutomation|AddCommentToBoard|Add Comment To Board| |
[[File:bpmaddcommenttoboard.png|thumb|link=https://wiki.hornbill.com/images/9/9e/Bpmaddcommenttoboard.png]]| | [[File:bpmaddcommenttoboard.png|thumb|link=https://wiki.hornbill.com/images/9/9e/Bpmaddcommenttoboard.png]]| | ||
Use this node to manually add a Comment card to a Service Manager Board at the required stage in a process.| | Use this node to manually add a Comment card to a Service Manager Board at the required stage in a process.| | ||
| Line 71: | Line 71: | ||
==Change Requests== | ==Change Requests== | ||
Use these nodes at any stage in a process to automate Change Request specific actions. | Use these nodes at any stage in a process to automate Change Request specific actions. | ||
| + | ===Get Information=== | ||
| + | <!-- ****************************************************************************************************************************** --> | ||
| + | <!-- * Get Information * --> | ||
| + | <!-- ****************************************************************************************************************************** --> | ||
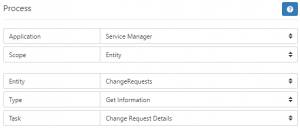
| + | {{BPMAutomation|getChangeInformation|GetInformation| | ||
| + | [[File:bpmgetchangeinfo.png|thumb|link=https://wiki.hornbill.com/images/3/34/Bpmgetchangeinfo.png]]| | ||
| + | Use this Hornbill Automation to get extended change information from a Change Request.| | ||
| + | {{bullet1|Backout Plan|Get the Backout Plan for the change}} | ||
| + | {{bullet1|Change Category|Get the category set against the change}} | ||
| + | {{bullet1|Change Justification|Get the Justification information from the change}} | ||
| + | {{bullet1|Change Type|Get the Change Type}} | ||
| + | {{bullet1|Communication Plan|Get the Communication Plan for the change}} | ||
| + | {{bullet1|Disruption Level|Get the Disruption Level for the change}} | ||
| + | {{bullet1|End Time|Get the time when the change is set to be completed}} | ||
| + | {{bullet1|Implementation Plan|Get the Implementation Plan}} | ||
| + | {{bullet1|Is Scheduled|Get information about if the change is scheduled or not}} | ||
| + | {{bullet1|Proposed End Time|Get the proposed end time of the change}} | ||
| + | {{bullet1|Proposed Start Time|Get the proposed start time of the change}} | ||
| + | {{bullet1|Security Implication|Get any security implications that have been added to the change}} | ||
| + | {{bullet1|Start Time|Get the start time for the change}} | ||
| + | {{bullet1|Support Plan|Get the support plan for the change}} | ||
| + | {{bullet1|Test Plan|Get the test plan for the change}} | ||
| + | }} | ||
| + | |||
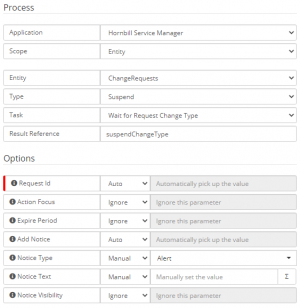
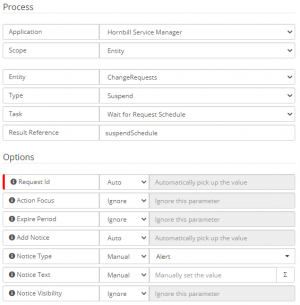
=== Suspend === | === Suspend === | ||
<!-- ****************************************************************************************************************************** --> | <!-- ****************************************************************************************************************************** --> | ||
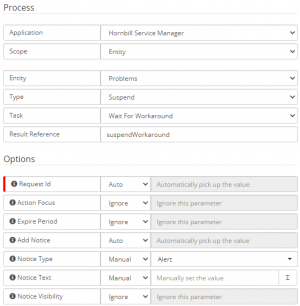
| Line 80: | Line 104: | ||
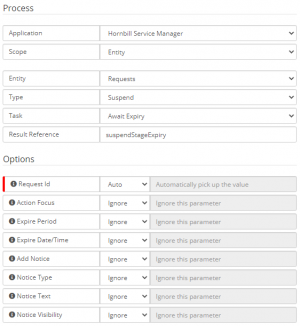
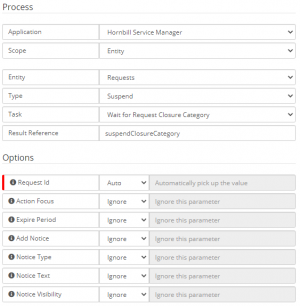
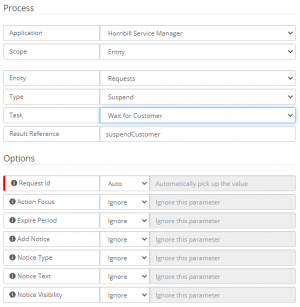
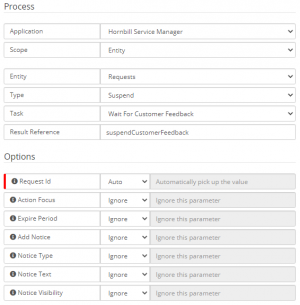
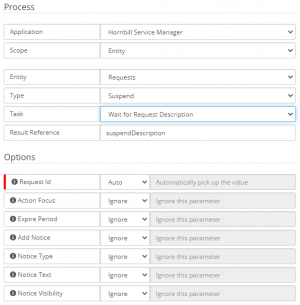
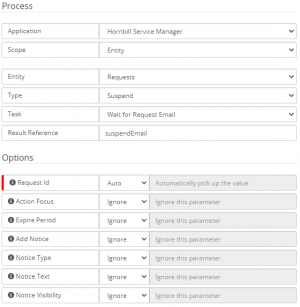
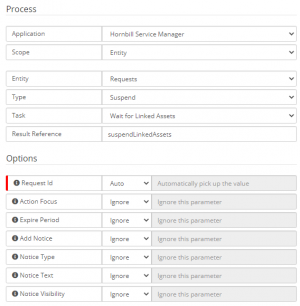
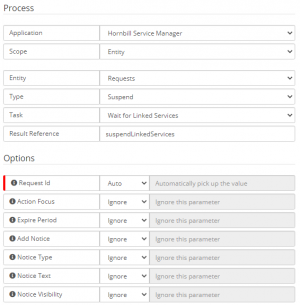
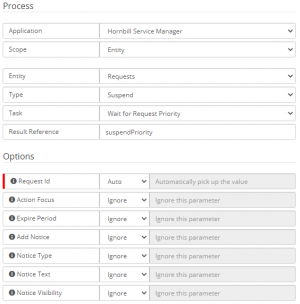
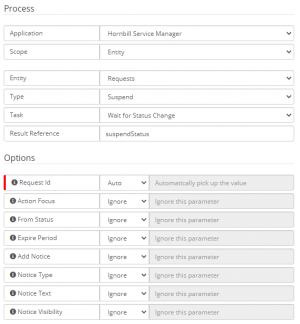
{{bullet1|Request Id|This is a mandatory setting that uses a variable to hold the Request Id of the request that is using this BPM. This should be set to Auto}} | {{bullet1|Request Id|This is a mandatory setting that uses a variable to hold the Request Id of the request that is using this BPM. This should be set to Auto}} | ||
{{bullet1|Action Focus|Sets the Action Item on a request that will be in focus when using this suspend node.}} | {{bullet1|Action Focus|Sets the Action Item on a request that will be in focus when using this suspend node.}} | ||
| − | {{bullet1|Expire Period| | + | {{bullet1|Expire Period|The length of time to wait until the node expires and the workflow will automatically continue. This is based on the Working Time Calendar defined in the setting '''guest.app.timer.defaultCalendar'''. When this date and time is reached, the BPM will automatically continue. An outcome of ''Expired'' will be provided to allow for a decision node to be placed after this operation to determine how the expired operation will be managed.}} |
| + | {{bullet1|Add Notice|Select Yes to add a notice to the top of the request}} | ||
| + | {{bullet1|Notice Type|The type of notice (Alert or Information). The default value is "Information".}} | ||
| + | {{bullet1|Notice Text|The text that will be displayed. This has a limit of 255 characters}} | ||
| + | {{bullet1|Notice Visibility|The visibility of the notice (Portals | Service Desk | Both). The default value is "Service Desk"}} | ||
}} | }} | ||
<!-- ****************************************************************************************************************************** --> | <!-- ****************************************************************************************************************************** --> | ||
| Line 90: | Line 118: | ||
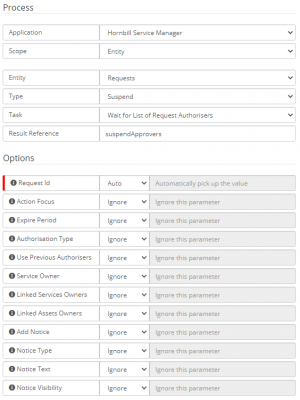
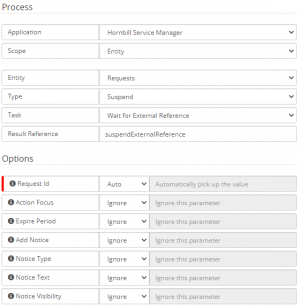
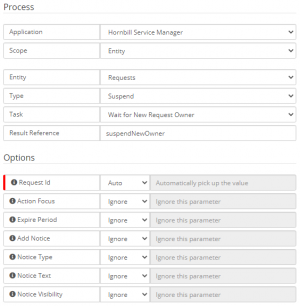
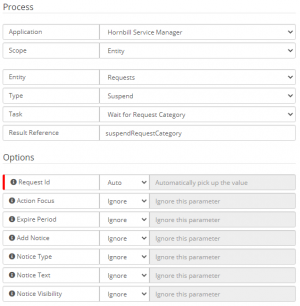
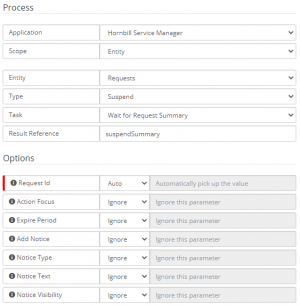
{{bullet1|Request Id|This is a mandatory setting that uses a variable to hold the Request Id of the request that is using this BPM. This should be set to Auto}} | {{bullet1|Request Id|This is a mandatory setting that uses a variable to hold the Request Id of the request that is using this BPM. This should be set to Auto}} | ||
{{bullet1|Action Focus|Sets the Action Item on a request that will be in focus when using this suspend node.}} | {{bullet1|Action Focus|Sets the Action Item on a request that will be in focus when using this suspend node.}} | ||
| − | {{bullet1|Expire Period| | + | {{bullet1|Expire Period|The length of time to wait until the node expires and the workflow will automatically continue. This is based on the Working Time Calendar defined in the setting '''guest.app.timer.defaultCalendar'''. When this date and time is reached, the BPM will automatically continue. An outcome of ''Expired'' will be provided to allow for a decision node to be placed after this operation to determine how the expired operation will be managed.}} |
| + | {{bullet1|Add Notice|Select Yes to add a notice to the top of the request}} | ||
| + | {{bullet1|Notice Type|The type of notice (Alert or Information). The default value is "Information".}} | ||
| + | {{bullet1|Notice Text|The text that will be displayed. This has a limit of 255 characters}} | ||
| + | {{bullet1|Notice Visibility|The visibility of the notice (Portals | Service Desk | Both). The default value is "Service Desk"}} | ||
}} | }} | ||
| Line 126: | Line 158: | ||
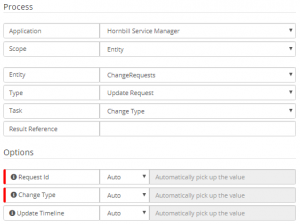
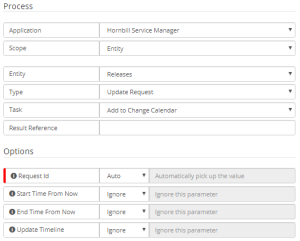
{{bullet1|Change Type|Select from the pick list which type of Change will be set on this change}} | {{bullet1|Change Type|Select from the pick list which type of Change will be set on this change}} | ||
{{bullet1|Update Timeline|Include a Timeline update on the request when this automation has completed}} | {{bullet1|Update Timeline|Include a Timeline update on the request when this automation has completed}} | ||
| + | }} | ||
| + | |||
| + | == Known Errors == | ||
| + | <!-- ****************************************************************************************************************************** --> | ||
| + | <!-- * * --> | ||
| + | <!-- * Known Errors * --> | ||
| + | <!-- * * --> | ||
| + | <!-- ****************************************************************************************************************************** --> | ||
| + | Use these nodes at any stage in a process to automate Known Error specific actions. | ||
| + | === Get Information=== | ||
| + | <!-- ****************************************************************************************************************************** --> | ||
| + | <!-- * Known Error Details * --> | ||
| + | <!-- ****************************************************************************************************************************** --> | ||
| + | {{BPMAutomation|Known_Error_Details|Known Error Details| | ||
| + | [[File:bpmknownerrordetails.png|thumb|link=https://wiki.hornbill.com/images/c/ca/Bpmknownerrordetails.png]]| | ||
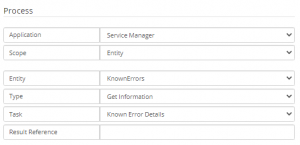
| + | Use this node to get the Accepted Solution, Root Cause, and the Workaround from a known error record.| | ||
| + | {{bullet1|RequestID|This is a mandatory setting that uses a variable to hold the Request Id of the request that is using this BPM. This should be set to Auto}} | ||
| + | }} | ||
| + | |||
| + | === Update Known Error === | ||
| + | <!-- ****************************************************************************************************************************** --> | ||
| + | <!-- * Update Known Error * --> | ||
| + | <!-- ****************************************************************************************************************************** --> | ||
| + | {{BPMAutomation|Update_Known_Error_Details|Update Known Error Details| | ||
| + | [[File:bpmupdateknownerror.png|thumb|link=https://wiki.hornbill.com/images/6/6d/Bpmupdateknownerror.png]]| | ||
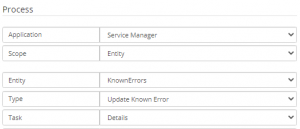
| + | Use this node to update the workaround and root cause on a Known Error record.| | ||
| + | {{bullet1|RequestID|This is a mandatory setting that uses a variable to hold the Request Id of the request that is using this BPM. This should be set to Auto}} | ||
| + | {{bullet1|Root Cause|Use this option to set the Root Cause of the known error record}} | ||
| + | {{bullet1|Workaround|Use this optino to set the Workaround for the known error record}} | ||
| + | {{bullet1|System Timeline Update|Select if the default system text will be added to the timeline for this action}} | ||
| + | {{bullet1|Manual Timeline Update|Select Yes to override the default System timeline Text, and add your own text which will appear in the timeline update for this action}} | ||
| + | {{bullet1|Visibility|Choose what level of visibility will be automatically applied to this update. Choosing anything other than Customer will result in the customer not seeing the update in the timeline of their requests on the Service or Customer Portals.}} | ||
}} | }} | ||
| Line 136: | Line 200: | ||
==Problem Records== | ==Problem Records== | ||
Use these nodes at any stage in a process to automate Problem Record specific actions. | Use these nodes at any stage in a process to automate Problem Record specific actions. | ||
| + | === Get Information === | ||
| + | <!-- ****************************************************************************************************************************** --> | ||
| + | <!-- * Problem Details * --> | ||
| + | <!-- ****************************************************************************************************************************** --> | ||
| + | {{BPMAutomation|Problem_Details|Problem Details| | ||
| + | [[File:bpmproblemdetails.png|thumb|link=https://wiki.hornbill.com/images/c/cc/Bpmproblemdetails.png]]| | ||
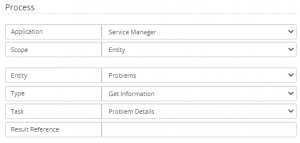
| + | Use this node to get the Accepted Solution, Root Cause, and the Workaround from a problem record.| | ||
| + | {{bullet1|RequestID|This is a mandatory setting that uses a variable to hold the Request Id of the request that is using this BPM. This should be set to Auto}} | ||
| + | }} | ||
| + | |||
=== Suspend === | === Suspend === | ||
<!-- ****************************************************************************************************************************** --> | <!-- ****************************************************************************************************************************** --> | ||
| Line 145: | Line 219: | ||
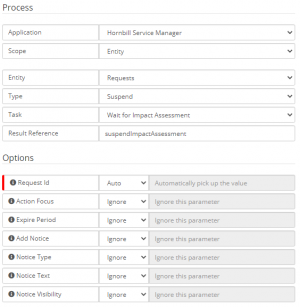
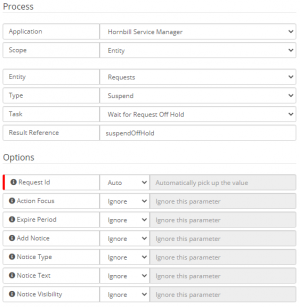
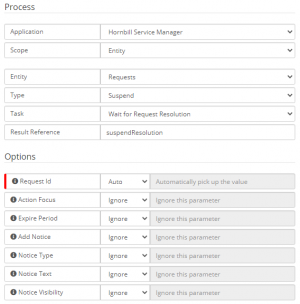
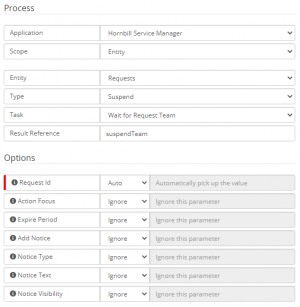
{{bullet1|RequestID|This is a mandatory setting that uses a variable to hold the Request Id of the request that is using this BPM. This should be set to Auto}} | {{bullet1|RequestID|This is a mandatory setting that uses a variable to hold the Request Id of the request that is using this BPM. This should be set to Auto}} | ||
{{bullet1|Action Focus|Sets the Action Item on a request that will be in focus while the process is suspended}} | {{bullet1|Action Focus|Sets the Action Item on a request that will be in focus while the process is suspended}} | ||
| − | {{bullet1|Expire Period| | + | {{bullet1|Expire Period|The length of time to wait until the node expires and the workflow will automatically continue. This is based on the Working Time Calendar defined in the setting '''guest.app.timer.defaultCalendar'''. When this date and time is reached, the BPM will automatically continue. An outcome of ''Expired'' will be provided to allow for a decision node to be placed after this operation to determine how the expired operation will be managed.}} |
| + | {{bullet1|Add Notice|Select Yes to add a notice to the top of the request}} | ||
| + | {{bullet1|Notice Type|The type of notice (Alert or Information). The default value is "Information".}} | ||
| + | {{bullet1|Notice Text|The text that will be displayed. This has a limit of 255 characters}} | ||
| + | {{bullet1|Notice Visibility|The visibility of the notice (Portals | Service Desk | Both). The default value is "Service Desk"}} | ||
}} | }} | ||
| + | === Update Problem === | ||
<!-- ****************************************************************************************************************************** --> | <!-- ****************************************************************************************************************************** --> | ||
| − | <!-- * * --> | + | <!-- * Update Problem Details * --> |
| − | <!-- * Release Records * --> | + | <!-- ****************************************************************************************************************************** --> |
| − | <!-- * * --> | + | {{BPMAutomation|Update_Problem_Details|Problem Details| |
| + | [[File:bpmproblemdetails.png|thumb|link=]]| | ||
| + | Use this node to update the workaround and root cause on a Problem Record.| | ||
| + | {{bullet1|RequestID|This is a mandatory setting that uses a variable to hold the Request Id of the request that is using this BPM. This should be set to Auto}} | ||
| + | {{bullet1|Root Cause|Use this option to set the Root Cause of the problem record}} | ||
| + | {{bullet1|Workaround|Use this optino to set the Workaround for the problem record}} | ||
| + | {{bullet1|System Timeline Update|Select if the default system text will be added to the timeline for this action}} | ||
| + | {{bullet1|Manual Timeline Update|Select Yes to override the default System timeline Text, and add your own text which will appear in the timeline update for this action}} | ||
| + | {{bullet1|Visibility|Choose what level of visibility will be automatically applied to this update. Choosing anything other than Customer will result in the customer not seeing the update in the timeline of their requests on the Service or Customer Portals.}} | ||
| + | }} | ||
| + | |||
| + | <!-- ****************************************************************************************************************************** --> | ||
| + | <!-- * * --> | ||
| + | <!-- * Release Records * --> | ||
| + | <!-- * * --> | ||
<!-- ****************************************************************************************************************************** --> | <!-- ****************************************************************************************************************************** --> | ||
| Line 165: | Line 258: | ||
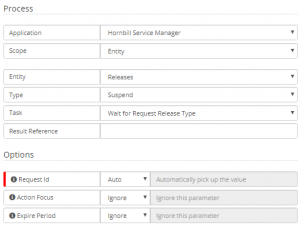
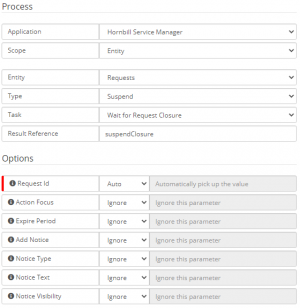
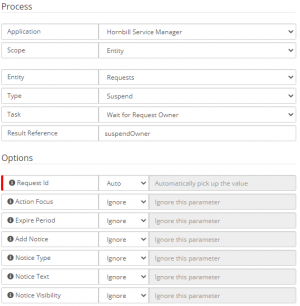
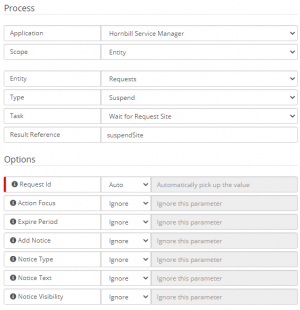
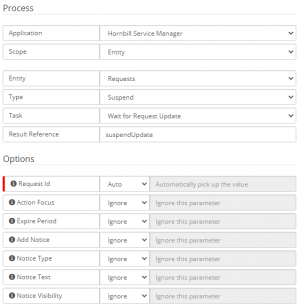
{{bullet1|Request Id|This is a mandatory setting that uses a variable to hold the Request Id of the request that is using this BPM. This should be set to Auto}} | {{bullet1|Request Id|This is a mandatory setting that uses a variable to hold the Request Id of the request that is using this BPM. This should be set to Auto}} | ||
{{bullet1|Action Focus|Sets the Action Item on a request that will be in focus when using this suspend node.}} | {{bullet1|Action Focus|Sets the Action Item on a request that will be in focus when using this suspend node.}} | ||
| − | {{bullet1|Expire Period| | + | {{bullet1|Expire Period|The length of time to wait until the node expires and the workflow will automatically continue. This is based on the Working Time Calendar defined in the setting '''guest.app.timer.defaultCalendar'''. When this date and time is reached, the BPM will automatically continue. An outcome of ''Expired'' will be provided to allow for a decision node to be placed after this operation to determine how the expired operation will be managed.}} |
}} | }} | ||
<!-- ****************************************************************************************************************************** --> | <!-- ****************************************************************************************************************************** --> | ||
| Line 175: | Line 268: | ||
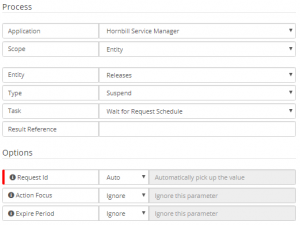
{{bullet1|Request Id|This is a mandatory setting that uses a variable to hold the Request Id of the request that is using this BPM. This should be set to Auto}} | {{bullet1|Request Id|This is a mandatory setting that uses a variable to hold the Request Id of the request that is using this BPM. This should be set to Auto}} | ||
{{bullet1|Action Focus|Sets the Action Item on a request that will be in focus when using this suspend node.}} | {{bullet1|Action Focus|Sets the Action Item on a request that will be in focus when using this suspend node.}} | ||
| − | {{bullet1|Expire Period| | + | {{bullet1|Expire Period|The length of time to wait until the node expires and the workflow will automatically continue. This is based on the Working Time Calendar defined in the setting '''guest.app.timer.defaultCalendar'''. When this date and time is reached, the BPM will automatically continue. An outcome of ''Expired'' will be provided to allow for a decision node to be placed after this operation to determine how the expired operation will be managed.}} |
}} | }} | ||
| Line 300: | Line 393: | ||
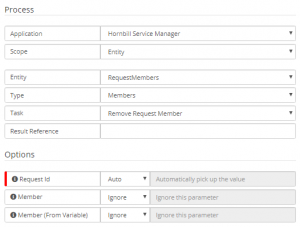
{{bullet1|Member|This option can contain the Co-worker to be removed from the Request members. If supplied, "Member (From Variable)" option will be ignored}} | {{bullet1|Member|This option can contain the Co-worker to be removed from the Request members. If supplied, "Member (From Variable)" option will be ignored}} | ||
{{bullet1|Member (From Variable)|This option can contain the Id of a Co-worker (h_user_id in h_sys_accounts table). This option should only be supplied if "Member" option is not set}} | {{bullet1|Member (From Variable)|This option can contain the Id of a Co-worker (h_user_id in h_sys_accounts table). This option should only be supplied if "Member" option is not set}} | ||
| + | }} | ||
| + | |||
| + | <!-- ****************************************************************************************************************************** --> | ||
| + | <!-- * * --> | ||
| + | <!-- * Request Notices * --> | ||
| + | <!-- * * --> | ||
| + | <!-- ****************************************************************************************************************************** --> | ||
| + | |||
| + | == Request Notices == | ||
| + | |||
| + | Use this Hornbill Automation to add or remove a notice which is displayed at the top of the request. | ||
| + | <!-- ******************************************************************************************************************************* --> | ||
| + | <!-- * Add Notice * --> | ||
| + | <!-- ******************************************************************************************************************************* --> | ||
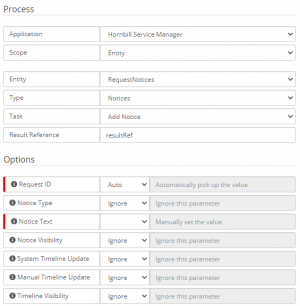
| + | {{BPMAutomation|Add_Notice|Add Notice| | ||
| + | [[File:bpmaddrequestnotice.png|thumb|link=https://wiki.hornbill.com/images/6/6f/Bpmaddrequestnotice.png]]| | ||
| + | Use this Hornbill Automation to add a notice to the top of the request| | ||
| + | {{bullet1|Request ID|The Request Id of the request the connection(s) are being removed from. This should be set to Auto}} | ||
| + | {{bullet1|Notice Type|The type of notice (Alert or Information). The default value is "Information".}} | ||
| + | {{bullet1|Notice Text|The text that will be displayed. This has a limit of 255 characters}} | ||
| + | {{bullet1|Notice Visibility|The visibility of the notice (Portals | Service Desk | Both). The default value is "Service Desk"}} | ||
| + | {{bullet1|System Timeline Update|Select if the default system text will be added to the timeline for this action}} | ||
| + | {{bullet1|Manual Timeline Update|Select Yes to override the default System timeline Text, and add your own text which will appear in the timeline update for this action}} | ||
| + | {{bullet1|Timeline Visibility|Choose what level of visibility will be automatically applied to this update. Choosing anything other than Customer will result in the customer not seeing the update in the timeline of their requests on the Service or Customer Portals}} | ||
| + | }} | ||
| + | <!-- ******************************************************************************************************************************* --> | ||
| + | <!-- * Remove Notice * --> | ||
| + | <!-- ******************************************************************************************************************************* --> | ||
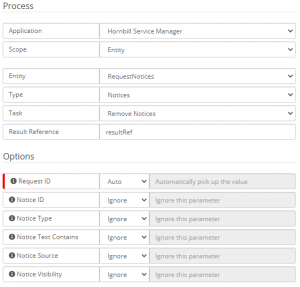
| + | {{BPMAutomation|Remove_Notice|Remove Notice| | ||
| + | [[File:bpmremoverequestnotice.png|thumb|link=https://wiki.hornbill.com/images/6/6d/Bpmremoverequestnotice.png]]| | ||
| + | Use this Hornbill Automation to remove one or all notices on a request| | ||
| + | {{bullet1|Request ID|The Request Id of the request the connection(s) are being removed from. This should be set to Auto}} | ||
| + | {{bullet1|Notice ID|The ID of the notice that needs removing. This can be taken as a variable from the output of the Hornbill Automation that created the notice}} | ||
| + | {{bullet1|Notice Type|This will remove notices of the selected type. Information or Alert}} | ||
| + | {{bullet1|Notice Text Contains|Remove any notice that contains this text}} | ||
| + | {{bullet1|Notice Source|Remove notices based on the source. Either BPM Workflow or Manually added notices.}} | ||
| + | {{bullet1|Notice Visibility|Remove notices that are set to a particular Visibility. Portals, Service Desk, or Both}} | ||
}} | }} | ||
| Line 384: | Line 514: | ||
{{bullet1|Visibility|Choose what level of visibility will be automatically applied to this update. Choosing anything other than '''Customer''' will result in the customer not seeing the update in the timeline of their requests on the Service or Customer Portals}} | {{bullet1|Visibility|Choose what level of visibility will be automatically applied to this update. Choosing anything other than '''Customer''' will result in the customer not seeing the update in the timeline of their requests on the Service or Customer Portals}} | ||
}} | }} | ||
| − | |||
<!-- ****************************************************************************************************************************** --> | <!-- ****************************************************************************************************************************** --> | ||
<!-- * * --> | <!-- * * --> | ||
| − | <!-- * | + | <!-- * Assets * --> |
<!-- * * --> | <!-- * * --> | ||
<!-- ****************************************************************************************************************************** --> | <!-- ****************************************************************************************************************************** --> | ||
| − | ==== | + | ====Assets==== |
| − | Use the | + | Use these Hornbill Automations for managing assets that are associated to the request |
<!-- ******************************************************************************************************************************* --> | <!-- ******************************************************************************************************************************* --> | ||
| − | <!-- * | + | <!-- * Add All Owned by Customer * --> |
<!-- ******************************************************************************************************************************* --> | <!-- ******************************************************************************************************************************* --> | ||
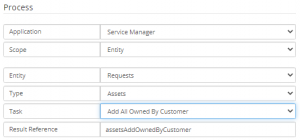
| − | {{BPMAutomation| | + | {{BPMAutomation|Add_All_Owned_by_Customer|Add All Owned by Customer| |
| − | [[File: | + | [[File:Add_All_Owned_by_Customer.png|thumb|link=https://wiki.hornbill.com/images/1/16/Add_All_Owned_by_Customer.png]]| |
| − | + | Add all assets that are owned by the customer to the request| | |
| − | {{bullet1|Request | + | {{bullet1|Request Id|This is a mandatory setting that uses a variable to hold the Request Id of the request that is using this BPM. This should be set to ''Auto''}} |
| − | {{bullet1| | + | {{bullet1|System Timeline Update|Indicates whether or not a system update is made to the request timeline. Default is No. This option is superseded by the Manual Timeline Update.}} |
| − | + | {{bullet1|Manual Timeline Update|Freetext update to the request timeline. This supersedes the option System Timeline Update.}} | |
| − | + | {{bullet1|Timeline Visibility|The request timeline post visibility. If not specified, the application option value will be used.}} | |
| − | {{bullet1|Manual Timeline Update| | ||
| − | {{bullet1|Visibility| | ||
}} | }} | ||
| − | <!-- ***************************************************************************************************************************** --> | + | <!-- ******************************************************************************************************************************* --> |
| − | <!-- * | + | <!-- * Add Generic Assets Owned by Customer * --> |
| − | <!-- ***************************************************************************************************************************** --> | + | <!-- ******************************************************************************************************************************* --> |
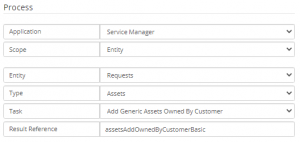
| − | {{BPMAutomation| | + | {{BPMAutomation|Add_Generic_Assets_Owned_by_Customer|Add Generic Assets Owned by Customer| |
| − | [[File: | + | [[File:Add_Generic_Assets_Owned_by_Customer.png|thumb|link=https://wiki.hornbill.com/images/5/53/Add_Generic_Assets_Owned_by_Customer.png]]| |
| − | + | Add assets that are owned or used by the customer that belong to the General class of asset| | |
| − | {{bullet1|Request | + | {{bullet1|Request Id|This is a mandatory setting that uses a variable to hold the Request Id of the request that is using this BPM. This should be set to ''Auto''}} |
| − | {{bullet1| | + | {{bullet1|Asset Type|The type of Generic assets to associate to the request.}} |
| − | + | {{bullet1|System Timeline Update|Indicates whether or not a system update is made to the request timeline. Default is No. This option is superseded by the Manual Timeline Update.}} | |
| − | {{bullet1|System Timeline Update| | + | {{bullet1|Manual Timeline Update|Freetext update to the request timeline. This supersedes the option System Timeline Update.}} |
| − | {{bullet1|Manual Timeline Update| | + | {{bullet1|Timeline Visibility|The request timeline post visibility. If not specified, the application option value will be used.}} |
| − | {{bullet1|Visibility| | + | {{bullet1|Used By|Associate assets that are Used By the Request Customer, rather than Owned By.}} |
}} | }} | ||
<!-- ******************************************************************************************************************************* --> | <!-- ******************************************************************************************************************************* --> | ||
| − | <!-- * | + | <!-- * Add Computer System Assets Owned by Customer * --> |
| + | <!-- ******************************************************************************************************************************* --> | ||
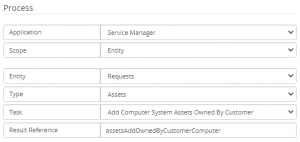
| + | {{BPMAutomation|Add_Computer_System_Assets_Owned_by_Customer|Add Computer System Assets Owned by Customer| | ||
| + | [[File:Add_Computer_System_Assets_Owned_by_Customer.png|thumb|link=https://wiki.hornbill.com/images/1/1b/Add_Computer_System_Assets_Owned_by_Customer.png]]| | ||
| + | Add assets that are owned or used by the customer that belong to the Computer System class of asset| | ||
| + | {{bullet1|Request Id|This is a mandatory setting that uses a variable to hold the Request Id of the request that is using this BPM. This should be set to ''Auto''}} | ||
| + | {{bullet1|Asset Type|The type of Computer System assets to associate to the request.}} | ||
| + | {{bullet1|System Timeline Update|Indicates whether or not a system update is made to the request timeline. Default is No. This option is superseded by the Manual Timeline Update.}} | ||
| + | {{bullet1|Manual Timeline Update|Freetext update to the request timeline. This supersedes the option System Timeline Update.}} | ||
| + | {{bullet1|Timeline Visibility|The request timeline post visibility. If not specified, the application option value will be used.}} | ||
| + | {{bullet1|Used By|Associate assets that are Used By the Request Customer, rather than Owned By.}} | ||
| + | }} | ||
<!-- ******************************************************************************************************************************* --> | <!-- ******************************************************************************************************************************* --> | ||
| − | {{BPMAutomation| | + | <!-- * Add Computer Peripheral Assets Owned by Customer * --> |
| − | [[File: | + | <!-- ******************************************************************************************************************************* --> |
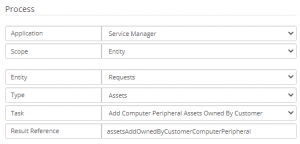
| − | + | {{BPMAutomation|Add_Computer_Peripheral_Assets_Owned_by_Customer|Add Computer Peripheral Assets Owned by Customer| | |
| − | {{bullet1|Request Id|This is a mandatory setting that uses a variable to hold the Request Id of the request that is using this BPM. This should be set to ''Auto'' | + | [[File:Add_Computer_Peripheral_Assets_Owned_by_Customer.png|thumb|link=https://wiki.hornbill.com/images/0/07/Add_Computer_Peripheral_Assets_Owned_by_Customer.png]]| |
| − | {{bullet1| | + | Add assets that are owned or used by the customer that belong to the Computer Peripheral class of asset| |
| − | {{bullet1| | + | {{bullet1|Request Id|This is a mandatory setting that uses a variable to hold the Request Id of the request that is using this BPM. This should be set to ''Auto''}} |
| − | {{bullet1| | + | {{bullet1|Asset Type|The type of Computer Peripheral assets to associate to the request.}} |
| − | {{bullet1| | + | {{bullet1|System Timeline Update|Indicates whether or not a system update is made to the request timeline. Default is No. This option is superseded by the Manual Timeline Update.}} |
| − | {{bullet1| | + | {{bullet1|Manual Timeline Update|Freetext update to the request timeline. This supersedes the option System Timeline Update.}} |
| + | {{bullet1|Timeline Visibility|The request timeline post visibility. If not specified, the application option value will be used.}} | ||
| + | {{bullet1|Used By|Associate assets that are Used By the Request Customer, rather than Owned By.}} | ||
}} | }} | ||
<!-- ******************************************************************************************************************************* --> | <!-- ******************************************************************************************************************************* --> | ||
| − | <!-- * | + | <!-- * Add Mobile Device Assets Owned by Customer * --> |
<!-- ******************************************************************************************************************************* --> | <!-- ******************************************************************************************************************************* --> | ||
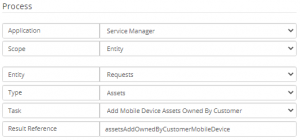
| − | {{BPMAutomation| | + | {{BPMAutomation|Add_Mobile_Device_Assets_Owned_by_Customer|Add Mobile Device Assets Owned by Customer| |
| − | [[File: | + | [[File:Add_Mobile_Device_Assets_Owned_by_Customer.png|thumb|link=https://wiki.hornbill.com/images/2/2c/Add_Mobile_Device_Assets_Owned_by_Customer.png]]| |
| − | + | Add assets that are owned or used by the customer that belong to the Mobile Device class of asset| | |
| − | {{bullet1|Request | + | {{bullet1|Request Id|This is a mandatory setting that uses a variable to hold the Request Id of the request that is using this BPM. This should be set to ''Auto''}} |
| − | {{bullet1| | + | {{bullet1|Asset Type|The type of Mobile Device assets to associate to the request.}} |
| − | {{bullet1| | + | {{bullet1|System Timeline Update|Indicates whether or not a system update is made to the request timeline. Default is No. This option is superseded by the Manual Timeline Update.}} |
| − | {{bullet1| | + | {{bullet1|Manual Timeline Update|Freetext update to the request timeline. This supersedes the option System Timeline Update.}} |
| − | {{bullet1| | + | {{bullet1|Timeline Visibility|The request timeline post visibility. If not specified, the application option value will be used.}} |
| − | {{bullet1| | + | {{bullet1|Used By|Associate assets that are Used By the Request Customer, rather than Owned By.}} |
}} | }} | ||
<!-- ******************************************************************************************************************************* --> | <!-- ******************************************************************************************************************************* --> | ||
| − | <!-- * | + | <!-- * Add Network Device Assets Owned by Customer * --> |
<!-- ******************************************************************************************************************************* --> | <!-- ******************************************************************************************************************************* --> | ||
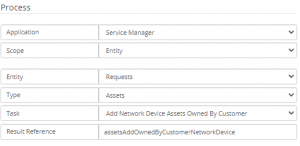
| − | {{BPMAutomation| | + | {{BPMAutomation|Add_Network_Device_Assets_Owned_by_Customer|Add Network Device Assets Owned by Customer| |
| − | [[File: | + | [[File:Add_Network_Device_Assets_Owned_by_Customer.png|thumb|link=https://wiki.hornbill.com/images/3/38/Add_Network_Device_Assets_Owned_by_Customer.png]]| |
| − | + | Add assets that are owned or used by the customer that belong to the Network Device class of asset| | |
| − | {{bullet1|Request Id|This is a mandatory setting that uses a variable to hold the Request Id of the request that is using this BPM. This should be set to ''Auto'' | + | {{bullet1|Request Id|This is a mandatory setting that uses a variable to hold the Request Id of the request that is using this BPM. This should be set to ''Auto''}} |
| − | {{bullet1| | + | {{bullet1|Asset Type|The type of Network Device assets to associate to the request.}} |
| − | {{bullet1|System Timeline Update| | + | {{bullet1|System Timeline Update|Indicates whether or not a system update is made to the request timeline. Default is No. This option is superseded by the Manual Timeline Update.}} |
| − | {{bullet1|Manual Timeline Update| | + | {{bullet1|Manual Timeline Update|Freetext update to the request timeline. This supersedes the option System Timeline Update.}} |
| − | {{bullet1|Visibility| | + | {{bullet1|Timeline Visibility|The request timeline post visibility. If not specified, the application option value will be used.}} |
| + | {{bullet1|Used By|Associate assets that are Used By the Request Customer, rather than Owned By.}} | ||
}} | }} | ||
| − | <!-- ****************************************************************************************************************************** --> | + | <!-- ******************************************************************************************************************************* --> |
| − | <!-- * | + | <!-- * Add Printer Assets Owned by Customer * --> |
| − | <!-- ****************************************************************************************************************************** --> | + | <!-- ******************************************************************************************************************************* --> |
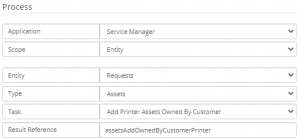
| − | {{BPMAutomation| | + | {{BPMAutomation|Add_Printer_Assets_Owned_by_Customer|Add Printer Assets Owned by Customer| |
| − | [[File: | + | [[File:Add_Printer_Assets_Owned_by_Customer.png|thumb|link=https://wiki.hornbill.com/images/8/8b/Add_Printer_Assets_Owned_by_Customer.png]]| |
| − | + | Add assets that are owned or used by the customer that belong to the Printer class of asset| | |
| − | + | {{bullet1|Request Id|This is a mandatory setting that uses a variable to hold the Request Id of the request that is using this BPM. This should be set to ''Auto''}} | |
| − | + | {{bullet1|Asset Type|The type of Printer assets to associate to the request.}} | |
| − | {{bullet1|Request Id|This is a mandatory setting that uses a variable to hold the Request Id of the request that is using this BPM. This should be set to ''Auto'' | + | {{bullet1|System Timeline Update|Indicates whether or not a system update is made to the request timeline. Default is No. This option is superseded by the Manual Timeline Update.}} |
| − | {{bullet1| | + | {{bullet1|Manual Timeline Update|Freetext update to the request timeline. This supersedes the option System Timeline Update.}} |
| − | {{bullet1| | + | {{bullet1|Timeline Visibility|The request timeline post visibility. If not specified, the application option value will be used.}} |
| − | {{bullet1| | + | {{bullet1|Used By|Associate assets that are Used By the Request Customer, rather than Owned By.}} |
| − | |||
| − | {{bullet1| | ||
| − | {{bullet1| | ||
}} | }} | ||
| − | <!-- ****************************************************************************************************************************** --> | + | <!-- ******************************************************************************************************************************* --> |
| − | <!-- * | + | <!-- * Add Software Assets Owned by Customer * --> |
| − | <!-- ****************************************************************************************************************************** --> | + | <!-- ******************************************************************************************************************************* --> |
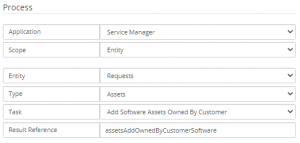
| − | {{BPMAutomation| | + | {{BPMAutomation|Add_Software_Assets_Owned_by_Customer|Add Software Assets Owned by Customer| |
| − | [[File: | + | [[File:Add_Software_Assets_Owned_by_Customer.png|thumb|link=https://wiki.hornbill.com/images/5/5a/Add_Software_Assets_Owned_by_Customer.png]]| |
| − | + | Add assets that are owned or used by the customer that belong to the Software class of asset| | |
{{bullet1|Request Id|This is a mandatory setting that uses a variable to hold the Request Id of the request that is using this BPM. This should be set to ''Auto''}} | {{bullet1|Request Id|This is a mandatory setting that uses a variable to hold the Request Id of the request that is using this BPM. This should be set to ''Auto''}} | ||
| − | {{bullet1| | + | {{bullet1|Asset Type|The type of Software assets to associate to the request.}} |
| − | {{bullet1| | + | {{bullet1|System Timeline Update|Indicates whether or not a system update is made to the request timeline. Default is No. This option is superseded by the Manual Timeline Update.}} |
| − | {{bullet1| | + | {{bullet1|Manual Timeline Update|Freetext update to the request timeline. This supersedes the option System Timeline Update.}} |
| − | {{bullet1| | + | {{bullet1|Timeline Visibility|The request timeline post visibility. If not specified, the application option value will be used.}} |
| − | {{bullet1| | + | {{bullet1|Used By|Associate assets that are Used By the Request Customer, rather than Owned By.}} |
}} | }} | ||
| − | <!-- * | + | <!-- ******************************************************************************************************************************* --> |
| − | + | <!-- * Add Telecoms Assets Owned by Customer * --> | |
| − | + | <!-- ******************************************************************************************************************************* --> | |
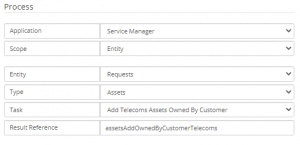
| − | + | {{BPMAutomation|Add_Telecoms_Assets_Owned_by_Customer|Add Telecoms Assets Owned by Customer| | |
| − | + | [[File:Add_Telecoms_Assets_Owned_by_Customer.png|thumb|link=https://wiki.hornbill.com/images/a/a9/Add_Telecoms_Assets_Owned_by_Customer.png]]| | |
| − | + | Add assets that are owned or used by the customer that belong to the Telecoms class of asset| | |
| − | <!-- * | ||
| − | <!-- * | ||
| − | |||
| − | |||
| − | |||
| − | {{BPMAutomation| | ||
| − | [[File: | ||
| − | |||
{{bullet1|Request Id|This is a mandatory setting that uses a variable to hold the Request Id of the request that is using this BPM. This should be set to ''Auto''}} | {{bullet1|Request Id|This is a mandatory setting that uses a variable to hold the Request Id of the request that is using this BPM. This should be set to ''Auto''}} | ||
| − | {{bullet1|System Timeline Update| | + | {{bullet1|Asset Type|The type of Telecoms assets to associate to the request.}} |
| − | {{bullet1|Manual Timeline Update| | + | {{bullet1|System Timeline Update|Indicates whether or not a system update is made to the request timeline. Default is No. This option is superseded by the Manual Timeline Update.}} |
| − | {{bullet1|Visibility| | + | {{bullet1|Manual Timeline Update|Freetext update to the request timeline. This supersedes the option System Timeline Update.}} |
| + | {{bullet1|Timeline Visibility|The request timeline post visibility. If not specified, the application option value will be used.}} | ||
| + | {{bullet1|Used By|Associate assets that are Used By the Request Customer, rather than Owned By.}} | ||
}} | }} | ||
| − | {{BPMAutomation| | + | <!-- ******************************************************************************************************************************* --> |
| − | [[File: | + | <!-- * Create Generic Asset * --> |
| − | + | <!-- ******************************************************************************************************************************* --> | |
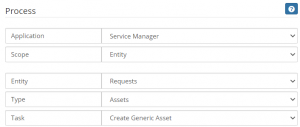
| − | + | {{BPMAutomation|Create_Generic_Asset|Create Generic Asset| | |
| + | [[File:Create_Generic_Asset.png|thumb|link=https://wiki.hornbill.com/images/7/70/Create_Generic_Asset.png]]| | ||
| + | Creates a new General asset within Asset Management and links the new asset to the request from which it was created.| | ||
{{bullet1|Request Id|This is a mandatory setting that uses a variable to hold the Request Id of the request that is using this BPM. This should be set to ''Auto''}} | {{bullet1|Request Id|This is a mandatory setting that uses a variable to hold the Request Id of the request that is using this BPM. This should be set to ''Auto''}} | ||
| − | {{bullet1| | + | {{bullet1|Operational State|Update the operational state of the assets. Options include pre-production, operational, and retired}} |
| − | {{bullet1| | + | {{bullet1|State|Update the state of the assets. Options include active, current, and archived}} |
| − | {{bullet1| | + | {{bullet1|Sub State|Update the sub state of the asset}} |
| + | {{bullet1|Company|Update the company that the assets should be associated to}} | ||
| + | {{bullet1|Name|Update the name of the assets}} | ||
| + | {{bullet1|Notes|Upldate the notes for the assets}} | ||
| + | {{bullet1|Owned By|Update the owner of the assets}} | ||
| + | {{bullet1|Used By|Update who uses the assets}} | ||
| + | {{bullet1|Department|Update the department that the asset is associated to}} | ||
| + | {{bullet1|Description|Update the asset description}} | ||
| + | {{bullet1|Booking|Update if the asset is available for booking}} | ||
| + | {{bullet1|Purpose|Update the purpose of the assets}} | ||
| + | {{bullet1|Last Audited Date|Update the last audit date for the assets}} | ||
| + | {{bullet1|Location Type|Update the type of location where the asset is}} | ||
| + | {{bullet1|Location|Update the Location of the assets}} | ||
| + | {{bullet1|Country|Update the country where the asset is located}} | ||
| + | {{bullet1|Building|Update the building where the asset is located}} | ||
| + | {{bullet1|Room|Update the room where the asset is}} | ||
| + | {{bullet1|Rack|Update the rack where the asset is located}} | ||
| + | {{bullet1|U Height|Update the U height location in the rack}} | ||
| + | {{bullet1|U Position|Update the U position of the asset in the rack}} | ||
| + | {{bullet1|Site|Update the site where the asset is located}} | ||
| + | {{bullet1|Floor|Update the Floor where the asset is located}} | ||
| + | {{bullet1|Geo Location|Update the Geo-location where the asset is located}} | ||
| + | {{bullet1|Static|Update if the asset is a static or not}} | ||
| + | {{bullet1|Cost|Update the cost of the asset}} | ||
| + | {{bullet1|Asset Tag|Update the Asset Tag}} | ||
| + | {{bullet1|Order Number|Update the Order number}} | ||
| + | {{bullet1|Invoice Number|Update the Invoice number}} | ||
| + | {{bullet1|Maintenance Cost|Update how much the annual maintenance cost of the asset is}} | ||
| + | {{bullet1|Maintenance Reference|Update the Reference to the maintenance contract}} | ||
| + | {{bullet1|Supplier ID|Update the ID of the asset supplier}} | ||
| + | {{bullet1|Supplier Contract|Update the name of the Supplier Contract associated to the asset}} | ||
| + | {{bullet1|Product ID|Update the Product ID}} | ||
| + | {{bullet1|Order Date|Update the Order date}} | ||
| + | {{bullet1|Received Date|Upldate the receive date}} | ||
| + | {{bullet1|Cost Center|Update the cost center}} | ||
| + | {{bullet1|Acq. Method|Update the method of how the asset was acquired}} | ||
| + | {{bullet1|Warranty Start|Update the start of the warranty date}} | ||
| + | {{bullet1|Warranty Expires|Update the warranty expiry date}} | ||
| + | {{bullet1|Supported By|Update who supports this asset}} | ||
| + | {{bullet1|Maintenance Notice Period|Update the notice period for Maintenance contract renewal}} | ||
| + | {{bullet1|Maintenance Termination Period|Update the termination period for the asset}} | ||
| + | {{bullet1|Annual Maintenance Review Date|Update the annual maintenance review date}} | ||
| + | {{bullet1|Scheduled Retired Date|Update the date that the asset set to retire on}} | ||
| + | {{bullet1|Actual Retired Date|Update the date that the asset was retired on}} | ||
| + | {{bullet1|Disposal Reason|Update why the asset was disposed of}} | ||
| + | {{bullet1|Disposal Price|Update how much it cost to dispose of the asset}} | ||
| + | {{bullet1|Disposal Code|Update the disposal code}} | ||
| + | {{bullet1|Beneficiary|Update who the beneficiary of the asset is}} | ||
| + | {{bullet1|Depreciation Method|Update the depreciation method}} | ||
| + | {{bullet1|Depreciation Start Date|Update when the asset cost starts deprecating }} | ||
| + | {{bullet1|Depreciation Value|Update the current depreciation value}} | ||
| + | {{bullet1|Residual Value|Update the residual value}} | ||
| + | }} | ||
| + | <!-- ******************************************************************************************************************************* --> | ||
| + | <!-- * Create Computer System Asset * --> | ||
| + | <!-- ******************************************************************************************************************************* --> | ||
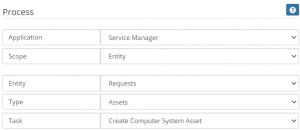
| + | {{BPMAutomation|Create_Computer_System_Asset|Create Computer System Asset| | ||
| + | [[File:Create_Computer_System_Asset.png|thumb|link=https://wiki.hornbill.com/images/c/c9/Create_Computer_System_Asset.png]]| | ||
| + | Creates a new Computer System asset within Asset Management and links the new asset to the request from which it was created.| | ||
| + | {{bullet1|Request Id|This is a mandatory setting that uses a variable to hold the Request Id of the request that is using this BPM. This should be set to ''Auto''}} | ||
| + | {{bullet1|Operational State|Update the operational state of the assets. Options include pre-production, operational, and retired}} | ||
| + | {{bullet1|State|Update the state of the assets. Options include active, current, and archived}} | ||
| + | {{bullet1|Sub State|Update the sub state of the asset}} | ||
| + | {{bullet1|Company|Update the company that the assets should be associated to}} | ||
| + | {{bullet1|Name|Update the name of the assets}} | ||
| + | {{bullet1|Notes|Upldate the notes for the assets}} | ||
| + | {{bullet1|Owned By|Update the owner of the assets}} | ||
| + | {{bullet1|Used By|Update who uses the assets}} | ||
| + | {{bullet1|Department|Update the department that the asset is associated to}} | ||
| + | {{bullet1|Description|Update the asset description}} | ||
| + | {{bullet1|Booking|Update if the asset is available for booking}} | ||
| + | {{bullet1|Purpose|Update the purpose of the assets}} | ||
| + | {{bullet1|Last Audited Date|Update the last audit date for the assets}} | ||
| + | {{bullet1|Location Type|Update the type of location where the asset is}} | ||
| + | {{bullet1|Location|Update the Location of the assets}} | ||
| + | {{bullet1|Country|Update the country where the asset is located}} | ||
| + | {{bullet1|Building|Update the building where the asset is located}} | ||
| + | {{bullet1|Room|Update the room where the asset is}} | ||
| + | {{bullet1|Rack|Update the rack where the asset is located}} | ||
| + | {{bullet1|U Height|Update the U height location in the rack}} | ||
| + | {{bullet1|U Position|Update the U position of the asset in the rack}} | ||
| + | {{bullet1|Site|Update the site where the asset is located}} | ||
| + | {{bullet1|Floor|Update the Floor where the asset is located}} | ||
| + | {{bullet1|Geo Location|Update the Geo-location where the asset is located}} | ||
| + | {{bullet1|Static|Update if the asset is a static or not}} | ||
| + | {{bullet1|Cost|Update the cost of the asset}} | ||
| + | {{bullet1|Asset Tag|Update the Asset Tag}} | ||
| + | {{bullet1|Order Number|Update the Order number}} | ||
| + | {{bullet1|Invoice Number|Update the Invoice number}} | ||
| + | {{bullet1|Maintenance Cost|Update how much the annual maintenance cost of the asset is}} | ||
| + | {{bullet1|Maintenance Reference|Update the Reference to the maintenance contract}} | ||
| + | {{bullet1|Supplier ID|Update the ID of the asset supplier}} | ||
| + | {{bullet1|Supplier Contract|Update the name of the Supplier Contract associated to the asset}} | ||
| + | {{bullet1|Product ID|Update the Product ID}} | ||
| + | {{bullet1|Order Date|Update the Order date}} | ||
| + | {{bullet1|Received Date|Upldate the receive date}} | ||
| + | {{bullet1|Cost Center|Update the cost center}} | ||
| + | {{bullet1|Acq. Method|Update the method of how the asset was acquired}} | ||
| + | {{bullet1|Warranty Start|Update the start of the warranty date}} | ||
| + | {{bullet1|Warranty Expires|Update the warranty expiry date}} | ||
| + | {{bullet1|Supported By|Update who supports this asset}} | ||
| + | {{bullet1|Maintenance Notice Period|Update the notice period for Maintenance contract renewal}} | ||
| + | {{bullet1|Maintenance Termination Period|Update the termination period for the asset}} | ||
| + | {{bullet1|Annual Maintenance Review Date|Update the annual maintenance review date}} | ||
| + | {{bullet1|Scheduled Retired Date|Update the date that the asset set to retire on}} | ||
| + | {{bullet1|Actual Retired Date|Update the date that the asset was retired on}} | ||
| + | {{bullet1|Disposal Reason|Update why the asset was disposed of}} | ||
| + | {{bullet1|Disposal Price|Update how much it cost to dispose of the asset}} | ||
| + | {{bullet1|Disposal Code|Update the disposal code}} | ||
| + | {{bullet1|Beneficiary|Update who the beneficiary of the asset is}} | ||
| + | {{bullet1|Depreciation Method|Update the depreciation method}} | ||
| + | {{bullet1|Depreciation Start Date|Update when the asset cost starts deprecating }} | ||
| + | {{bullet1|Depreciation Value|Update the current depreciation value}} | ||
| + | {{bullet1|Residual Value|Update the residual value}} | ||
}} | }} | ||
| − | |||
| − | |||
| − | |||
| − | |||
| − | |||
| − | |||
| − | |||
| − | |||
| − | |||
<!-- ******************************************************************************************************************************* --> | <!-- ******************************************************************************************************************************* --> | ||
| − | <!-- * | + | <!-- * Create Computer Peripheral Asset * --> |
<!-- ******************************************************************************************************************************* --> | <!-- ******************************************************************************************************************************* --> | ||
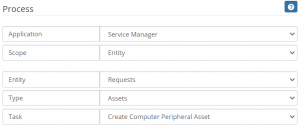
| − | {{BPMAutomation| | + | {{BPMAutomation|Create_Computer_Peripheral_Asset|Create Computer Peripheral Asset| |
| − | [[File: | + | [[File:Create_Computer_Peripheral_Asset.png|thumb|link=https://wiki.hornbill.com/images/c/c2/Create_Computer_Peripheral_Asset.png]]| |
| − | + | Creates a new Computer Peripheral asset within Asset Management and links the new asset to the request from which it was created.| | |
{{bullet1|Request Id|This is a mandatory setting that uses a variable to hold the Request Id of the request that is using this BPM. This should be set to ''Auto''}} | {{bullet1|Request Id|This is a mandatory setting that uses a variable to hold the Request Id of the request that is using this BPM. This should be set to ''Auto''}} | ||
| − | {{bullet1| | + | {{bullet1|Operational State|Update the operational state of the assets. Options include pre-production, operational, and retired}} |
| − | {{bullet1| | + | {{bullet1|State|Update the state of the assets. Options include active, current, and archived}} |
| − | {{bullet1|Update | + | {{bullet1|Sub State|Update the sub state of the asset}} |
| + | {{bullet1|Company|Update the company that the assets should be associated to}} | ||
| + | {{bullet1|Name|Update the name of the assets}} | ||
| + | {{bullet1|Notes|Upldate the notes for the assets}} | ||
| + | {{bullet1|Owned By|Update the owner of the assets}} | ||
| + | {{bullet1|Used By|Update who uses the assets}} | ||
| + | {{bullet1|Department|Update the department that the asset is associated to}} | ||
| + | {{bullet1|Description|Update the asset description}} | ||
| + | {{bullet1|Booking|Update if the asset is available for booking}} | ||
| + | {{bullet1|Purpose|Update the purpose of the assets}} | ||
| + | {{bullet1|Last Audited Date|Update the last audit date for the assets}} | ||
| + | {{bullet1|Location Type|Update the type of location where the asset is}} | ||
| + | {{bullet1|Location|Update the Location of the assets}} | ||
| + | {{bullet1|Country|Update the country where the asset is located}} | ||
| + | {{bullet1|Building|Update the building where the asset is located}} | ||
| + | {{bullet1|Room|Update the room where the asset is}} | ||
| + | {{bullet1|Rack|Update the rack where the asset is located}} | ||
| + | {{bullet1|U Height|Update the U height location in the rack}} | ||
| + | {{bullet1|U Position|Update the U position of the asset in the rack}} | ||
| + | {{bullet1|Site|Update the site where the asset is located}} | ||
| + | {{bullet1|Floor|Update the Floor where the asset is located}} | ||
| + | {{bullet1|Geo Location|Update the Geo-location where the asset is located}} | ||
| + | {{bullet1|Static|Update if the asset is a static or not}} | ||
| + | {{bullet1|Cost|Update the cost of the asset}} | ||
| + | {{bullet1|Asset Tag|Update the Asset Tag}} | ||
| + | {{bullet1|Order Number|Update the Order number}} | ||
| + | {{bullet1|Invoice Number|Update the Invoice number}} | ||
| + | {{bullet1|Maintenance Cost|Update how much the annual maintenance cost of the asset is}} | ||
| + | {{bullet1|Maintenance Reference|Update the Reference to the maintenance contract}} | ||
| + | {{bullet1|Supplier ID|Update the ID of the asset supplier}} | ||
| + | {{bullet1|Supplier Contract|Update the name of the Supplier Contract associated to the asset}} | ||
| + | {{bullet1|Product ID|Update the Product ID}} | ||
| + | {{bullet1|Order Date|Update the Order date}} | ||
| + | {{bullet1|Received Date|Upldate the receive date}} | ||
| + | {{bullet1|Cost Center|Update the cost center}} | ||
| + | {{bullet1|Acq. Method|Update the method of how the asset was acquired}} | ||
| + | {{bullet1|Warranty Start|Update the start of the warranty date}} | ||
| + | {{bullet1|Warranty Expires|Update the warranty expiry date}} | ||
| + | {{bullet1|Supported By|Update who supports this asset}} | ||
| + | {{bullet1|Maintenance Notice Period|Update the notice period for Maintenance contract renewal}} | ||
| + | {{bullet1|Maintenance Termination Period|Update the termination period for the asset}} | ||
| + | {{bullet1|Annual Maintenance Review Date|Update the annual maintenance review date}} | ||
| + | {{bullet1|Scheduled Retired Date|Update the date that the asset set to retire on}} | ||
| + | {{bullet1|Actual Retired Date|Update the date that the asset was retired on}} | ||
| + | {{bullet1|Disposal Reason|Update why the asset was disposed of}} | ||
| + | {{bullet1|Disposal Price|Update how much it cost to dispose of the asset}} | ||
| + | {{bullet1|Disposal Code|Update the disposal code}} | ||
| + | {{bullet1|Beneficiary|Update who the beneficiary of the asset is}} | ||
| + | {{bullet1|Depreciation Method|Update the depreciation method}} | ||
| + | {{bullet1|Depreciation Start Date|Update when the asset cost starts deprecating }} | ||
| + | {{bullet1|Depreciation Value|Update the current depreciation value}} | ||
| + | {{bullet1|Residual Value|Update the residual value}} | ||
}} | }} | ||
| − | {{BPMAutomation| | + | <!-- ******************************************************************************************************************************* --> |
| − | [[File: | + | <!-- * Create Mobile Device Asset * --> |
| − | + | <!-- ******************************************************************************************************************************* --> | |
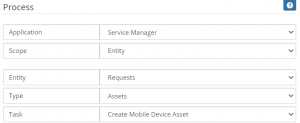
| + | {{BPMAutomation|Create_Mobile_Device_Asset|Create Mobile Device Asset| | ||
| + | [[File:Create_Mobile_Device_Asset.png|thumb|link=https://wiki.hornbill.com/images/3/33/Create_Mobile_Device_Asset.png]]| | ||
| + | Creates a new Mobile Device asset within Asset Management and links the new asset to the request from which it was created.| | ||
{{bullet1|Request Id|This is a mandatory setting that uses a variable to hold the Request Id of the request that is using this BPM. This should be set to ''Auto''}} | {{bullet1|Request Id|This is a mandatory setting that uses a variable to hold the Request Id of the request that is using this BPM. This should be set to ''Auto''}} | ||
| − | {{bullet1| | + | {{bullet1|Operational State|Update the operational state of the assets. Options include pre-production, operational, and retired}} |
| − | {{bullet1| | + | {{bullet1|State|Update the state of the assets. Options include active, current, and archived}} |
| − | {{bullet1| | + | {{bullet1|Sub State|Update the sub state of the asset}} |
| − | {{bullet1|Update | + | {{bullet1|Company|Update the company that the assets should be associated to}} |
| + | {{bullet1|Name|Update the name of the assets}} | ||
| + | {{bullet1|Notes|Upldate the notes for the assets}} | ||
| + | {{bullet1|Owned By|Update the owner of the assets}} | ||
| + | {{bullet1|Used By|Update who uses the assets}} | ||
| + | {{bullet1|Department|Update the department that the asset is associated to}} | ||
| + | {{bullet1|Description|Update the asset description}} | ||
| + | {{bullet1|Booking|Update if the asset is available for booking}} | ||
| + | {{bullet1|Purpose|Update the purpose of the assets}} | ||
| + | {{bullet1|Last Audited Date|Update the last audit date for the assets}} | ||
| + | {{bullet1|Location Type|Update the type of location where the asset is}} | ||
| + | {{bullet1|Location|Update the Location of the assets}} | ||
| + | {{bullet1|Country|Update the country where the asset is located}} | ||
| + | {{bullet1|Building|Update the building where the asset is located}} | ||
| + | {{bullet1|Room|Update the room where the asset is}} | ||
| + | {{bullet1|Rack|Update the rack where the asset is located}} | ||
| + | {{bullet1|U Height|Update the U height location in the rack}} | ||
| + | {{bullet1|U Position|Update the U position of the asset in the rack}} | ||
| + | {{bullet1|Site|Update the site where the asset is located}} | ||
| + | {{bullet1|Floor|Update the Floor where the asset is located}} | ||
| + | {{bullet1|Geo Location|Update the Geo-location where the asset is located}} | ||
| + | {{bullet1|Static|Update if the asset is a static or not}} | ||
| + | {{bullet1|Cost|Update the cost of the asset}} | ||
| + | {{bullet1|Asset Tag|Update the Asset Tag}} | ||
| + | {{bullet1|Order Number|Update the Order number}} | ||
| + | {{bullet1|Invoice Number|Update the Invoice number}} | ||
| + | {{bullet1|Maintenance Cost|Update how much the annual maintenance cost of the asset is}} | ||
| + | {{bullet1|Maintenance Reference|Update the Reference to the maintenance contract}} | ||
| + | {{bullet1|Supplier ID|Update the ID of the asset supplier}} | ||
| + | {{bullet1|Supplier Contract|Update the name of the Supplier Contract associated to the asset}} | ||
| + | {{bullet1|Product ID|Update the Product ID}} | ||
| + | {{bullet1|Order Date|Update the Order date}} | ||
| + | {{bullet1|Received Date|Upldate the receive date}} | ||
| + | {{bullet1|Cost Center|Update the cost center}} | ||
| + | {{bullet1|Acq. Method|Update the method of how the asset was acquired}} | ||
| + | {{bullet1|Warranty Start|Update the start of the warranty date}} | ||
| + | {{bullet1|Warranty Expires|Update the warranty expiry date}} | ||
| + | {{bullet1|Supported By|Update who supports this asset}} | ||
| + | {{bullet1|Maintenance Notice Period|Update the notice period for Maintenance contract renewal}} | ||
| + | {{bullet1|Maintenance Termination Period|Update the termination period for the asset}} | ||
| + | {{bullet1|Annual Maintenance Review Date|Update the annual maintenance review date}} | ||
| + | {{bullet1|Scheduled Retired Date|Update the date that the asset set to retire on}} | ||
| + | {{bullet1|Actual Retired Date|Update the date that the asset was retired on}} | ||
| + | {{bullet1|Disposal Reason|Update why the asset was disposed of}} | ||
| + | {{bullet1|Disposal Price|Update how much it cost to dispose of the asset}} | ||
| + | {{bullet1|Disposal Code|Update the disposal code}} | ||
| + | {{bullet1|Beneficiary|Update who the beneficiary of the asset is}} | ||
| + | {{bullet1|Depreciation Method|Update the depreciation method}} | ||
| + | {{bullet1|Depreciation Start Date|Update when the asset cost starts deprecating }} | ||
| + | {{bullet1|Depreciation Value|Update the current depreciation value}} | ||
| + | {{bullet1|Residual Value|Update the residual value}} | ||
}} | }} | ||
| − | {{BPMAutomation| | + | <!-- ******************************************************************************************************************************* --> |
| − | [[File: | + | <!-- * Create Network Device Asset * --> |
| − | + | <!-- ******************************************************************************************************************************* --> | |
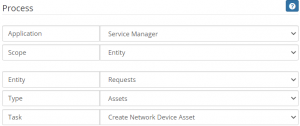
| − | + | {{BPMAutomation|Create_Network_Device|Create Network Device Asset| | |
| − | + | [[File:Create_Network_Device_Asset.png|thumb|link=https://wiki.hornbill.com/images/4/4f/Create_Network_Device_Asset.png]]| | |
| + | Creates a new Network Device asset within Asset Management and links the new asset to the request from which it was created.| | ||
| + | {{bullet1|Request Id|This is a mandatory setting that uses a variable to hold the Request Id of the request that is using this BPM. This should be set to ''Auto''}} | ||
| + | {{bullet1|Operational State|Update the operational state of the assets. Options include pre-production, operational, and retired}} | ||
| + | {{bullet1|State|Update the state of the assets. Options include active, current, and archived}} | ||
| + | {{bullet1|Sub State|Update the sub state of the asset}} | ||
| + | {{bullet1|Company|Update the company that the assets should be associated to}} | ||
| + | {{bullet1|Name|Update the name of the assets}} | ||
| + | {{bullet1|Notes|Upldate the notes for the assets}} | ||
| + | {{bullet1|Owned By|Update the owner of the assets}} | ||
| + | {{bullet1|Used By|Update who uses the assets}} | ||
| + | {{bullet1|Department|Update the department that the asset is associated to}} | ||
| + | {{bullet1|Description|Update the asset description}} | ||
| + | {{bullet1|Booking|Update if the asset is available for booking}} | ||
| + | {{bullet1|Purpose|Update the purpose of the assets}} | ||
| + | {{bullet1|Last Audited Date|Update the last audit date for the assets}} | ||
| + | {{bullet1|Location Type|Update the type of location where the asset is}} | ||
| + | {{bullet1|Location|Update the Location of the assets}} | ||
| + | {{bullet1|Country|Update the country where the asset is located}} | ||
| + | {{bullet1|Building|Update the building where the asset is located}} | ||
| + | {{bullet1|Room|Update the room where the asset is}} | ||
| + | {{bullet1|Rack|Update the rack where the asset is located}} | ||
| + | {{bullet1|U Height|Update the U height location in the rack}} | ||
| + | {{bullet1|U Position|Update the U position of the asset in the rack}} | ||
| + | {{bullet1|Site|Update the site where the asset is located}} | ||
| + | {{bullet1|Floor|Update the Floor where the asset is located}} | ||
| + | {{bullet1|Geo Location|Update the Geo-location where the asset is located}} | ||
| + | {{bullet1|Static|Update if the asset is a static or not}} | ||
| + | {{bullet1|Cost|Update the cost of the asset}} | ||
| + | {{bullet1|Asset Tag|Update the Asset Tag}} | ||
| + | {{bullet1|Order Number|Update the Order number}} | ||
| + | {{bullet1|Invoice Number|Update the Invoice number}} | ||
| + | {{bullet1|Maintenance Cost|Update how much the annual maintenance cost of the asset is}} | ||
| + | {{bullet1|Maintenance Reference|Update the Reference to the maintenance contract}} | ||
| + | {{bullet1|Supplier ID|Update the ID of the asset supplier}} | ||
| + | {{bullet1|Supplier Contract|Update the name of the Supplier Contract associated to the asset}} | ||
| + | {{bullet1|Product ID|Update the Product ID}} | ||
| + | {{bullet1|Order Date|Update the Order date}} | ||
| + | {{bullet1|Received Date|Upldate the receive date}} | ||
| + | {{bullet1|Cost Center|Update the cost center}} | ||
| + | {{bullet1|Acq. Method|Update the method of how the asset was acquired}} | ||
| + | {{bullet1|Warranty Start|Update the start of the warranty date}} | ||
| + | {{bullet1|Warranty Expires|Update the warranty expiry date}} | ||
| + | {{bullet1|Supported By|Update who supports this asset}} | ||
| + | {{bullet1|Maintenance Notice Period|Update the notice period for Maintenance contract renewal}} | ||
| + | {{bullet1|Maintenance Termination Period|Update the termination period for the asset}} | ||
| + | {{bullet1|Annual Maintenance Review Date|Update the annual maintenance review date}} | ||
| + | {{bullet1|Scheduled Retired Date|Update the date that the asset set to retire on}} | ||
| + | {{bullet1|Actual Retired Date|Update the date that the asset was retired on}} | ||
| + | {{bullet1|Disposal Reason|Update why the asset was disposed of}} | ||
| + | {{bullet1|Disposal Price|Update how much it cost to dispose of the asset}} | ||
| + | {{bullet1|Disposal Code|Update the disposal code}} | ||
| + | {{bullet1|Beneficiary|Update who the beneficiary of the asset is}} | ||
| + | {{bullet1|Depreciation Method|Update the depreciation method}} | ||
| + | {{bullet1|Depreciation Start Date|Update when the asset cost starts deprecating }} | ||
| + | {{bullet1|Depreciation Value|Update the current depreciation value}} | ||
| + | {{bullet1|Residual Value|Update the residual value}} | ||
| + | }} | ||
| + | <!-- ******************************************************************************************************************************* --> | ||
| + | <!-- * Create Printer Asset * --> | ||
| + | <!-- ******************************************************************************************************************************* --> | ||
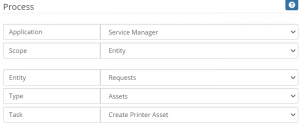
| + | {{BPMAutomation|Create_Printer_Asset|Create Printer Asset| | ||
| + | [[File:Create_Printer_Asset.png|thumb|link=https://wiki.hornbill.com/images/b/bf/Create_Printer_Asset.png]]| | ||
| + | Creates a new Printer asset within Asset Management and links the new asset to the request from which it was created.| | ||
| + | {{bullet1|Request Id|This is a mandatory setting that uses a variable to hold the Request Id of the request that is using this BPM. This should be set to ''Auto''}} | ||
| + | {{bullet1|Operational State|Update the operational state of the assets. Options include pre-production, operational, and retired}} | ||
| + | {{bullet1|State|Update the state of the assets. Options include active, current, and archived}} | ||
| + | {{bullet1|Sub State|Update the sub state of the asset}} | ||
| + | {{bullet1|Company|Update the company that the assets should be associated to}} | ||
| + | {{bullet1|Name|Update the name of the assets}} | ||
| + | {{bullet1|Notes|Upldate the notes for the assets}} | ||
| + | {{bullet1|Owned By|Update the owner of the assets}} | ||
| + | {{bullet1|Used By|Update who uses the assets}} | ||
| + | {{bullet1|Department|Update the department that the asset is associated to}} | ||
| + | {{bullet1|Description|Update the asset description}} | ||
| + | {{bullet1|Booking|Update if the asset is available for booking}} | ||
| + | {{bullet1|Purpose|Update the purpose of the assets}} | ||
| + | {{bullet1|Last Audited Date|Update the last audit date for the assets}} | ||
| + | {{bullet1|Location Type|Update the type of location where the asset is}} | ||
| + | {{bullet1|Location|Update the Location of the assets}} | ||
| + | {{bullet1|Country|Update the country where the asset is located}} | ||
| + | {{bullet1|Building|Update the building where the asset is located}} | ||
| + | {{bullet1|Room|Update the room where the asset is}} | ||
| + | {{bullet1|Rack|Update the rack where the asset is located}} | ||
| + | {{bullet1|U Height|Update the U height location in the rack}} | ||
| + | {{bullet1|U Position|Update the U position of the asset in the rack}} | ||
| + | {{bullet1|Site|Update the site where the asset is located}} | ||
| + | {{bullet1|Floor|Update the Floor where the asset is located}} | ||
| + | {{bullet1|Geo Location|Update the Geo-location where the asset is located}} | ||
| + | {{bullet1|Static|Update if the asset is a static or not}} | ||
| + | {{bullet1|Cost|Update the cost of the asset}} | ||
| + | {{bullet1|Asset Tag|Update the Asset Tag}} | ||
| + | {{bullet1|Order Number|Update the Order number}} | ||
| + | {{bullet1|Invoice Number|Update the Invoice number}} | ||
| + | {{bullet1|Maintenance Cost|Update how much the annual maintenance cost of the asset is}} | ||
| + | {{bullet1|Maintenance Reference|Update the Reference to the maintenance contract}} | ||
| + | {{bullet1|Supplier ID|Update the ID of the asset supplier}} | ||
| + | {{bullet1|Supplier Contract|Update the name of the Supplier Contract associated to the asset}} | ||
| + | {{bullet1|Product ID|Update the Product ID}} | ||
| + | {{bullet1|Order Date|Update the Order date}} | ||
| + | {{bullet1|Received Date|Upldate the receive date}} | ||
| + | {{bullet1|Cost Center|Update the cost center}} | ||
| + | {{bullet1|Acq. Method|Update the method of how the asset was acquired}} | ||
| + | {{bullet1|Warranty Start|Update the start of the warranty date}} | ||
| + | {{bullet1|Warranty Expires|Update the warranty expiry date}} | ||
| + | {{bullet1|Supported By|Update who supports this asset}} | ||
| + | {{bullet1|Maintenance Notice Period|Update the notice period for Maintenance contract renewal}} | ||
| + | {{bullet1|Maintenance Termination Period|Update the termination period for the asset}} | ||
| + | {{bullet1|Annual Maintenance Review Date|Update the annual maintenance review date}} | ||
| + | {{bullet1|Scheduled Retired Date|Update the date that the asset set to retire on}} | ||
| + | {{bullet1|Actual Retired Date|Update the date that the asset was retired on}} | ||
| + | {{bullet1|Disposal Reason|Update why the asset was disposed of}} | ||
| + | {{bullet1|Disposal Price|Update how much it cost to dispose of the asset}} | ||
| + | {{bullet1|Disposal Code|Update the disposal code}} | ||
| + | {{bullet1|Beneficiary|Update who the beneficiary of the asset is}} | ||
| + | {{bullet1|Depreciation Method|Update the depreciation method}} | ||
| + | {{bullet1|Depreciation Start Date|Update when the asset cost starts deprecating }} | ||
| + | {{bullet1|Depreciation Value|Update the current depreciation value}} | ||
| + | {{bullet1|Residual Value|Update the residual value}} | ||
| + | }} | ||
| + | <!-- ******************************************************************************************************************************* --> | ||
| + | <!-- * Get All Assets * --> | ||
| + | <!-- ******************************************************************************************************************************* --> | ||
| + | {{BPMAutomation|Get_All_Assets|Get All Assets| | ||
| + | [[File:Get_All_Assets.png|thumb|link=]]| | ||
| + | Get a comma delimited list of the asset names that have been associated with the request| | ||
{{bullet1|Request Id|This is a mandatory setting that uses a variable to hold the Request Id of the request that is using this BPM. This should be set to ''Auto''}} | {{bullet1|Request Id|This is a mandatory setting that uses a variable to hold the Request Id of the request that is using this BPM. This should be set to ''Auto''}} | ||
| − | {{bullet1| | + | {{bullet1|Include Type|When set to Yes, it will return the Type of each asset as well as the asset name}} |
| − | |||
| − | |||
| − | |||
| − | |||
}} | }} | ||
| − | + | <!-- ******************************************************************************************************************************* --> | |
| − | <!-- ****************************************************************************************************************************** | + | <!-- * Get All Generic Assets * --> |
| − | + | <!-- ******************************************************************************************************************************* --> | |
| − | <!-- * | + | {{BPMAutomation|Get_All_Generic_Assets|Get All Generic Assets| |
| − | <!-- * | + | [[File:Get_All_Generic_Assets.png|thumb|link=]]| |
| − | + | Get a comma delimited list of the asset names that belong to the Generic Class of asset that have been associated with the request| | |
| − | = | + | {{bullet1|Request Id|This is a mandatory setting that uses a variable to hold the Request Id of the request that is using this BPM. This should be set to ''Auto''}} |
| − | + | {{bullet1|Assets Type|The type of Generic assets to to get a list of}} | |
| − | <!-- ****************************************************************************************************************************** --> | + | {{bullet1|Include Type|When set to Yes, it will return the Type of each asset as well as the asset name}} |
| − | <!-- * | + | }} |
| − | <!-- ****************************************************************************************************************************** --> | + | <!-- ******************************************************************************************************************************* --> |
| − | {{BPMAutomation| | + | <!-- * Get All Computer Peripheral Assets * --> |
| − | [[File: | + | <!-- ******************************************************************************************************************************* --> |
| − | + | {{BPMAutomation|Get_All_Computer_Peripheral_Assets|Get All Computer Peripheral Assets| | |
| − | + | [[File:Get_All_Computer_Peripheral_Assets.png|thumb|link=]]| | |
| − | {{bullet1|Request | + | Get a comma delimited list of the asset names that belong to the Computer Peripheral Class of asset that have been associated with the request| |
| − | {{bullet1| | + | {{bullet1|Request Id|This is a mandatory setting that uses a variable to hold the Request Id of the request that is using this BPM. This should be set to ''Auto''}} |
| − | {{bullet1| | + | {{bullet1|Assets Type|The type of Computer Peripheral assets to get a list of}} |
| − | {{ | + | {{bullet1|Include Type|When set to Yes, it will return the Type of each asset as well as the asset name}} |
| − | {{bullet1| | + | }} |
| − | {{bullet1| | + | <!-- ******************************************************************************************************************************* --> |
| − | {{bullet1| | + | <!-- * Get All Mobile Device Assets * --> |
| − | + | <!-- ******************************************************************************************************************************* --> | |
| − | + | {{BPMAutomation|Get_All_Mobile_Device_Assets|Get All Mobile Device Assets| | |
| + | [[File:Get_All_Mobile_Device_Assets.png|thumb|link=]]| | ||
| + | Get a comma delimited list of the asset names that belong to the Mobile Device Class of asset that have been associated with the request| | ||
| + | {{bullet1|Request Id|This is a mandatory setting that uses a variable to hold the Request Id of the request that is using this BPM. This should be set to ''Auto''}} | ||
| + | {{bullet1|Assets Type|The type of Mobile Device assets to to get a list of}} | ||
| + | {{bullet1|Include Type|When set to Yes, it will return the Type of each asset as well as the asset name}} | ||
}} | }} | ||
| − | <!-- ***************************************************************************************************************************** --> | + | <!-- ******************************************************************************************************************************* --> |
| − | <!-- * | + | <!-- * Get All Network Device Assets * --> |
| − | <!-- ***************************************************************************************************************************** --> | + | <!-- ******************************************************************************************************************************* --> |
| − | {{BPMAutomation| | + | {{BPMAutomation|Get_All_Network_Device_Assets|Get All Network Device Assets| |
| − | [[File: | + | [[File:Get_All_Network_Device_Assets.png|thumb|link=]]| |
| − | + | Get a comma delimited list of the asset names that belong to the Network Device Class of asset that have been associated with the request| | |
| − | + | {{bullet1|Request Id|This is a mandatory setting that uses a variable to hold the Request Id of the request that is using this BPM. This should be set to ''Auto''}} | |
| − | {{bullet1| | + | {{bullet1|Assets Type|The type of Network Device assets to get a list of}} |
| − | + | {{bullet1|Include Type|When set to Yes, it will return the Type of each asset as well as the asset name}} | |
| − | |||
| − | |||
| − | |||
| − | {{bullet1| | ||
| − | {{bullet1| | ||
| − | |||
| − | |||
}} | }} | ||
| − | <!-- ***************************************************************************************************************************** --> | + | <!-- ******************************************************************************************************************************* --> |
| − | <!-- * | + | <!-- * Get All Printer Assets * --> |
| − | <!-- ***************************************************************************************************************************** --> | + | <!-- ******************************************************************************************************************************* --> |
| − | {{BPMAutomation| | + | {{BPMAutomation|Get_All_Printer_Assets|Get All Printer Assets| |
| − | [[File: | + | [[File:Get_All_Printer_Assets.png|thumb|link=]]| |
| − | + | Get a comma delimited list of the asset names that belong to the Printer Class of asset that have been associated with the request| | |
| − | {{bullet1|Request | + | {{bullet1|Request Id|This is a mandatory setting that uses a variable to hold the Request Id of the request that is using this BPM. This should be set to ''Auto''}} |
| − | + | {{bullet1|Assets Type|The type of Printer assets to get a list of}} | |
| − | + | {{bullet1|Include Type|When set to Yes, it will return the Type of each asset as well as the asset name}} | |
| − | |||
| − | {{bullet1| | ||
| − | {{bullet1| | ||
| − | |||
| − | |||
}} | }} | ||
| − | <!-- ***************************************************************************************************************************** --> | + | <!-- ******************************************************************************************************************************* --> |
| − | <!-- * | + | <!-- * Get All Software Assets * --> |
| − | <!-- ***************************************************************************************************************************** --> | + | <!-- ******************************************************************************************************************************* --> |
| − | {{BPMAutomation| | + | {{BPMAutomation|Get_All_Software_Assets|Get All Software Assets| |
| − | [[File: | + | [[File:Get_All_Software_Assets.png|thumb|link=]]| |
| − | + | Get a comma delimited list of the asset names that belong to the Software Class of asset that have been associated with the request| | |
| − | {{bullet1|Request | + | {{bullet1|Request Id|This is a mandatory setting that uses a variable to hold the Request Id of the request that is using this BPM. This should be set to ''Auto''}} |
| − | {{bullet1| | + | {{bullet1|Assets Type|The type of Software assets to get a list of}} |
| − | {{bullet1| | + | {{bullet1|Include Type|When set to Yes, it will return the Type of each asset as well as the asset name}} |
| − | {{bullet1| | + | }} |
| − | {{bullet1| | + | <!-- ******************************************************************************************************************************* --> |
| − | {{bullet1| | + | <!-- * Get All Telecoms Assets * --> |
| − | {{bullet1| | + | <!-- ******************************************************************************************************************************* --> |
| − | {{bullet1| | + | {{BPMAutomation|Get_All_Telecoms_Assets|Get All Telecoms Assets| |
| + | [[File:Get_All_Telecoms_Assets.png|thumb|link=https://wiki.hornbill.com/images/0/04/Get_All_Telecoms_Assets.png]]| | ||
| + | Get a comma delimited list of the asset names that belong to the Telecoms Class of asset that have been associated with the request| | ||
| + | {{bullet1|Request Id|This is a mandatory setting that uses a variable to hold the Request Id of the request that is using this BPM. This should be set to ''Auto''}} | ||
| + | {{bullet1|Assets Type|The type of Telecoms assets to get a list of}} | ||
| + | {{bullet1|Include Type|When set to Yes, it will return the Type of each asset as well as the asset name}} | ||
| + | }} | ||
| + | <!-- ******************************************************************************************************************************* --> | ||
| + | <!-- * Update All Assets - General Information * --> | ||
| + | <!-- ******************************************************************************************************************************* --> | ||
| + | {{BPMAutomation|Update_All_Assets_-_General_Information|Update All Assets - General Information| | ||
| + | [[File:Update_All_Assets_-_General_Information.png|thumb|link=https://wiki.hornbill.com/images/5/57/Update_All_Assets_-_General_Information.png]]| | ||
| + | Update the General Information attributes of all assets that are associated to the request| | ||
| + | {{bullet1|Request Id|This is a mandatory setting that uses a variable to hold the Request Id of the request that is using this BPM. This should be set to ''Auto''}} | ||
| + | {{bullet1|Operational State|Update the operational state of the assets. Options include pre-production, operational, and retired}} | ||
| + | {{bullet1|State|Update the state of the assets. Options include active, current, and archived}} | ||
| + | {{bullet1|Sub State|Update the sub state of the asset}} | ||
| + | {{bullet1|Company|Update the company that the assets should be associated to}} | ||
| + | {{bullet1|Name|Update the name of the assets}} | ||
| + | {{bullet1|Notes|Upldate the notes for the assets}} | ||
| + | {{bullet1|Owned By|Update the owner of the assets}} | ||
| + | {{bullet1|Used By|Update who uses the assets}} | ||
| + | {{bullet1|Department|Update the department that the asset is associated to}} | ||
| + | {{bullet1|Description|Update the asset description}} | ||
| + | {{bullet1|Booking|Update if the asset is available for booking}} | ||
| + | {{bullet1|Purpose|Update the purpose of the assets}} | ||
| + | {{bullet1|Last Audited Date|Update the last audit date for the assets}} | ||
| + | {{bullet1|Location Type|Update the type of location where the asset is}} | ||
| + | {{bullet1|Location|Update the Location of the assets}} | ||
| + | {{bullet1|Country|Update the country where the asset is located}} | ||
| + | {{bullet1|Building|Update the building where the asset is located}} | ||
| + | {{bullet1|Room|Update the room where the asset is}} | ||
| + | {{bullet1|Rack|Update the rack where the asset is located}} | ||
| + | {{bullet1|U Height|Update the U height location in the rack}} | ||
| + | {{bullet1|U Position|Update the U position of the asset in the rack}} | ||
| + | {{bullet1|Site|Update the site where the asset is located}} | ||
| + | {{bullet1|Floor|Update the Floor where the asset is located}} | ||
| + | {{bullet1|Geo Location|Update the Geo-location where the asset is located}} | ||
| + | {{bullet1|Static|Update if the asset is a static or not}} | ||
| + | {{bullet1|Cost|Update the cost of the asset}} | ||
| + | {{bullet1|Asset Tag|Update the Asset Tag}} | ||
| + | {{bullet1|Order Number|Update the Order number}} | ||
| + | {{bullet1|Invoice Number|Update the Invoice number}} | ||
| + | {{bullet1|Maintenance Cost|Update how much the annual maintenance cost of the asset is}} | ||
| + | {{bullet1|Maintenance Reference|Update the Reference to the maintenance contract}} | ||
| + | {{bullet1|Supplier ID|Update the ID of the asset supplier}} | ||
| + | {{bullet1|Supplier Contract|Update the name of the Supplier Contract associated to the asset}} | ||
| + | {{bullet1|Product ID|Update the Product ID}} | ||
| + | {{bullet1|Order Date|Update the Order date}} | ||
| + | {{bullet1|Received Date|Upldate the receive date}} | ||
| + | {{bullet1|Cost Center|Update the cost center}} | ||
| + | {{bullet1|Acq. Method|Update the method of how the asset was acquired}} | ||
| + | {{bullet1|Warranty Start|Update the start of the warranty date}} | ||
| + | {{bullet1|Warranty Expires|Update the warranty expiry date}} | ||
| + | {{bullet1|Supported By|Update who supports this asset}} | ||
| + | {{bullet1|Maintenance Notice Period|Update the notice period for Maintenance contract renewal}} | ||
| + | {{bullet1|Maintenance Termination Period|Update the termination period for the asset}} | ||
| + | {{bullet1|Annual Maintenance Review Date|Update the annual maintenance review date}} | ||
| + | {{bullet1|Scheduled Retired Date|Update the date that the asset set to retire on}} | ||
| + | {{bullet1|Actual Retired Date|Update the date that the asset was retired on}} | ||
| + | {{bullet1|Disposal Reason|Update why the asset was disposed of}} | ||
| + | {{bullet1|Disposal Price|Update how much it cost to dispose of the asset}} | ||
| + | {{bullet1|Disposal Code|Update the disposal code}} | ||
| + | {{bullet1|Beneficiary|Update who the beneficiary of the asset is}} | ||
| + | {{bullet1|Depreciation Method|Update the depreciation method}} | ||
| + | {{bullet1|Depreciation Start Date|Update when the asset cost starts deprecating }} | ||
| + | {{bullet1|Depreciation Value|Update the current depreciation value}} | ||
| + | {{bullet1|Residual Value|Update the residual value}} | ||
}} | }} | ||
| − | <!-- ***************************************************************************************************************************** --> | + | <!-- ******************************************************************************************************************************* --> |
| − | <!-- * | + | <!-- * Update Computer Assets - Additional Properties * --> |
| − | <!-- ***************************************************************************************************************************** --> | + | <!-- ******************************************************************************************************************************* --> |
| − | {{BPMAutomation| | + | {{BPMAutomation|Update_Computer_Assets_-_Additional_Properties|Update Computer Assets - Additional Properties| |
| − | [[File: | + | [[File:Update_Computer_Assets_-_Additional_Properties.png|thumb|link=https://wiki.hornbill.com/images/a/a6/Update_Computer_Assets_-_Additional_Properties.png]]| |
| − | + | Update the Additional Properties attributes of assets belonging to the Computer class that are associated to the request| | |
| − | {{bullet1|Request | + | {{bullet1|Request Id|This is a mandatory setting that uses a variable to hold the Request Id of the request that is using this BPM. This should be set to ''Auto''}} |
| − | |||
| − | |||
| − | |||
| − | |||
| − | |||
| − | |||
| − | |||
| − | |||
}} | }} | ||
| − | <!-- **************************************************************************************************************************** --> | + | <!-- ******************************************************************************************************************************* --> |
| − | <!-- * | + | <!-- * Update Computer Assets - General Information * --> |
| − | <!-- **************************************************************************************************************************** --> | + | <!-- ******************************************************************************************************************************* --> |
| − | {{BPMAutomation| | + | {{BPMAutomation|Update_Computer_Assets_-_General_Information|Update Computer Assets - General Information| |
| − | [[File: | + | [[File:Update_Computer_Assets_-_General_Information.png|thumb|link=https://wiki.hornbill.com/images/a/a8/Update_Computer_Assets_-_General_Information.png]]| |
| − | + | Update the General Information attributes of assets belonging to the Computer class that are associated to the request| | |
| − | {{bullet1|Request | + | {{bullet1|Request Id|This is a mandatory setting that uses a variable to hold the Request Id of the request that is using this BPM. This should be set to ''Auto''}} |
| − | {{bullet1| | + | {{bullet1|Operational State|Update the operational state of the assets. Options include pre-production, operational, and retired}} |
| − | {{bullet1| | + | {{bullet1|State|Update the state of the assets. Options include active, current, and archived}} |
| − | {{bullet1| | + | {{bullet1|Sub State|Update the sub state of the asset}} |
| − | {{bullet1| | + | {{bullet1|Company|Update the company that the assets should be associated to}} |
| − | {{bullet1| | + | {{bullet1|Name|Update the name of the assets}} |
| − | {{bullet1| | + | {{bullet1|Notes|Upldate the notes for the assets}} |
| − | {{bullet1| | + | {{bullet1|Owned By|Update the owner of the assets}} |
| + | {{bullet1|Used By|Update who uses the assets}} | ||
| + | {{bullet1|Department|Update the department that the asset is associated to}} | ||
| + | {{bullet1|Description|Update the asset description}} | ||
| + | {{bullet1|Booking|Update if the asset is available for booking}} | ||
| + | {{bullet1|Purpose|Update the purpose of the assets}} | ||
| + | {{bullet1|Last Audited Date|Update the last audit date for the assets}} | ||
| + | {{bullet1|Location Type|Update the type of location where the asset is}} | ||
| + | {{bullet1|Location|Update the Location of the assets}} | ||
| + | {{bullet1|Country|Update the country where the asset is located}} | ||
| + | {{bullet1|Building|Update the building where the asset is located}} | ||
| + | {{bullet1|Room|Update the room where the asset is}} | ||
| + | {{bullet1|Rack|Update the rack where the asset is located}} | ||
| + | {{bullet1|U Height|Update the U height location in the rack}} | ||
| + | {{bullet1|U Position|Update the U position of the asset in the rack}} | ||
| + | {{bullet1|Site|Update the site where the asset is located}} | ||
| + | {{bullet1|Floor|Update the Floor where the asset is located}} | ||
| + | {{bullet1|Geo Location|Update the Geo-location where the asset is located}} | ||
| + | {{bullet1|Static|Update if the asset is a static or not}} | ||
| + | {{bullet1|Cost|Update the cost of the asset}} | ||
| + | {{bullet1|Asset Tag|Update the Asset Tag}} | ||
| + | {{bullet1|Order Number|Update the Order number}} | ||
| + | {{bullet1|Invoice Number|Update the Invoice number}} | ||
| + | {{bullet1|Maintenance Cost|Update how much the annual maintenance cost of the asset is}} | ||
| + | {{bullet1|Maintenance Reference|Update the Reference to the maintenance contract}} | ||
| + | {{bullet1|Supplier ID|Update the ID of the asset supplier}} | ||
| + | {{bullet1|Supplier Contract|Update the name of the Supplier Contract associated to the asset}} | ||
| + | {{bullet1|Product ID|Update the Product ID}} | ||
| + | {{bullet1|Order Date|Update the Order date}} | ||
| + | {{bullet1|Received Date|Upldate the receive date}} | ||
| + | {{bullet1|Cost Center|Update the cost center}} | ||
| + | {{bullet1|Acq. Method|Update the method of how the asset was acquired}} | ||
| + | {{bullet1|Warranty Start|Update the start of the warranty date}} | ||
| + | {{bullet1|Warranty Expires|Update the warranty expiry date}} | ||
| + | {{bullet1|Supported By|Update who supports this asset}} | ||
| + | {{bullet1|Maintenance Notice Period|Update the notice period for Maintenance contract renewal}} | ||
| + | {{bullet1|Maintenance Termination Period|Update the termination period for the asset}} | ||
| + | {{bullet1|Annual Maintenance Review Date|Update the annual maintenance review date}} | ||
| + | {{bullet1|Scheduled Retired Date|Update the date that the asset set to retire on}} | ||
| + | {{bullet1|Actual Retired Date|Update the date that the asset was retired on}} | ||
| + | {{bullet1|Disposal Reason|Update why the asset was disposed of}} | ||
| + | {{bullet1|Disposal Price|Update how much it cost to dispose of the asset}} | ||
| + | {{bullet1|Disposal Code|Update the disposal code}} | ||
| + | {{bullet1|Beneficiary|Update who the beneficiary of the asset is}} | ||
| + | {{bullet1|Depreciation Method|Update the depreciation method}} | ||
| + | {{bullet1|Depreciation Start Date|Update when the asset cost starts deprecating }} | ||
| + | {{bullet1|Depreciation Value|Update the current depreciation value}} | ||
| + | {{bullet1|Residual Value|Update the residual value}} | ||
}} | }} | ||
| − | <!-- ****************************************************************************************************************************** --> | + | <!-- ******************************************************************************************************************************* --> |
| − | <!-- * | + | <!-- * Update Computer Peripheral Assets - Additional Properties * --> |
| − | <!-- * | + | <!-- ******************************************************************************************************************************* --> |
| − | <!-- * | + | {{BPMAutomation|Update_Computer_Peripheral_Assets_-_Additional_Properties|Update Computer Peripheral Assets - Additional Properties| |
| − | <!-- ****************************************************************************************************************************** --> | + | [[File:Update_Computer_Peripheral_Assets_-_Additional_Properties.png|thumb|link=https://wiki.hornbill.com/images/c/cd/Update_Computer_Peripheral_Assets_-_Additional_Properties.png]]| |
| − | + | Update the Additional Properties attributes of assets belonging to the Computer Peripheral class that are associated to the request| | |
| − | + | {{bullet1|Request Id|This is a mandatory setting that uses a variable to hold the Request Id of the request that is using this BPM. This should be set to ''Auto''}} | |
| − | <!-- ****************************************************************************************************************************** --> | + | }} |
| − | <!-- * | + | <!-- ******************************************************************************************************************************* --> |
| − | <!-- ****************************************************************************************************************************** --> | + | <!-- * Update Computer Peripheral Assets - General Information * --> |
| − | {{BPMAutomation| | + | <!-- ******************************************************************************************************************************* --> |
| − | [[File: | + | {{BPMAutomation|Update_Computer_Peripheral_Assets_-_General_Information|Update Computer Peripheral Assets - General Information| |
| − | + | [[File:Update_Computer_Peripheral_Assets_-_General_Information.png|thumb|link=https://wiki.hornbill.com/images/9/93/Update_Computer_Peripheral_Assets_-_General_Information.png]]| | |
| − | {{bullet1|Request | + | Update the General Information attributes of assets belonging to the Computer Peripheral class that are associated to the request| |
| + | {{bullet1|Request Id|This is a mandatory setting that uses a variable to hold the Request Id of the request that is using this BPM. This should be set to ''Auto''}} | ||
| + | {{bullet1|Operational State|Update the operational state of the assets. Options include pre-production, operational, and retired}} | ||
| + | {{bullet1|State|Update the state of the assets. Options include active, current, and archived}} | ||
| + | {{bullet1|Sub State|Update the sub state of the asset}} | ||
| + | {{bullet1|Company|Update the company that the assets should be associated to}} | ||
| + | {{bullet1|Name|Update the name of the assets}} | ||
| + | {{bullet1|Notes|Upldate the notes for the assets}} | ||
| + | {{bullet1|Owned By|Update the owner of the assets}} | ||
| + | {{bullet1|Used By|Update who uses the assets}} | ||
| + | {{bullet1|Department|Update the department that the asset is associated to}} | ||
| + | {{bullet1|Description|Update the asset description}} | ||
| + | {{bullet1|Booking|Update if the asset is available for booking}} | ||
| + | {{bullet1|Purpose|Update the purpose of the assets}} | ||
| + | {{bullet1|Last Audited Date|Update the last audit date for the assets}} | ||
| + | {{bullet1|Location Type|Update the type of location where the asset is}} | ||
| + | {{bullet1|Location|Update the Location of the assets}} | ||
| + | {{bullet1|Country|Update the country where the asset is located}} | ||
| + | {{bullet1|Building|Update the building where the asset is located}} | ||
| + | {{bullet1|Room|Update the room where the asset is}} | ||
| + | {{bullet1|Rack|Update the rack where the asset is located}} | ||
| + | {{bullet1|U Height|Update the U height location in the rack}} | ||
| + | {{bullet1|U Position|Update the U position of the asset in the rack}} | ||
| + | {{bullet1|Site|Update the site where the asset is located}} | ||
| + | {{bullet1|Floor|Update the Floor where the asset is located}} | ||
| + | {{bullet1|Geo Location|Update the Geo-location where the asset is located}} | ||
| + | {{bullet1|Static|Update if the asset is a static or not}} | ||
| + | {{bullet1|Cost|Update the cost of the asset}} | ||
| + | {{bullet1|Asset Tag|Update the Asset Tag}} | ||
| + | {{bullet1|Order Number|Update the Order number}} | ||
| + | {{bullet1|Invoice Number|Update the Invoice number}} | ||
| + | {{bullet1|Maintenance Cost|Update how much the annual maintenance cost of the asset is}} | ||
| + | {{bullet1|Maintenance Reference|Update the Reference to the maintenance contract}} | ||
| + | {{bullet1|Supplier ID|Update the ID of the asset supplier}} | ||
| + | {{bullet1|Supplier Contract|Update the name of the Supplier Contract associated to the asset}} | ||
| + | {{bullet1|Product ID|Update the Product ID}} | ||
| + | {{bullet1|Order Date|Update the Order date}} | ||
| + | {{bullet1|Received Date|Upldate the receive date}} | ||
| + | {{bullet1|Cost Center|Update the cost center}} | ||
| + | {{bullet1|Acq. Method|Update the method of how the asset was aquired}} | ||
| + | {{bullet1|Warranty Start|Update the start of the warranty date}} | ||
| + | {{bullet1|Warranty Expires|Update the warranty expiry date}} | ||
| + | {{bullet1|Supported By|Update who supports this asset}} | ||
| + | {{bullet1|Maintenance Notice Period|Update the notice period for Maintenance contract renewal}} | ||
| + | {{bullet1|Maintenance Termination Period|Update the termination period for the asset}} | ||
| + | {{bullet1|Annual Maintenance Review Date|Update the annual maintenance review date}} | ||
| + | {{bullet1|Scheduled Retired Date|Update the date that the asset set to retire on}} | ||
| + | {{bullet1|Actual Retired Date|Update the date that the asset was retired on}} | ||
| + | {{bullet1|Disposal Reason|Update why the asset was disposed of}} | ||
| + | {{bullet1|Disposal Price|Update how much it cost to dispose of the asset}} | ||
| + | {{bullet1|Disposal Code|Update the desposal code}} | ||
| + | {{bullet1|Beneficiary|Update who the beneficiary of the asset is}} | ||
| + | {{bullet1|Depreciation Method|Update the depreciation method}} | ||
| + | {{bullet1|Depreciation Start Date|Update when the asset cost starts deprecating }} | ||
| + | {{bullet1|Depreciation Value|Update the current depreciation value}} | ||
| + | {{bullet1|Residual Value|Update the residual value}} | ||
| + | }} | ||
| + | <!-- ******************************************************************************************************************************* --> | ||
| + | <!-- * Update Mobile Device Assets - Additional Properties * --> | ||
| + | <!-- ******************************************************************************************************************************* --> | ||
| + | {{BPMAutomation|Update_Mobile_Device_Assets_-_Additional_Properties|Update Mobile Device Assets - Additional Properties| | ||
| + | [[File:Update_Mobile_Device_Assets_-_Additional_Properties.png|thumb|link=https://wiki.hornbill.com/images/a/a4/Update_Mobile_Device_Assets_-_Additional_Properties.png]]| | ||
| + | Update the Additional Properties attributes of assets belonging to the Mobile Device class that are associated to the request| | ||
| + | {{bullet1|Request Id|This is a mandatory setting that uses a variable to hold the Request Id of the request that is using this BPM. This should be set to ''Auto''}} | ||
}} | }} | ||
| − | <!-- ****************************************************************************************************************************** --> | + | <!-- ******************************************************************************************************************************* --> |
| − | <!-- * | + | <!-- * Update Mobile Device Assets - General Information * --> |
| − | <!-- ****************************************************************************************************************************** --> | + | <!-- ******************************************************************************************************************************* --> |
| − | + | {{BPMAutomation|Update_Mobile_Device_Assets_-_General_Information|Update Mobile Device Assets - General Information| | |
| − | + | [[File:Update_Mobile_Device_Assets_-_General_Information.png|thumb|link=https://wiki.hornbill.com/images/1/18/Update_Mobile_Device_Assets_-_General_Information.png]]| | |
| − | + | Update the General Information attributes of assets belonging to the Mobile Device class that are associated to the request| | |
| − | + | {{bullet1|Request Id|This is a mandatory setting that uses a variable to hold the Request Id of the request that is using this BPM. This should be set to ''Auto''}} | |
| − | + | {{bullet1|Operational State|Update the operational state of the assets. Options include pre-production, operational, and retired}} | |
| − | + | {{bullet1|State|Update the state of the assets. Options include active, current, and archived}} | |
| − | + | {{bullet1|Sub State|Update the sub state of the asset}} | |
| − | + | {{bullet1|Company|Update the company that the assets should be associated to}} | |
| − | + | {{bullet1|Name|Update the name of the assets}} | |
| − | + | {{bullet1|Notes|Upldate the notes for the assets}} | |
| − | + | {{bullet1|Owned By|Update the owner of the assets}} | |
| − | + | {{bullet1|Used By|Update who uses the assets}} | |
| − | + | {{bullet1|Department|Update the department that the asset is associated to}} | |
| − | + | {{bullet1|Description|Update the asset description}} | |
| − | + | {{bullet1|Booking|Update if the asset is available for booking}} | |
| − | + | {{bullet1|Purpose|Update the purpose of the assets}} | |
| − | + | {{bullet1|Last Audited Date|Update the last audit date for the assets}} | |
| − | + | {{bullet1|Location Type|Update the type of location where the asset is}} | |
| − | + | {{bullet1|Location|Update the Location of the assets}} | |
| − | + | {{bullet1|Country|Update the country where the asset is located}} | |
| − | + | {{bullet1|Building|Update the building where the asset is located}} | |
| − | + | {{bullet1|Room|Update the room where the asset is}} | |
| − | + | {{bullet1|Rack|Update the rack where the asset is located}} | |
| − | + | {{bullet1|U Height|Update the U height location in the rack}} | |
| − | + | {{bullet1|U Position|Update the U position of the asset in the rack}} | |
| − | + | {{bullet1|Site|Update the site where the asset is located}} | |
| − | + | {{bullet1|Floor|Update the Floor where the asset is located}} | |
| − | + | {{bullet1|Geo Location|Update the Geo-location where the asset is located}} | |
| − | * | + | {{bullet1|Static|Update if the asset is a static or not}} |
| − | + | {{bullet1|Cost|Update the cost of the asset}} | |
| − | + | {{bullet1|Asset Tag|Update the Asset Tag}} | |
| − | + | {{bullet1|Order Number|Update the Order number}} | |
| − | + | {{bullet1|Invoice Number|Update the Invoice number}} | |
| − | + | {{bullet1|Maintenance Cost|Update how much the annual maintenance cost of the asset is}} | |
| − | + | {{bullet1|Maintenance Reference|Update the Reference to the maintenance contract}} | |
| + | {{bullet1|Supplier ID|Update the ID of the asset supplier}} | ||
| + | {{bullet1|Supplier Contract|Update the name of the Supplier Contract associated to the asset}} | ||
| + | {{bullet1|Product ID|Update the Product ID}} | ||
| + | {{bullet1|Order Date|Update the Order date}} | ||
| + | {{bullet1|Received Date|Upldate the receive date}} | ||
| + | {{bullet1|Cost Center|Update the cost center}} | ||
| + | {{bullet1|Acq. Method|Update the method of how the asset was acquired}} | ||
| + | {{bullet1|Warranty Start|Update the start of the warranty date}} | ||
| + | {{bullet1|Warranty Expires|Update the warranty expiry date}} | ||
| + | {{bullet1|Supported By|Update who supports this asset}} | ||
| + | {{bullet1|Maintenance Notice Period|Update the notice period for Maintenance contract renewal}} | ||
| + | {{bullet1|Maintenance Termination Period|Update the termination period for the asset}} | ||
| + | {{bullet1|Annual Maintenance Review Date|Update the annual maintenance review date}} | ||
| + | {{bullet1|Scheduled Retired Date|Update the date that the asset set to retire on}} | ||
| + | {{bullet1|Actual Retired Date|Update the date that the asset was retired on}} | ||
| + | {{bullet1|Disposal Reason|Update why the asset was disposed of}} | ||
| + | {{bullet1|Disposal Price|Update how much it cost to dispose of the asset}} | ||
| + | {{bullet1|Disposal Code|Update the disposal code}} | ||
| + | {{bullet1|Beneficiary|Update who the beneficiary of the asset is}} | ||
| + | {{bullet1|Depreciation Method|Update the depreciation method}} | ||
| + | {{bullet1|Depreciation Start Date|Update when the asset cost starts deprecating }} | ||
| + | {{bullet1|Depreciation Value|Update the current depreciation value}} | ||
| + | {{bullet1|Residual Value|Update the residual value}} | ||
| + | }} | ||
| + | <!-- ******************************************************************************************************************************* --> | ||
| + | <!-- * Update Network Device Assets - Additional Properties * --> | ||
| + | <!-- ******************************************************************************************************************************* --> | ||
| + | {{BPMAutomation|Update_Network_Device_Assets_-_Additional_Properties|Update Network Device Assets - Additional Properties| | ||
| + | [[File:Update_Network_Device_Assets_-_Additional_Properties.png|thumb|link=https://wiki.hornbill.com/images/0/03/Update_Network_Device_Assets_-_Additional_Properties.png]]| | ||
| + | Update the Additional Properties attributes of assets belonging to the Network Device class that are associated to the request| | ||
| + | {{bullet1|Request Id|This is a mandatory setting that uses a variable to hold the Request Id of the request that is using this BPM. This should be set to ''Auto''}} | ||
| + | }} | ||
| + | <!-- ******************************************************************************************************************************* --> | ||
| + | <!-- * Update Network Device Assets - General Information * --> | ||
| + | <!-- ******************************************************************************************************************************* --> | ||
| + | {{BPMAutomation|Update_Network_Device_Assets_-_General_Information|Update Network Device Assets - General Information| | ||
| + | [[File:Update_Network_Device_Assets_-_General_Information.png|thumb|link=https://wiki.hornbill.com/images/1/19/Update_Network_Device_Assets_-_General_Information.png]]| | ||
| + | Update the General Information attributes of assets belonging to the Network Device class that are associated to the request| | ||
| + | {{bullet1|Request Id|This is a mandatory setting that uses a variable to hold the Request Id of the request that is using this BPM. This should be set to ''Auto''}} | ||
| + | {{bullet1|Operational State|Update the operational state of the assets. Options include pre-production, operational, and retired}} | ||
| + | {{bullet1|State|Update the state of the assets. Options include active, current, and archived}} | ||
| + | {{bullet1|Sub State|Update the sub state of the asset}} | ||
| + | {{bullet1|Company|Update the company that the assets should be associated to}} | ||
| + | {{bullet1|Name|Update the name of the assets}} | ||
| + | {{bullet1|Notes|Upldate the notes for the assets}} | ||
| + | {{bullet1|Owned By|Update the owner of the assets}} | ||
| + | {{bullet1|Used By|Update who uses the assets}} | ||
| + | {{bullet1|Department|Update the department that the asset is associated to}} | ||
| + | {{bullet1|Description|Update the asset description}} | ||
| + | {{bullet1|Booking|Update if the asset is available for booking}} | ||
| + | {{bullet1|Purpose|Update the purpose of the assets}} | ||
| + | {{bullet1|Last Audited Date|Update the last audit date for the assets}} | ||
| + | {{bullet1|Location Type|Update the type of location where the asset is}} | ||
| + | {{bullet1|Location|Update the Location of the assets}} | ||
| + | {{bullet1|Country|Update the country where the asset is located}} | ||
| + | {{bullet1|Building|Update the building where the asset is located}} | ||
| + | {{bullet1|Room|Update the room where the asset is}} | ||
| + | {{bullet1|Rack|Update the rack where the asset is located}} | ||
| + | {{bullet1|U Height|Update the U height location in the rack}} | ||
| + | {{bullet1|U Position|Update the U position of the asset in the rack}} | ||
| + | {{bullet1|Site|Update the site where the asset is located}} | ||
| + | {{bullet1|Floor|Update the Floor where the asset is located}} | ||
| + | {{bullet1|Geo Location|Update the Geo-location where the asset is located}} | ||
| + | {{bullet1|Static|Update if the asset is a static or not}} | ||
| + | {{bullet1|Cost|Update the cost of the asset}} | ||
| + | {{bullet1|Asset Tag|Update the Asset Tag}} | ||
| + | {{bullet1|Order Number|Update the Order number}} | ||
| + | {{bullet1|Invoice Number|Update the Invoice number}} | ||
| + | {{bullet1|Maintenance Cost|Update how much the annual maintenance cost of the asset is}} | ||
| + | {{bullet1|Maintenance Reference|Update the Reference to the maintenance contract}} | ||
| + | {{bullet1|Supplier ID|Update the ID of the asset supplier}} | ||
| + | {{bullet1|Supplier Contract|Update the name of the Supplier Contract associated to the asset}} | ||
| + | {{bullet1|Product ID|Update the Product ID}} | ||
| + | {{bullet1|Order Date|Update the Order date}} | ||
| + | {{bullet1|Received Date|Upldate the receive date}} | ||
| + | {{bullet1|Cost Center|Update the cost center}} | ||
| + | {{bullet1|Acq. Method|Update the method of how the asset was acquired}} | ||
| + | {{bullet1|Warranty Start|Update the start of the warranty date}} | ||
| + | {{bullet1|Warranty Expires|Update the warranty expiry date}} | ||
| + | {{bullet1|Supported By|Update who supports this asset}} | ||
| + | {{bullet1|Maintenance Notice Period|Update the notice period for Maintenance contract renewal}} | ||
| + | {{bullet1|Maintenance Termination Period|Update the termination period for the asset}} | ||
| + | {{bullet1|Annual Maintenance Review Date|Update the annual maintenance review date}} | ||
| + | {{bullet1|Scheduled Retired Date|Update the date that the asset set to retire on}} | ||
| + | {{bullet1|Actual Retired Date|Update the date that the asset was retired on}} | ||
| + | {{bullet1|Disposal Reason|Update why the asset was disposed of}} | ||
| + | {{bullet1|Disposal Price|Update how much it cost to dispose of the asset}} | ||
| + | {{bullet1|Disposal Code|Update the disposal code}} | ||
| + | {{bullet1|Beneficiary|Update who the beneficiary of the asset is}} | ||
| + | {{bullet1|Depreciation Method|Update the depreciation method}} | ||
| + | {{bullet1|Depreciation Start Date|Update when the asset cost starts deprecating }} | ||
| + | {{bullet1|Depreciation Value|Update the current depreciation value}} | ||
| + | {{bullet1|Residual Value|Update the residual value}} | ||
| + | }} | ||
| + | <!-- ******************************************************************************************************************************* --> | ||
| + | <!-- * Update Printer Assets - Additional Properties * --> | ||
| + | <!-- ******************************************************************************************************************************* --> | ||
| + | {{BPMAutomation|Update_Printer_Assets_-_Additional_Properties|Update Printer Assets - Additional Properties| | ||
| + | [[File:Update_Printer_Assets_-_Additional_Properties.png|thumb|link=https://wiki.hornbill.com/images/a/a4/Update_Printer_Assets_-_Additional_Properties.png]]| | ||
| + | Update the Additional Properties attributes of assets belonging to the Printer class that are associated to the request| | ||
| + | {{bullet1|Request Id|This is a mandatory setting that uses a variable to hold the Request Id of the request that is using this BPM. This should be set to ''Auto''}} | ||
| + | }} | ||
| + | <!-- ******************************************************************************************************************************* --> | ||
| + | <!-- * Update Printer Assets - General Information * --> | ||
| + | <!-- ******************************************************************************************************************************* --> | ||
| + | {{BPMAutomation|Update_Printer_Assets_-_General_Information|Update Printer Assets - General Information| | ||
| + | [[File:Update_Printer_Assets_-_General_Information.png|thumb|link=https://wiki.hornbill.com/images/1/19/Update_Printer_Assets_-_General_Information.png]]| | ||
| + | Update the General Information attributes of assets belonging to the Printer class that are associated to the request| | ||
| + | {{bullet1|Request Id|This is a mandatory setting that uses a variable to hold the Request Id of the request that is using this BPM. This should be set to ''Auto''}} | ||
| + | {{bullet1|Operational State|Update the operational state of the assets. Options include pre-production, operational, and retired}} | ||
| + | {{bullet1|State|Update the state of the assets. Options include active, current, and archived}} | ||
| + | {{bullet1|Sub State|Update the sub state of the asset}} | ||
| + | {{bullet1|Company|Update the company that the assets should be associated to}} | ||
| + | {{bullet1|Name|Update the name of the assets}} | ||
| + | {{bullet1|Notes|Upldate the notes for the assets}} | ||
| + | {{bullet1|Owned By|Update the owner of the assets}} | ||
| + | {{bullet1|Used By|Update who uses the assets}} | ||
| + | {{bullet1|Department|Update the department that the asset is associated to}} | ||
| + | {{bullet1|Description|Update the asset description}} | ||
| + | {{bullet1|Booking|Update if the asset is available for booking}} | ||
| + | {{bullet1|Purpose|Update the purpose of the assets}} | ||
| + | {{bullet1|Last Audited Date|Update the last audit date for the assets}} | ||
| + | {{bullet1|Location Type|Update the type of location where the asset is}} | ||
| + | {{bullet1|Location|Update the Location of the assets}} | ||
| + | {{bullet1|Country|Update the country where the asset is located}} | ||
| + | {{bullet1|Building|Update the building where the asset is located}} | ||
| + | {{bullet1|Room|Update the room where the asset is}} | ||
| + | {{bullet1|Rack|Update the rack where the asset is located}} | ||
| + | {{bullet1|U Height|Update the U height location in the rack}} | ||
| + | {{bullet1|U Position|Update the U position of the asset in the rack}} | ||
| + | {{bullet1|Site|Update the site where the asset is located}} | ||
| + | {{bullet1|Floor|Update the Floor where the asset is located}} | ||
| + | {{bullet1|Geo Location|Update the Geo-location where the asset is located}} | ||
| + | {{bullet1|Static|Update if the asset is a static or not}} | ||
| + | {{bullet1|Cost|Update the cost of the asset}} | ||
| + | {{bullet1|Asset Tag|Update the Asset Tag}} | ||
| + | {{bullet1|Order Number|Update the Order number}} | ||
| + | {{bullet1|Invoice Number|Update the Invoice number}} | ||
| + | {{bullet1|Maintenance Cost|Update how much the annual maintenance cost of the asset is}} | ||
| + | {{bullet1|Maintenance Reference|Update the Reference to the maintenance contract}} | ||
| + | {{bullet1|Supplier ID|Update the ID of the asset supplier}} | ||
| + | {{bullet1|Supplier Contract|Update the name of the Supplier Contract associated to the asset}} | ||
| + | {{bullet1|Product ID|Update the Product ID}} | ||
| + | {{bullet1|Order Date|Update the Order date}} | ||
| + | {{bullet1|Received Date|Upldate the receive date}} | ||
| + | {{bullet1|Cost Center|Update the cost center}} | ||
| + | {{bullet1|Acq. Method|Update the method of how the asset was acquired}} | ||
| + | {{bullet1|Warranty Start|Update the start of the warranty date}} | ||
| + | {{bullet1|Warranty Expires|Update the warranty expiry date}} | ||
| + | {{bullet1|Supported By|Update who supports this asset}} | ||
| + | {{bullet1|Maintenance Notice Period|Update the notice period for Maintenance contract renewal}} | ||
| + | {{bullet1|Maintenance Termination Period|Update the termination period for the asset}} | ||
| + | {{bullet1|Annual Maintenance Review Date|Update the annual maintenance review date}} | ||
| + | {{bullet1|Scheduled Retired Date|Update the date that the asset set to retire on}} | ||
| + | {{bullet1|Actual Retired Date|Update the date that the asset was retired on}} | ||
| + | {{bullet1|Disposal Reason|Update why the asset was disposed of}} | ||
| + | {{bullet1|Disposal Price|Update how much it cost to dispose of the asset}} | ||
| + | {{bullet1|Disposal Code|Update the disposal code}} | ||
| + | {{bullet1|Beneficiary|Update who the beneficiary of the asset is}} | ||
| + | {{bullet1|Depreciation Method|Update the depreciation method}} | ||
| + | {{bullet1|Depreciation Start Date|Update when the asset cost starts deprecating }} | ||
| + | {{bullet1|Depreciation Value|Update the current depreciation value}} | ||
| + | {{bullet1|Residual Value|Update the residual value}} | ||
| + | }} | ||
| + | <!-- ******************************************************************************************************************************* --> | ||
| + | <!-- * Update Software Assets - Additional Properties * --> | ||
| + | <!-- ******************************************************************************************************************************* --> | ||
| + | {{BPMAutomation|Update_Software_Assets_-_Additional_Properties|Update Software Assets - Additional Properties| | ||
| + | [[File:Update_Software_Assets_-_Additional_Properties.png|thumb|link=https://wiki.hornbill.com/images/9/91/Update_Software_Assets_-_Additional_Properties.png]]| | ||
| + | Update the Additional Properties attributes of assets belonging to the Software class that are associated to the request| | ||
| + | {{bullet1|Request Id|This is a mandatory setting that uses a variable to hold the Request Id of the request that is using this BPM. This should be set to ''Auto''}} | ||
| + | }} | ||
| + | <!-- ******************************************************************************************************************************* --> | ||
| + | <!-- * Update Software Assets - General Information * --> | ||
| + | <!-- ******************************************************************************************************************************* --> | ||
| + | {{BPMAutomation|Update_Software_Assets_-_General_Information|Update Software Assets - General Information| | ||
| + | [[File:Update_Software_Assets_-_General_Information.png|thumb|link=https://wiki.hornbill.com/images/e/e3/Update_Software_Assets_-_General_Information.png]]| | ||
| + | Update the General Information attributes of assets belonging to the Software class that are associated to the request| | ||
| + | {{bullet1|Request Id|This is a mandatory setting that uses a variable to hold the Request Id of the request that is using this BPM. This should be set to ''Auto''}} | ||
| + | {{bullet1|Operational State|Update the operational state of the assets. Options include pre-production, operational, and retired}} | ||
| + | {{bullet1|State|Update the state of the assets. Options include active, current, and archived}} | ||
| + | {{bullet1|Sub State|Update the sub state of the asset}} | ||
| + | {{bullet1|Company|Update the company that the assets should be associated to}} | ||
| + | {{bullet1|Name|Update the name of the assets}} | ||
| + | {{bullet1|Notes|Upldate the notes for the assets}} | ||
| + | {{bullet1|Owned By|Update the owner of the assets}} | ||
| + | {{bullet1|Used By|Update who uses the assets}} | ||
| + | {{bullet1|Department|Update the department that the asset is associated to}} | ||
| + | {{bullet1|Description|Update the asset description}} | ||
| + | {{bullet1|Booking|Update if the asset is available for booking}} | ||
| + | {{bullet1|Purpose|Update the purpose of the assets}} | ||
| + | {{bullet1|Last Audited Date|Update the last audit date for the assets}} | ||
| + | {{bullet1|Location Type|Update the type of location where the asset is}} | ||
| + | {{bullet1|Location|Update the Location of the assets}} | ||
| + | {{bullet1|Country|Update the country where the asset is located}} | ||
| + | {{bullet1|Building|Update the building where the asset is located}} | ||
| + | {{bullet1|Room|Update the room where the asset is}} | ||
| + | {{bullet1|Rack|Update the rack where the asset is located}} | ||
| + | {{bullet1|U Height|Update the U height location in the rack}} | ||
| + | {{bullet1|U Position|Update the U position of the asset in the rack}} | ||
| + | {{bullet1|Site|Update the site where the asset is located}} | ||
| + | {{bullet1|Floor|Update the Floor where the asset is located}} | ||
| + | {{bullet1|Geo Location|Update the Geo-location where the asset is located}} | ||
| + | {{bullet1|Static|Update if the asset is a static or not}} | ||
| + | {{bullet1|Cost|Update the cost of the asset}} | ||
| + | {{bullet1|Asset Tag|Update the Asset Tag}} | ||
| + | {{bullet1|Order Number|Update the Order number}} | ||
| + | {{bullet1|Invoice Number|Update the Invoice number}} | ||
| + | {{bullet1|Maintenance Cost|Update how much the annual maintenance cost of the asset is}} | ||
| + | {{bullet1|Maintenance Reference|Update the Reference to the maintenance contract}} | ||
| + | {{bullet1|Supplier ID|Update the ID of the asset supplier}} | ||
| + | {{bullet1|Supplier Contract|Update the name of the Supplier Contract associated to the asset}} | ||
| + | {{bullet1|Product ID|Update the Product ID}} | ||
| + | {{bullet1|Order Date|Update the Order date}} | ||
| + | {{bullet1|Received Date|Upldate the receive date}} | ||
| + | {{bullet1|Cost Center|Update the cost center}} | ||
| + | {{bullet1|Acq. Method|Update the method of how the asset was acquired}} | ||
| + | {{bullet1|Warranty Start|Update the start of the warranty date}} | ||
| + | {{bullet1|Warranty Expires|Update the warranty expiry date}} | ||
| + | {{bullet1|Supported By|Update who supports this asset}} | ||
| + | {{bullet1|Maintenance Notice Period|Update the notice period for Maintenance contract renewal}} | ||
| + | {{bullet1|Maintenance Termination Period|Update the termination period for the asset}} | ||
| + | {{bullet1|Annual Maintenance Review Date|Update the annual maintenance review date}} | ||
| + | {{bullet1|Scheduled Retired Date|Update the date that the asset set to retire on}} | ||
| + | {{bullet1|Actual Retired Date|Update the date that the asset was retired on}} | ||
| + | {{bullet1|Disposal Reason|Update why the asset was disposed of}} | ||
| + | {{bullet1|Disposal Price|Update how much it cost to dispose of the asset}} | ||
| + | {{bullet1|Disposal Code|Update the disposal code}} | ||
| + | {{bullet1|Beneficiary|Update who the beneficiary of the asset is}} | ||
| + | {{bullet1|Depreciation Method|Update the depreciation method}} | ||
| + | {{bullet1|Depreciation Start Date|Update when the asset cost starts deprecating }} | ||
| + | {{bullet1|Depreciation Value|Update the current depreciation value}} | ||
| + | {{bullet1|Residual Value|Update the residual value}} | ||
| + | }} | ||
| + | <!-- ******************************************************************************************************************************* --> | ||
| + | <!-- * Update Telecoms Assets - Additional Properties * --> | ||
| + | <!-- ******************************************************************************************************************************* --> | ||
| + | <!-- | ||
| + | {{BPMAutomation|Update_Telecoms_Assets_-_Additional_Properties|Update Telecoms Assets - Additional Properties| | ||
| + | [[File:Update_Telecoms_Assets_-_Additional_Properties.png|thumb|link=https://wiki.hornbill.com/images/a/a4/Update_Telecoms_Assets_-_Additional_Properties.png]]| | ||
| + | Update the Additional Properties attributes of assets belonging to the Telecoms class that are associated to the request| | ||
| + | {{bullet1|Request Id|This is a mandatory setting that uses a variable to hold the Request Id of the request that is using this BPM. This should be set to ''Auto''}} | ||
| + | }} | ||
| + | <!-- ******************************************************************************************************************************* --> | ||
| + | <!-- * Update Telecoms Assets - General Information * --> | ||
| + | <!-- ******************************************************************************************************************************* --> | ||
| + | {{BPMAutomation|Update_Telecoms_Assets_-_General_Information|Update Telecoms Assets - General Information| | ||
| + | [[File:Update_Telecoms_Assets_-_General_Information.png|thumb|link=https://wiki.hornbill.com/images/e/e7/Update_Telecoms_Assets_-_General_Information.png]]| | ||
| + | Update the General Information attributes of assets belonging to the Telecoms class that are associated to the request| | ||
| + | {{bullet1|Request Id|This is a mandatory setting that uses a variable to hold the Request Id of the request that is using this BPM. This should be set to ''Auto''}} | ||
| + | {{bullet1|Operational State|Update the operational state of the assets. Options include pre-production, operational, and retired}} | ||
| + | {{bullet1|State|Update the state of the assets. Options include active, current, and archived}} | ||
| + | {{bullet1|Sub State|Update the sub state of the asset}} | ||
| + | {{bullet1|Company|Update the company that the assets should be associated to}} | ||
| + | {{bullet1|Name|Update the name of the assets}} | ||
| + | {{bullet1|Notes|Upldate the notes for the assets}} | ||
| + | {{bullet1|Owned By|Update the owner of the assets}} | ||
| + | {{bullet1|Used By|Update who uses the assets}} | ||
| + | {{bullet1|Department|Update the department that the asset is associated to}} | ||
| + | {{bullet1|Description|Update the asset description}} | ||
| + | {{bullet1|Booking|Update if the asset is available for booking}} | ||
| + | {{bullet1|Purpose|Update the purpose of the assets}} | ||
| + | {{bullet1|Last Audited Date|Update the last audit date for the assets}} | ||
| + | {{bullet1|Location Type|Update the type of location where the asset is}} | ||
| + | {{bullet1|Location|Update the Location of the assets}} | ||
| + | {{bullet1|Country|Update the country where the asset is located}} | ||
| + | {{bullet1|Building|Update the building where the asset is located}} | ||
| + | {{bullet1|Room|Update the room where the asset is}} | ||
| + | {{bullet1|Rack|Update the rack where the asset is located}} | ||
| + | {{bullet1|U Height|Update the U height location in the rack}} | ||
| + | {{bullet1|U Position|Update the U position of the asset in the rack}} | ||
| + | {{bullet1|Site|Update the site where the asset is located}} | ||
| + | {{bullet1|Floor|Update the Floor where the asset is located}} | ||
| + | {{bullet1|Geo Location|Update the Geo-location where the asset is located}} | ||
| + | {{bullet1|Static|Update if the asset is a static or not}} | ||
| + | {{bullet1|Cost|Update the cost of the asset}} | ||
| + | {{bullet1|Asset Tag|Update the Asset Tag}} | ||
| + | {{bullet1|Order Number|Update the Order number}} | ||
| + | {{bullet1|Invoice Number|Update the Invoice number}} | ||
| + | {{bullet1|Maintenance Cost|Update how much the annual maintenance cost of the asset is}} | ||
| + | {{bullet1|Maintenance Reference|Update the Reference to the maintenance contract}} | ||
| + | {{bullet1|Supplier ID|Update the ID of the asset supplier}} | ||
| + | {{bullet1|Supplier Contract|Update the name of the Supplier Contract associated to the asset}} | ||
| + | {{bullet1|Product ID|Update the Product ID}} | ||
| + | {{bullet1|Order Date|Update the Order date}} | ||
| + | {{bullet1|Received Date|Upldate the receive date}} | ||
| + | {{bullet1|Cost Center|Update the cost center}} | ||
| + | {{bullet1|Acq. Method|Update the method of how the asset was acquired}} | ||
| + | {{bullet1|Warranty Start|Update the start of the warranty date}} | ||
| + | {{bullet1|Warranty Expires|Update the warranty expiry date}} | ||
| + | {{bullet1|Supported By|Update who supports this asset}} | ||
| + | {{bullet1|Maintenance Notice Period|Update the notice period for Maintenance contract renewal}} | ||
| + | {{bullet1|Maintenance Termination Period|Update the termination period for the asset}} | ||
| + | {{bullet1|Annual Maintenance Review Date|Update the annual maintenance review date}} | ||
| + | {{bullet1|Scheduled Retired Date|Update the date that the asset set to retire on}} | ||
| + | {{bullet1|Actual Retired Date|Update the date that the asset was retired on}} | ||
| + | {{bullet1|Disposal Reason|Update why the asset was disposed of}} | ||
| + | {{bullet1|Disposal Price|Update how much it cost to dispose of the asset}} | ||
| + | {{bullet1|Disposal Code|Update the disposal code}} | ||
| + | {{bullet1|Beneficiary|Update who the beneficiary of the asset is}} | ||
| + | {{bullet1|Depreciation Method|Update the depreciation method}} | ||
| + | {{bullet1|Depreciation Start Date|Update when the asset cost starts deprecating }} | ||
| + | {{bullet1|Depreciation Value|Update the current depreciation value}} | ||
| + | {{bullet1|Residual Value|Update the residual value}} | ||
| + | }} | ||
| + | <!-- ****************************************************************************************************************************** --> | ||
| + | <!-- * * --> | ||
| + | <!-- * Assignment * --> | ||
| + | <!-- * * --> | ||
| + | <!-- ****************************************************************************************************************************** --> | ||
| − | + | ====Assignment==== | |
| − | + | Use the Assignment node to automatically assign a request to different Service Manager users or teams. | |
| − | + | <!-- ******************************************************************************************************************************* --> | |
| − | + | <!-- * Assign to Service Team * --> | |
| − | + | <!-- ******************************************************************************************************************************* --> | |
| − | + | {{BPMAutomation|AssignToServiceTeam|Assign to Service Team| | |
| − | + | [[File:bpmassigntoserviceteam.png|thumb|link=https://wiki.hornbill.com/images/6/6e/Bpmassigntoserviceteam.png]]| | |
| − | + | Assign to Service Team assigns the request to the team that supports the service. If no team supports the service that the request is logged against then the request is not assigned. If more than one team supports the service, the request is assigned to the team that has supported the service the longest. This automated task does not assign the request to an individual within the team(s) supported by the service.| | |
| − | + | {{bullet1|Request ID|In almost all cases, this should be set to ''Auto'' which will take the global variable for the request ID that the BPM is associated and apply all selected options to this request}} | |
| − | + | {{bullet1|Use Request Service|Choose whether or not to use the service of the request. The default is No. If this parameter is set to Yes, it will override any other service specified as an input parameter}} | |
| − | * | + | {{bullet1|Service|The Service ID of the service which is supported by the team to be assigned to the request}} |
| − | * | + | {{bullet1|System Timeline Update|Select if the default system text will be added to the timeline for this action}} |
| − | * | + | {{bullet1|Manual Timeline Update|Select Yes to override the default System timeline Text, and add your own text which will appear in the timeline update for this action}} |
| − | * | + | {{bullet1|Visibility|Choose what level of visibility will be automatically applied to this update. Choosing anything other than '''Customer''' will result in the customer not seeing the update in the timeline of their requests on the Service or Customer Portals}} |
| − | * | + | }} |
| − | * | + | <!-- ***************************************************************************************************************************** --> |
| − | * | + | <!-- * Assign to Team * --> |
| − | * | + | <!-- ***************************************************************************************************************************** --> |
| − | * | + | {{BPMAutomation|AssignToTeam|Assign to Team| |
| − | * | + | [[File:bpmassigntoteam.png|thumb|link=link=https://wiki.hornbill.com/images/8/8a/Bpmassigntoteam.png|Assign to Team]]| |
| − | * | + | Use this option to assign the request to a specified team. | |
| − | * | + | {{bullet1|Request ID|In almost all cases, this should be set to ''Auto'' which will take the global variable for the request ID that the BPM is associated and apply all selected options to this request.}} |
| − | * | + | {{bullet1|Team|Select a team from the list of available teams that have been defined under the Organizational Data in Administration}} |
| − | * | + | {{bullet1|Team (From Variable)|Assign to a Team based on a variable that has been populated using Progressive Capture or through the Get Information nodes}} |
| − | * | + | {{bullet1|System Timeline Update|Select if the default system text will be added to the timeline for this action}} |
| − | * | + | {{bullet1|Manual Timeline Update|Select Yes to override the default System timeline Text, and add your own text which will appear in the timeline update for this action}} |
| − | * | + | {{bullet1|Visibility|Choose what level of visibility will be automatically applied to this update. Choosing anything other than ''Customer'' will result in the customer not seeing the update in the timeline of their requests on the Service or Customer Portals}} |
| − | + | }} | |
| − | * | + | <!-- ******************************************************************************************************************************* --> |
| − | * | + | <!-- * Assign to Owner * --> |
| − | * | + | <!-- ******************************************************************************************************************************* --> |
| − | * | + | {{BPMAutomation|AssignToOwner|Assign to Owner| |
| − | * | + | [[File:bpmassigntoowner.png|thumb|link=https://wiki.hornbill.com/images/e/e9/Bpmassigntoowner.png]]| |
| − | * | + | Use this option to assign the request to a specific Service Manager analyst.| |
| − | * | + | {{bullet1|Request Id|This is a mandatory setting that uses a variable to hold the Request Id of the request that is using this BPM. This should be set to ''Auto''.}} |
| − | * | + | {{bullet1|Team|The Team ID to be applied to the request}} |
| − | * | + | {{bullet1|Owner|The user ID to be applied to the request}} |
| − | * | + | {{bullet1|System Timeline Update|Select if the default system text will be added to the timeline for this action}} |
| − | * | + | {{bullet1|Manual Timeline Update|Select Yes to override the default System timeline Text, and add your own text which will appear in the timeline update for this action}} |
| − | * | + | {{bullet1|Visibility|Choose what level of visibility will be automatically applied to this update. Choosing anything other than '''Customer''' will result in the customer not seeing the update in the timeline of their requests on the Service or Customer Portals}} |
| − | * | + | }} |
| − | * | + | <!-- ******************************************************************************************************************************* --> |
| − | * | + | <!-- * Assign to Owner (Variable) * --> |
| − | * | + | <!-- ******************************************************************************************************************************* --> |
| − | * | + | {{BPMAutomation|AssignTOwnerVariable|Assign to Owner (Variable)| |
| − | * | + | [[File:bpmassigntoownervariable.png|thumb|link=https://wiki.hornbill.com/images/e/e9/Bpmassigntoowner.png]]| |
| − | + | Use this option to assign the request to a specific Service Manager analyst using a dynamic value provided by a runtime variable that has been populated using Progressive Capture or through the Get Information nodes| | |
| − | * | + | {{bullet1|Request ID|In almost all cases, this should be set to ''Auto'' which will take the global variable for the request ID that the BPM is associated and apply all selected options to this request.}} |
| − | * | + | {{bullet1|Team|Select a team from the list of available teams that have been defined under the Organizational Data in Administration. If no team specified and if the designated owner is a member of multiple teams, the team that gets assigned will be the first team in a list of owner teams ordered by team name.}} |
| − | * | + | {{bullet1|Owner|Assign to an analyst based on a variable that has been populated using Progressive Capture or through the Get Information nodes}} |
| − | * | + | {{bullet1|System Timeline Update|Select if the default system text will be added to the timeline for this action}} |
| − | * | + | {{bullet1|Manual Timeline Update|Select Yes to override the default System timeline Text, and add your own text which will appear in the timeline update for this action}} |
| − | * | + | {{bullet1|Visibility|Choose what level of visibility will be automatically applied to this update. Choosing anything other than ''Customer'' will result in the customer not seeing the update in the timeline of their requests on the Service or Customer Portals.}} |
| − | * | + | }} |
| − | * | + | <!-- ******************************************************************************************************************************* --> |
| − | * | + | <!-- * Assign to Request Creator * --> |
| − | * | + | <!-- ******************************************************************************************************************************* --> |
| − | * | + | {{BPMAutomation|AssignToRequestCreator|Assign to Request Creator| |
| − | * | + | [[File:bpmassigntorequestcreator.png|thumb|link=https://wiki.hornbill.com/images/7/7c/Bpmassigntorequestcreator.png]]| |
| − | * | + | Use this option to automatically assign the request to the Service Manager analyst who created / raised the request via Progressive Capture| |
| − | * | + | {{bullet1|Request Id|This is a mandatory setting that uses a variable to hold the Request Id of the request that is using this BPM. This should be set to ''Auto''.}} |
| − | * | + | {{bullet1|Team|The Team ID to be applied to the request}} |
| − | * | + | {{bullet1|System Timeline Update|Select if the default system text will be added to the timeline for this action}} |
| − | * | + | {{bullet1|Manual Timeline Update|Select Yes to override the default System timeline Text, and add your own text which will appear in the timeline update for this action}} |
| − | * | + | {{bullet1|Visibility|Choose what level of visibility will be automatically applied to this update. Choosing anything other than '''Customer''' will result in the customer not seeing the update in the timeline of their requests on the Service or Customer Portals.}} |
| − | + | }} | |
| − | + | <!-- ****************************************************************************************************************************** --> | |
| − | + | <!-- * Assign to Most Available * --> | |
| − | + | <!-- ****************************************************************************************************************************** --> | |
| − | + | {{BPMAutomation|AssignToMostAvailableAnalyst|Assign to Most Available Analyst| | |
| − | + | [[File:bpmassigntomostavailable.png|thumb|link=https://wiki.hornbill.com/images/2/2c/Bpmassigntomostavailable.png]]| | |
| − | + | Using ''Assign to Most Available Analyst'' is a great way to automatically assign out requests to the members of a team. This operation works on the basis of capacity. The system will look through the members of the selected team and will assign the request to the member who has the least amount of open requests. If more than one team member have an equal number of open requests and have the least amount of assigned requests, the system will allocate the request to the team member who has had the greatest amount of time pass since their last assignment. | |
| − | |||
| − | |||
| − | |||
| − | |||
| − | * | ||
| − | |||
| − | |||
| − | |||
| − | |||
| − | | | ||
| − | [[File: | ||
| − | |||
| − | |||
| − | |||
| − | |||
| − | |||
| − | |||
| − | |||
| − | {| | ||
| − | | | ||
| − | | | ||
| − | |||
| − | |||
| − | |||
| − | |||
| − | |||
| − | |||
| − | |||
| − | |||
| − | |||
| − | |||
| − | |||
| − | |||
| − | * | ||
| − | * | ||
| − | * | ||
| − | * | ||
| − | * | ||
| − | * | ||
| − | * | ||
| − | |||
| − | * | ||
| − | * | ||
| − | * | ||
| − | * | ||
| − | * | ||
| − | * | ||
| − | * | ||
| − | * | ||
| − | * | ||
| − | * | ||
| − | * | ||
| − | * | ||
| − | * | ||
| − | * | ||
| − | * | ||
| − | * | ||
| − | * | ||
| − | * | ||
| − | * | ||
| − | * | ||
| − | * | ||
| − | * | ||
| − | * | ||
| − | |||
| − | * | ||
| − | * | ||
| − | * | ||
| − | * | ||
| − | * | ||
| − | * | ||
| − | * | ||
| − | * | ||
| − | * | ||
| − | * | ||
| − | * | ||
| − | * | ||
| − | * | ||
| − | * | ||
| − | * | ||
| − | * | ||
| − | * | ||
| − | * | ||
| − | * | ||
| − | * | ||
| − | * | ||
| − | * | ||
| − | |||
| − | |||
| − | |||
| − | |||
| − | |||
| − | |||
| − | |||
| − | |||
| − | |||
| − | |||
| − | * | ||
| − | |||
| − | |||
| − | |||
| − | |||
| − | |||
| − | |||
| − | |||
| − | |||
| − | |||
| − | + | The system will take into account the user status which is found on their profile. If the user status is set to anything other than 'Available' that user/analyst/team member will not be considered as a request owner| | |
| − | + | {{bullet1|Request Id|This is a mandatory setting that uses a variable to hold the Request Id of the request that is using this BPM. This should be set to ''Auto''.}} | |
| − | + | {{bullet1|Team|Select the team that you would like to participate in the Round Robin Assignment. This is a mandatory setting and must be set to Manual and have a team assigned.}} | |
| − | + | {{bullet1|Include Offline Users|This takes into account if the user is logged into Hornbill and have an active session. The default behavior (Auto) is to include offline users. Set this option to ''No'' if you don't want requests assigned to users that are not online. If all the team members are off-line, the request will be assigned to just the team. In order for this to work effectively when taking into account users logged in status, users will need to be disciplined in logging off Hornbill. Simply closing the browser window does not end a users session(s). We would also strongly recommend that you disable the allow multi-logon option on your instance, otherwise taking into consideration a users Logged On status will be unreliable.}} | |
| − | + | {{bullet1|Exclude On-hold Requests|If set to "Yes", when determining a user's availability, any requests that are on-hold will not be included when calculating availability. The default value is "No"}} | |
| − | + | {{bullet1|System Timeline Update|Select if the default system text will be added to the timeline for this action}} | |
| − | + | {{bullet1|Manual Timeline Update|Select Yes to override the default System timeline Text, and add your own text which will appear in the timeline update for this action}} | |
| − | + | {{bullet1|Visibility|Choose what level of visibility will be automatically applied to this update. Choosing anything other than '''Customer''' will result in the customer not seeing the update in the timeline of their requests on the Service or Customer Portals}} | |
| − | + | }} | |
| − | + | <!-- ****************************************************************************************************************************** --> | |
| − | + | <!-- * Assign on Round Robin Basis * --> | |
| − | + | <!-- ****************************************************************************************************************************** --> | |
| − | + | {{BPMAutomation|RoundRobin|Assign on Round Robin Basis| | |
| − | + | [[File:bpmroundrobin.png|thumb|link=https://wiki.hornbill.com/images/4/41/Bpmroundrobin.png|Round Robin BPM Operation]]| | |
| − | + | Using the ''Assign Round Robin'' is a great way to automatically assign out requests to the members of a team . The system will look through the members of the selected team and will assign the request to the member who has had the greatest amount of time pass since their last assignment. The system will take into account the user's status which is found on their profile. If the user's status is set to anything other than 'Available' that user will not be considered for assignment. This does not take into account the volume of requests assigned to each user.| | |
| − | + | {{bullet1|Request Id|This is a mandatory setting that uses a variable to hold the Request Id of the request that is using this BPM. This should be set to ''Auto''}} | |
| − | + | {{bullet1|Team|Select the team that you would like to participate in the Round Robin Assignment. This is a mandatory setting and must be set to Manual and have a team assigned}} | |
| − | + | {{bullet1|Include Offline Users|This takes into account if the user is logged into Hornbill and have an active session. The default behavior (Auto) is to include offline users. Set this option to ''No'' if you don't want requests assigned to users that are not online. In order for Round Robin to work effectively when taking into account users login status, users must become disciplined in logging off Hornbill via the User menu located to the top right. Simply closing the browser window does not end a users session. We would also strongly recommend that you disable the allow multi-logon option on your instance, otherwise taking into consideration a users Logged On status will be unreliable.}} | |
| − | <!-- ******************************************************** | + | {{bullet1|System Timeline Update|Select if the default system text will be added to the timeline for this action}} |
| − | < | + | {{bullet1|Manual Timeline Update|Select Yes to override the default System timeline Text, and add your own text which will appear in the timeline update for this action}} |
| − | < | + | {{bullet1|Visibility|Choose what level of visibility will be automatically applied to this update. Choosing anything other than '''Customer''' will result in the customer not seeing the update in the timeline of their requests on the Service or Customer Portals}} |
| − | * | + | }} |
| − | + | <!-- ****************************************************************************************************************************** --> | |
| − | + | <!-- * * --> | |
| − | + | <!-- * Authorization * --> | |
| − | + | <!-- * * --> | |
| − | | | + | <!-- ****************************************************************************************************************************** --> |
| − | [[File: | + | <!-- ****************************************************************************************************************************** --> |
| − | + | <!-- * Authorization Decision * --> | |
| − | + | <!-- ****************************************************************************************************************************** --> | |
| − | + | ==== Authorisation Decision ==== | |
| − | + | Use the Authorisation Decision node to mark on a Change or Service Request form if an authorization decision has been made. | |
| − | + | {{BPMAutomation|Approved|Approved| | |
| − | The | + | [[File:bpmapproved.png|thumb|link=https://wiki.hornbill.com/images/5/56/Bpmapproved.png]]| |
| − | + | Use this Authorisation Decision node to mark on a Change or Service Request as being approved. The status of ''Approved'' will be displayed in the Information panel on the request.| | |
| − | {| | + | {{bullet1|Request Id|This is a mandatory setting that uses a variable to hold the Request Id of the request that is using this BPM. This should be set to ''Auto''}} |
| − | | | + | {{bullet1|System Timeline Update|Select if the default system text will be added to the timeline for this action}} |
| − | | | + | {{bullet1|Manual Timeline Update|Select Yes to override the default System timeline Text, and add your own text which will appear in the timeline update for this action}} |
| − | * | + | {{bullet1|Visibility|Choose what level of visibility will be automatically applied to this update. Choosing anything other than '''Customer''' will result in the customer not seeing the update in the timeline of their requests on the Service or Customer Portals.}} |
| − | * | + | }} |
| − | * | + | {{BPMAutomation|Rejected|Rejected| |
| − | * | + | [[File:bpmrejected.png|thumb|link=https://wiki.hornbill.com/images/d/d5/Bpmrejected.png]]| |
| − | * | + | Use this Authorization Decision node to mark on a Change or Service Request as being rejected. The status of ''Rejected'' will be displayed in the Information panel on the request.| |
| − | + | {{bullet1|Request Id|This is a mandatory setting that uses a variable to hold the Request Id of the request that is using this BPM. This should be set to ''Auto''}} | |
| − | * | + | {{bullet1|System Timeline Update|Select if the default system text will be added to the timeline for this action}} |
| − | * | + | {{bullet1|Manual Timeline Update|Select Yes to override the default System timeline Text, and add your own text which will appear in the timeline update for this action}} |
| − | * | + | {{bullet1|Visibility|Choose what level of visibility will be automatically applied to this update. Choosing anything other than '''Customer''' will result in the customer not seeing the update in the timeline of their requests on the Service or Customer Portals.}} |
| − | * | + | }} |
| − | + | {{BPMAutomation|Clear|Clear| | |
| − | + | [[File:bpmclearauthorization.png|thumb|link=https://wiki.hornbill.com/images/2/21/Bpmclearauthorization.png]]| | |
| − | + | Use this Authorization Decision node to clear a previous authorization decision that was added to the request. Once cleared, the authorization decision will no longer show in the Information Panel.| | |
| − | < | + | {{bullet1|Request Id|This is a mandatory setting that uses a variable to hold the Request Id of the request that is using this BPM. This should be set to ''Auto''}} |
| − | < | + | {{bullet1|System Timeline Update|Select if the default system text will be added to the timeline for this action}} |
| − | < | + | {{bullet1|Manual Timeline Update|Select Yes to override the default System timeline Text, and add your own text which will appear in the timeline update for this action}} |
| − | + | {{bullet1|Visibility|Choose what level of visibility will be automatically applied to this update. Choosing anything other than '''Customer''' will result in the customer not seeing the update in the timeline of their requests on the Service or Customer Portals.}} | |
| − | <!-- ******************************************************** | + | }} |
| − | < | + | <!-- ****************************************************************************************************************************** --> |
| − | < | + | <!-- * * --> |
| − | * | + | <!-- * Collaboration * --> |
| − | + | <!-- * * --> | |
| − | + | <!-- ****************************************************************************************************************************** --> | |
| − | |||
| − | | | ||
| − | | | ||
| − | [[File: | ||
| − | + | ====Collaboration==== | |
| − | |||
| − | |||
| − | |||
| − | |||
| − | {| | + | Use the Collaboration node to post an automated update onto a public workspace at any stage in a process. This will be visible to members of the specified workspace, on the timeline of the workspace and their News Feeds. |
| − | | | + | <!-- ******************************************************************************************************************************* --> |
| − | | | + | <!-- * Comment on Existing Public Workspace Post --> |
| − | + | <!-- ******************************************************************************************************************************* --> | |
| − | + | {{BPMAutomation|CommentOnPost|Comment on Existing Public Workspace Post| | |
| − | + | [[File:bpmcommentonpost.png|thumb|link=https://wiki.hornbill.com/images/d/d3/Bpmcommentonpost.png]]| | |
| − | + | Use this node to automate the adding of a comment to an existing Post in a workspace. It will always look to add the comment to the most recent post from the request in the workspace. An example use case for this node, is to include the Comment Update after key milestones such as Logged, In progress, Resolved, Closed or Change Accepted, Scheduled, Implemented, Reviewed. This will allow members of the workspace to stay informed about request progress without the need to monitor lists or queues. This node will only be applicable if the '''Post to Public Workspace''' Node has been used and a Post already exists from the request in a Workspace.| | |
| − | + | {{bullet1|Request Id|This is a mandatory setting that uses a variable to hold the Request Id of the request that is using this BPM. This should be set to ''Auto''}} | |
| − | + | {{bullet1|Workspace|The ID of the workspace where the comment will be posted}} | |
| − | | | + | {{bullet1|Content|The content of the comment to be added to the post}} |
| − | + | {{bullet1|Update Timeline|Include a Timeline update on the request when this automation has completed}} | |
| − | + | }} | |
| − | + | {{BPMAutomation|CommentOnRequestSourcePost|Comment on Request Source Post| | |
| − | + | [[File:bpmcommentonsourcepost.png|thumb|link=https://wiki.hornbill.com/images/8/88/Bpmcommentonsourcepost.png]]| | |
| − | + | Use this option when the source of the request is from a post in order to post a comment back to this source post.| | |
| − | |} | + | {{bullet1|Request Id|This is a mandatory setting that uses a variable to hold the Request Id of the request that is using this BPM. This should be set to ''Auto''}} |
| + | {{bullet1|Content|The content of the comment to be added to the post}} | ||
| + | {{bullet1|Include Id|Include the Request Id in the comment which will include a link in the comment, back to the request}} | ||
| + | {{bullet1|Include Summary|Include the Summary of the request in the comment as part of the link back to the request}} | ||
| + | {{bullet1|Update Timeline|Include a Timeline update on the request when this automation has completed}} | ||
| + | }} | ||
| + | {{BPMAutomation|PostToPublicWorkspace|Post to Public Workspace| | ||
| + | [[File:bpmposttoworkspace.png|thumb|link=https://wiki.hornbill.com/images/3/38/Bpmposttoworkspace.png]]| | ||
| + | Use this node to add a new post to a specific workspace. This will allow you to post important information to Collaboration users pertaining to the request. | ||
| − | |} | + | One example of it's use would be during a Change Request, to let interested parties / stakeholders (Workspace Members) know that the Change had been accepted, scheduled and would therefore be being deployed. The member's of the workspace may not be Service Manager subscribed users, but their Collaboration subscription would enable them to be kept informed about Change, Problem, or Major Incident notifications by receiving notifications about the automated '''Posting''' from this node to their workspaces. | |
| − | + | {{bullet1|Request Id|This is a mandatory setting that uses a variable to hold the Request Id of the request that is using this BPM. This should be set to ''Auto''}} | |
| − | + | {{bullet1|Workspace|The ID of the workspace where the comment will be posted}} | |
| − | + | {{bullet1|Content|The content of the comment to be added to the post}} | |
| + | {{bullet1|Include Id|Include the Request Id in the comment which will include a link in the comment, back to the request}} | ||
| + | {{bullet1|Include Summary|Include the Summary of the request in the comment as part of the link back to the request}} | ||
| + | {{bullet1|Update Timeline|Include a Timeline update on the request when this automation has completed}} | ||
| + | }} | ||
| − | ==== | + | <!-- ****************************************************************************************************************************** --> |
| + | <!-- * * --> | ||
| + | <!-- * Email Notifications * --> | ||
| + | <!-- * * --> | ||
| + | <!-- ****************************************************************************************************************************** --> | ||
| + | ====Email Notifications==== | ||
| + | Use the Email Notification nodes to send email templates to different Request stakeholders. Configuration options include recipient, which email template to use and which mailbox to send the email from. | ||
| + | <!-- ****************************************************************************************************************************** --> | ||
| + | <!-- * Email Contact --> | ||
| + | <!-- ****************************************************************************************************************************** --> | ||
| + | {{BPMAutomation|EmailContact|Email Contact| | ||
| + | [[File:bpmemailcontact.png|thumb|link=https://wiki.hornbill.com/images/6/68/Bpmemailcontact.png]]| | ||
| + | Use this node to send an email to a contact that has a contact record stored in Hornbill| | ||
| − | + | {{bullet1|Request ID|In almost all cases, this should be set to ''Auto'' which will take the global variable for the request ID that the BPM is associated and apply all selected options to this request.}} | |
| − | + | {{bullet1|Contact|Select a contact from the searchable pick list. Only contacts that have records stored in Hornbill will be available}} | |
| − | + | {{bullet1|CC|Comma separated email addresses to send as Carbon Copy recipients}} | |
| − | + | {{bullet1|BCC|Comma separated email addresses to send as Blind Carbon Copy recipients}} | |
| − | + | {{bullet1|Mailbox Name|Select the Hornbill Mailbox from which you want this sent. If this is not set, it will use the default mailbox for the Service that the request has been raised under}} | |
| − | + | {{bullet1|Email From|Select the email address that you want listed as the sender.}} | |
| − | + | {{bullet1|Email Template Entity|Select the Entity from which you want to use the associated Email Templates. For example select the Change Request Entity to use email templates that contain variables which are specific to this entity. Leave this as ''Auto'' to use the default ''Request'' entity.}} | |
| − | + | {{bullet1|Email Template|Select the email template that you want to use for this email}} | |
| − | + | {{bullet1|System Timeline Update|Select if the default system text will be added to the timeline for this action}} | |
| − | + | {{bullet1|Manual Timeline Update|Select Yes to override the default System timeline Text, and add your own text which will appear in the timeline update for this action}} | |
| − | + | {{bullet1|Visibility|Choose what level of visibility will be automatically applied to this update. Choosing anything other than ''Customer'' will result in the customer not seeing the update in the timeline of their requests on the Service or Customer Portals.}} | |
| − | + | }} | |
| − | + | <!-- ***************************************************************************************************************************** --> | |
| − | + | <!-- * Email Co-worker * --> | |
| − | + | <!-- ***************************************************************************************************************************** --> | |
| − | + | {{BPMAutomation|EmailCoworker|Email Co-worker| | |
| − | + | [[File:bpmemailcoworker.png|thumb|link=https://wiki.hornbill.com/images/b/b3/Bpmemailcoworker.png]]| | |
| − | + | Use this node to send an email to a Co-worker that has a user account in Hornbill| | |
| − | + | {{bullet1|Request ID|In almost all cases, this should be set to ''Auto'' which will take the global variable for the request ID that the BPM is associated and apply all selected options to this request.}} | |
| − | + | {{bullet1|Co-worker|Select a Co-worker from the searchable pick list. Only Co-workers that have accounts in Hornbill will be available}} | |
| − | + | {{bullet1|Co-worker (From Variable)|Set a Co-worker from a variable}} | |
| − | + | {{bullet1|CC|Comma separated email addresses to send as Carbon Copy recipients}} | |
| − | + | {{bullet1|BCC|Comma separated email addresses to send as Blind Carbon Copy recipients}} | |
| − | + | {{bullet1|Mailbox Name|Select the Hornbill Mailbox from which you want this sent. If this is not set, it will use the default mailbox for the Service that the request has been raised under}} | |
| − | + | {{bullet1|Email From|Select the email address that you want listed as the sender.}} | |
| − | + | {{bullet1|Email Template Entity|Select the Entity from which you want to use the associated Email Templates. For example select the Change Request Entity to use email templates that contain variables which are specific to this entity. Leave this as ''Auto'' to use the default ''Request'' entity.}} | |
| − | * | + | {{bullet1|Email Template|Select the email template that you want to use for this email}} |
| − | * | + | {{bullet1|System Timeline Update|Select if the default system text will be added to the timeline for this action}} |
| − | * | + | {{bullet1|Manual Timeline Update|Select Yes to override the default System timeline Text, and add your own text which will appear in the timeline update for this action}} |
| − | * | + | {{bullet1|Visibility|Choose what level of visibility will be automatically applied to this update. Choosing anything other than ''Customer'' will result in the customer not seeing the update in the timeline of their requests on the Service or Customer Portals.}} |
| − | * | + | }} |
| − | + | <!-- ***************************************************************************************************************************** --> | |
| − | + | <!-- * Email Customer * --> | |
| − | + | <!-- ***************************************************************************************************************************** --> | |
| − | * | + | {{BPMAutomation|EmailCustomer|Email Customer| |
| − | + | [[File:bpmemailcustomer.png|thumb|link=https://wiki.hornbill.com/images/2/23/Bpmemailcustomer.png]]| | |
| − | + | Use this node to send an email to the customer that is associated to the request| | |
| − | < | + | {{bullet1|Request ID|In almost all cases, this should be set to ''Auto'' which will take the global variable for the request ID that the BPM is associated and apply all selected options to this request.}} |
| − | + | {{bullet1|CC|Comma separated email addresses to send as Carbon Copy recipients}} | |
| − | + | {{bullet1|BCC|Comma separated email addresses to send as Blind Carbon Copy recipients}} | |
| − | + | {{bullet1|Mailbox Name|Select the Hornbill Mailbox from which you want this sent. If this is not set, it will use the default mailbox for the Service that the request has been raised under}} | |
| − | < | + | {{bullet1|Email From|Select the email address that you want listed as the sender.}} |
| − | + | {{bullet1|Email Template Entity|Select the Entity from which you want to use the associated Email Templates. For example select the Change Request Entity to use email templates that contain variables which are specific to this entity. Leave this as ''Auto'' to use the default ''Request'' entity}} | |
| − | + | {{bullet1|Email Template|Select the email template that you want to use for this email}} | |
| − | + | {{bullet1|System Timeline Update|Select if the default system text will be added to the timeline for this action}} | |
| − | + | {{bullet1|Manual Timeline Update|Select Yes to override the default System timeline Text, and add your own text which will appear in the timeline update for this action}} | |
| − | * | + | {{bullet1|Visibility|Choose what level of visibility will be automatically applied to this update. Choosing anything other than ''Customer'' will result in the customer not seeing the update in the timeline of their requests on the Service or Customer Portals.}} |
| − | + | }} | |
| − | + | <!-- ***************************************************************************************************************************** --> | |
| − | + | <!-- * Email Customer's Manager * --> | |
| − | * | + | <!-- ***************************************************************************************************************************** --> |
| − | * | + | {{BPMAutomation|EmailCustomerManager|Email Customer Manager| |
| − | + | [[File:bpmemailcustomermanager.png|thumb|link=https://wiki.hornbill.com/images/9/9e/Bpmemailcustomermanager.png]]| | |
| − | + | Use this node to send an email to the Manager of the customer that is associated to the request| | |
| − | + | {{bullet1|Request ID|In almost all cases, this should be set to ''Auto'' which will take the global variable for the request ID that the BPM is associated and apply all selected options to this request.}} | |
| − | + | {{bullet1|CC|Comma separated email addresses to send as Carbon Copy recipients}} | |
| − | + | {{bullet1|BCC|Comma separated email addresses to send as Blind Carbon Copy recipients}} | |
| − | + | {{bullet1|Mailbox Name|Select the Hornbill Mailbox from which you want this sent. If this is not set, it will use the default mailbox for the Service that the request has been raised under}} | |
| − | + | {{bullet1|Email From|Select the email address that you want listed as the sender.}} | |
| − | + | {{bullet1|Email Template Entity|Select the Entity from which you want to use the associated Email Templates. For example select the Change Request Entity to use email templates that contain variables which are specific to this entity. Leave this as ''Auto'' to use the default ''Request'' entity. }} | |
| − | + | {{bullet1|Email Template|Select the email template that you want to use for this email}} | |
| − | + | {{bullet1|System Timeline Update|Select if the default system text will be added to the timeline for this action}} | |
| − | + | {{bullet1|Manual Timeline Update|Select Yes to override the default System timeline Text, and add your own text which will appear in the timeline update for this action}} | |
| − | + | {{bullet1|Visibility|Choose what level of visibility will be automatically applied to this update. Choosing anything other than ''Customer'' will result in the customer not seeing the update in the timeline of their requests on the Service or Customer Portals.}} | |
| − | + | }} | |
| − | + | <!-- ***************************************************************************************************************************** --> | |
| + | <!-- * Email External Address * --> | ||
| + | <!-- ***************************************************************************************************************************** --> | ||
| + | {{BPMAutomation|EmailExternalAddress|Email External Address| | ||
| + | [[File:bpmemailexternal.png|thumb|link=https://wiki.hornbill.com/images/4/4a/Bpmemailexternal.png]]| | ||
| + | Use this node to send an email to one or more email addresses that are not available within Hornbill| | ||
| + | {{bullet1|Request ID|In almost all cases, this should be set to ''Auto'' which will take the global variable for the request ID that the BPM is associated and apply all selected options to this request.}} | ||
| + | {{bullet1|External Addresses|Add one or more email addresses that are not held within Hornbill. Multiple email address must be separated by a comma. '''Note:''' Please ensure there is no trailing comma. This will create an additional, empty, address which will cause an error.}} | ||
| + | {{bullet1|CC|Comma separated email addresses to send as Carbon Copy recipients}} | ||
| + | {{bullet1|BCC|Comma separated email addresses to send as Blind Carbon Copy recipients}} | ||
| + | {{bullet1|Mailbox Name|Select the Hornbill Mailbox from which you want this sent. If this is not set, it will use the default mailbox for the Service that the request has been raised under}} | ||
| + | {{bullet1|Email From|Select the email address that you want listed as the sender.}} | ||
| + | {{bullet1|Email Template Entity|Select the Entity from which you want to use the associated Email Templates. For example select the Change Request Entity to use email templates that contain variables which are specific to this entity. Leave this as ''Auto'' to use the default ''Request'' entity.}} | ||
| + | {{bullet1|Email Template|Select the email template that you want to use for this email}} | ||
| + | {{bullet1|System Timeline Update|Select if the default system text will be added to the timeline for this action}} | ||
| + | {{bullet1|Manual Timeline Update|Select Yes to override the default System timeline Text, and add your own text which will appear in the timeline update for this action}} | ||
| + | {{bullet1|Visibility|Choose what level of visibility will be automatically applied to this update. Choosing anything other than ''Customer'' will result in the customer not seeing the update in the timeline of their requests on the Service or Customer Portals.}} | ||
| + | }} | ||
| + | <!-- **************************************************************************************************************************** --> | ||
| + | <!-- * Email Request Owner * --> | ||
| + | <!-- **************************************************************************************************************************** --> | ||
| + | {{BPMAutomation|EmailOwner|Email Request Owner| | ||
| + | [[File:bpmemailowner.png|thumb|link=https://wiki.hornbill.com/images/e/ea/Bpmemailowner.png]]| | ||
| + | Use this node to send an email to the owner of the request| | ||
| + | {{bullet1|Request ID|In almost all cases, this should be set to ''Auto'' which will take the global variable for the request ID that the BPM is associated and apply all selected options to this request.}} | ||
| + | {{bullet1|CC|Comma separated email addresses to send as Carbon Copy recipients}} | ||
| + | {{bullet1|BCC|Comma separated email addresses to send as Blind Carbon Copy recipients}} | ||
| + | {{bullet1|Mailbox Name|Select the Hornbill Mailbox from which you want this sent. If this is not set, it will use the default mailbox for the Service that the request has been raised under}} | ||
| + | {{bullet1|Email From|Select the email address that you want listed as the sender.}} | ||
| + | {{bullet1|Email Template Entity|Select the Entity from which you want to use the associated Email Templates. For example select the Change Request Entity to use email templates that contain variables which are specific to this entity. Leave this as ''Auto'' to use the default ''Request'' entity.}} | ||
| + | {{bullet1|Email Template|Select the email template that you want to use for this email}} | ||
| + | {{bullet1|System Timeline Update|Select if the default system text will be added to the timeline for this action}} | ||
| + | {{bullet1|Manual Timeline Update|Select Yes to override the default System timeline Text, and add your own text which will appear in the timeline update for this action}} | ||
| + | {{bullet1|Visibility|Choose what level of visibility will be automatically applied to this update. Choosing anything other than ''Customer'' will result in the customer not seeing the update in the timeline of their requests on the Service or Customer Portals.}} | ||
| + | }} | ||
| + | <!-- ****************************************************************************************************************************** --> | ||
| + | <!-- * * --> | ||
| + | <!-- * Get Request Information * --> | ||
| + | <!-- * * --> | ||
| + | <!-- ****************************************************************************************************************************** --> | ||
| − | + | ====Get Request Information==== | |
| − | * | + | Use the Get Request Information node at any stage in a process and preceding another workflow node when you want to make the variables of the Request available. Variables may include Customer, Status, Site, Priority, or any Answers to Customer defined questions from different Progressive capture forms or attributes of the customer or organisation of the request the business process is running against. |
| − | + | <!-- ****************************************************************************************************************************** --> | |
| − | + | <!-- * Category Details * --> | |
| − | + | <!-- ****************************************************************************************************************************** --> | |
| − | + | {{BPMAutomation|Category_Details|Catagory Details| | |
| − | + | [[File:bpmgetcategorydetails.png|thumb|link=]]| | |
| − | + | Use this automation to get information about the logging or closure categories. | | |
| − | + | {{bullet1|Request ID|In almost all cases, this should be set to ''Auto'' which will take the global variable for the request ID that the BPM is associated and apply all selected options to this request.}} | |
| − | + | }} | |
| − | + | <!-- ****************************************************************************************************************************** --> | |
| − | + | <!-- * Customer Details * --> | |
| − | * | + | <!-- ****************************************************************************************************************************** --> |
| − | + | {{BPMAutomation|Customer_Details|Customer Details| | |
| − | + | [[File:bpmgetcustomerdetails.png|thumb|link=https://wiki.hornbill.com/images/3/3a/Bpmgetcustomerdetails.png]]| | |
| − | + | Use this option at the start of a stage or preceding a task, authorisation, or decision node to load the Customer's organisations details (variables) into the stage, and to make them available to other node operations where you may wish to specify or refer to '''Variable''' values from the customer of the request.| | |
| − | + | {{bullet1|Request ID|In almost all cases, this should be set to ''Auto'' which will take the global variable for the request ID that the BPM is associated and apply all selected options to this request.}} | |
| − | + | }} | |
| − | + | <!-- ****************************************************************************************************************************** --> | |
| − | + | <!-- * Source Email Details * --> | |
| − | + | <!-- ****************************************************************************************************************************** --> | |
| − | + | {{BPMAutomation|Source_Email_Details|Source Email Details| | |
| − | + | [[File:bpmsourceemaildetails.png|thumb|link=https://wiki.hornbill.com/images/a/ad/Bpmsourceemaildetails.png]]| | |
| − | + | When the origin of a Request is an email (i.e. raised via Routing Rules or Email View), this option can be used to retrieve the details of the email message. This includes FROM address, TO address, subject, content, date sent and date received. You can use the Variable Picker or the Expressions Builder to make a decision on the retrieved details.| | |
| − | + | {{bullet1|Request ID|In almost all cases, this should be set to ''Auto'' which will take the global variable for the request ID that the BPM is associated and apply all selected options to this request.}} | |
| − | + | }} | |
| − | + | <!-- ****************************************************************************************************************************** --> | |
| − | + | <!-- * Organisation Details * --> | |
| − | + | <!-- ****************************************************************************************************************************** --> | |
| − | + | {{BPMAutomation|Organisation_Details|Organisation Details| | |
| − | + | [[File:bpmorganisationdetails.png|thumb|link=https://wiki.hornbill.com/images/1/1c/Bpmorganisationdetails.png]]| | |
| − | + | Use this option at the start of a stage or preceding a task, authorisation, or a decision node to load the Customer's Organisations details to make them available as variables to other node operations where you may wish to specify or refer to values from the customer's organisation associated to the request.| | |
| − | + | {{bullet1|Request ID|In almost all cases, this should be set to ''Auto'' which will take the global variable for the request ID that the BPM is associated and apply all selected options to this request.}} | |
| − | + | }} | |
| − | + | <!-- ****************************************************************************************************************************** --> | |
| − | + | <!-- * Owner Details * --> | |
| − | + | <!-- ****************************************************************************************************************************** --> | |
| − | + | {{BPMAutomation|GetRequestInfoOwner|Owner Details| | |
| − | + | [[File:getrequestownerbpm.png|thumb|link=https://wiki.hornbill.com/images/8/8b/Getrequestownerbpm.png]]| | |
| − | + | Use this operation when you need to use information about the owner of the request for making decisions or to populate other BPM operations with this data. This operation will populate a number of variables that represent the information about the owner of the request.| | |
| − | + | {{bullet1|Request ID|In almost all cases, this should be set to ''Auto'' which will take the global variable for the request ID that the BPM is associated and apply all selected options to this request.}} | |
| − | + | }} | |
| − | + | <!-- ****************************************************************************************************************************** --> | |
| − | + | <!-- * Request Details * --> | |
| − | + | <!-- ****************************************************************************************************************************** --> | |
| − | + | {{BPMAutomation|GetRequestInfoRequestDetails|Request Details| | |
| − | + | [[File:getrequestdetailsbpm.png|thumb|link=https://wiki.hornbill.com/images/b/bb/Getrequestdetailsbpm.png]]| | |
| − | + | Use this operation when you need to use information held within a request for making decisions or to populate other BPM operations with this data. This operation will populate a number of variables that represent the information held within a request.| | |
| − | + | {{bullet1|Request ID|In almost all cases, this should be set to ''Auto'' which will take the global variable for the request ID that the BPM is associated and apply all selected options to this request.}} | |
| − | + | }} | |
| − | + | <!-- ****************************************************************************************************************************** --> | |
| − | + | <!-- * Progressive Capture Answers * --> | |
| − | + | <!-- ****************************************************************************************************************************** --> | |
| + | {{BPMAutomation|Progessive_Capture_Answers|Progressive Capture Answers| | ||
| + | [[File:bpmprogressivecaptureanswers.png|thumb|link=https://wiki.hornbill.com/images/d/d7/Bpmprogressivecaptureanswers.png]]| | ||
| + | Use this option before a '''Decision''' node, if you want to load into the process the '''Answers''' from Progressive Capture Custom Forms. By selecting this option, you can load and make available the answers to progressive capture custom forms, to then evaluate in following '''Decision''' nodes. | ||
| + | |||
| + | An example of the use of this node could be if you have created a custom form which asked questions about a new start, and one of these questions was to determine which Department they would be joining, it is feasible in your business process that you may wish to check the answer value, and if it was '''Sales''' then branch in one direction, and if it was '''Accounts''' you may want to branch in another direction. Using the Get Request Information > Progressive Capture Answers will allow these answers to be evaluated in a supporting business process.| | ||
| + | {{bullet1|Request ID|In almost all cases, this should be set to ''Auto'' which will take the global variable for the request ID that the BPM is associated and apply all selected options to this request.}} | ||
| + | }} | ||
| + | <!-- ****************************************************************************************************************************** --> | ||
| + | <!-- * Service Details * --> | ||
| + | <!-- ****************************************************************************************************************************** --> | ||
| + | {{BPMAutomation|Service_Details|Service Details| | ||
| + | [[File:bpmservicedetails.png|thumb|link=https://wiki.hornbill.com/images/1/10/Bpmservicedetails.png]]| | ||
| + | Use this operation to extract details of the service that is set against a request in order to use the Service Details to use with decision node outcomes within your workflow.| | ||
| + | {{bullet1|Request ID|In almost all cases, this should be set to ''Auto'' which will take the global variable for the request ID that the BPM is associated and apply all selected options to this request.}} | ||
| + | }} | ||
| + | <!-- ****************************************************************************************************************************** --> | ||
| + | <!-- * Site Details * --> | ||
| + | <!-- ****************************************************************************************************************************** --> | ||
| + | {{BPMAutomation|GetRequestInfoRequestDetails|Site Details| | ||
| + | [[File:getrequestsitebpm.png|thumb|link=https://wiki.hornbill.com/images/0/0a/Getrequestsitebpm.png]]| | ||
| + | Use this operation when you need to use information held within a request for making decisions or to populate other BPM operations with this site details. This operation will populate a number of variables that represent the site information held within a request.| | ||
| + | {{bullet1|Request ID|In almost all cases, this should be set to ''Auto'' which will take the global variable for the request ID that the BPM is associated and apply all selected options to this request.}} | ||
| + | }} | ||
| + | <!-- ****************************************************************************************************************************** --> | ||
| + | <!-- * Team Details * --> | ||
| + | <!-- ****************************************************************************************************************************** --> | ||
| + | {{BPMAutomation|GetTeamDetails|Team Details| | ||
| + | [[File:getteamdetails.png|thumb|link=https://wiki.hornbill.com/images/a/a2/Getteamdetails.png]]| | ||
| + | Use this operation when you need to get information about the team that the request is assigned to. This can be used for making decisions or to populate other BPM operations with this team details. Team Manager and Team Lead information can also be returned to help with notifications and assignments for important requests.| | ||
| + | {{bullet1|Request ID|In almost all cases, this should be set to ''Auto'' which will take the global variable for the request ID that the BPM is associated and apply all selected options to this request.}} | ||
| + | }} | ||
| + | |||
| + | ====Integration==== | ||
| + | |||
| + | Use the Integration node at any stage of a process, where you wish to invoke specific actions against a 3rd party application from the available list of applications. | ||
| − | |||
| − | |||
| − | |||
| − | |||
<div class="mw-collapsible mw-collapsed" data-collapsetext="Show Less" data-expandtext="Read More" style="width:700px"> | <div class="mw-collapsible mw-collapsed" data-collapsetext="Show Less" data-expandtext="Read More" style="width:700px"> | ||
| − | * | + | * Create Jira Request |
<div class="mw-collapsible-content"> | <div class="mw-collapsible-content"> | ||
| − | + | ::Requests > Integration > Create Jira Request | |
| − | + | [[File:Creat_Jira_Request.png|600px]] | |
| − | |||
| − | |||
| − | [[File: | ||
| − | + | Create a new request in a specific Jira instance and against a parent project. Using this option will create a new request in Jira, of the required type. | |
| − | + | *This will pass the summary and description of the Service Manager request to the newly created request in Jira, and then pass back the Jira request id into the '''External Reference''' field on the Service Manager request if successful, as well as include an update in the request timeline if required, with a hyperlink to the request in Jira. If the request to raise a request fails, this will also be written to the Service Manager Timeline with the reason for the failure to create. | |
| − | + | The following options need to be Configured: | |
| − | |||
| − | |||
| − | |||
| − | |||
| − | |||
| − | |||
| − | |||
| − | |||
| − | |||
| − | |||
| − | |||
| − | |||
| − | |||
| − | |||
| − | |||
| − | |||
| − | |||
| − | |||
| − | |||
| − | |||
| − | |||
| − | |||
| − | |||
| − | |||
| − | |||
| − | |||
| − | |||
| − | |||
| − | + | *'''Request id:''' Leave as Auto to pick up on the Request id against which the process is running. | |
| − | + | *'''Use App Settings:''' Set to Yes if you want to use the global values you can define in the system settings for Service Manager (Home > Service Manager > Application), select No if you want to manually set the values to use for this specific node. | |
| − | * | + | |
| − | + | If selecting Yes, the following system settings will need to have been set and will be used: | |
| − | + | ||
| − | :: | + | :* '''guest.ui.app.com.hornbill.servicemanager.integration.jira.issueType''': This is the Jira Issue type which will be created - Bug, Improvement, New Feature, Task or custom created on your Jira instance. |
| − | + | :* '''guest.ui.app.com.hornbill.servicemanager.integration.jira.userName''': The Username of the account in Jira which the new request will be created under. | |
| − | + | :* '''guest.ui.app.com.hornbill.servicemanager.integration.jira.password''': The Password for the user account in Jira which the new request will be created under. | |
| − | + | :* '''guest.ui.app.com.hornbill.servicemanager.integration.jira.projectName''': The Parent Project to which the new request will belong. | |
| + | :* '''guest.ui.app.com.hornbill.servicemanager.integration.jira.url''': The full URL for the Jira instance against which the new request will be created. | ||
| − | + | If selecting No the following options will need to be manually set | |
| − | |||
| − | + | *'''URL:''' The full URL for the Jira instance against which the new request will be created. | |
| − | + | *'''Project Name:''' The Parent Project to which the new request will belong. | |
| − | + | *'''Issue Type:''' This is the Jira Issue type which will be created - Bug, Improvement, New Feature, Task or custom created on your Jira instance. | |
| − | + | *'''Username:''' The Username of the account in Jira which the new request will be created under. | |
| − | + | *'''Password:''' The Password for the user account in Jira which the new request will be created under. | |
| − | + | ||
| − | + | In either case the following can also be configured manually. | |
| − | + | ||
| − | + | *'''Update Timeline:''' Leave this as Auto if you want the Service Manager Request Timeline to be updated to record the fact that a Request has been created in Jira, and for the update to contain a hyperlink to the newly created request in Jira (as shown below) | |
| − | + | [[File:Jira_Create.png|600px]] | |
| − | |||
| − | |||
| − | |||
| − | |||
| − | |||
| − | | | ||
| − | |||
</div> | </div> | ||
</div> | </div> | ||
| − | |||
| − | |||
| − | |||
| − | |||
<div class="mw-collapsible mw-collapsed" data-collapsetext="Show Less" data-expandtext="Read More" style="width:700px"> | <div class="mw-collapsible mw-collapsed" data-collapsetext="Show Less" data-expandtext="Read More" style="width:700px"> | ||
| − | + | * Add Jira Request Comment | |
| − | * | ||
<div class="mw-collapsible-content"> | <div class="mw-collapsible-content"> | ||
| − | + | ::Requests > Integration > Add Jira Request Comment | |
| − | + | [[File:Add_Jira_Comment.png|600px]] | |
| − | + | ||
| − | + | Add a comment to an existing Jira request. | |
| − | [[File: | + | * This option will allow for a predefined comment to be added to a specific Jira Request. The configured comment will be added to the Jira request id, which is held in the '''External Reference''' field of the Service Manager request, against which this node is invoked from it's underlying business process. In most cases this will have been created automatically by using the '''Create Jira Request''' earlier in the same business process, but the Jira Request id can have been added manually to the Service Manager request '''External Reference''' field as well. |
| − | + | ||
| − | + | The following options need to be Configured: | |
| − | + | ||
| − | + | *'''Request id:''' Leave as Auto to pick up on the Request id against which the process is running. | |
| − | + | *'''Use App Settings:''' Set to Yes if you want to use the global values you can define in the system settings for Service Manager (Home > Service Manager > Application), select No if you want to manually set the values to use for this specific node. | |
| − | + | ||
| − | + | If selecting Yes, the following system settings will need to have been set and will be used: | |
| − | + | ||
| − | + | :* '''guest.ui.app.com.hornbill.servicemanager.integration.jira.userName''': The Username of the account in Jira which the new comment will be created under. | |
| − | + | :* '''guest.ui.app.com.hornbill.servicemanager.integration.jira.password''': The Password for the user account in Jira which the new comment will be created under. | |
| − | + | :* '''guest.ui.app.com.hornbill.servicemanager.integration.jira.url''': The full URL for the Jira instance against which the new request comment will be added. | |
| − | : | + | |
| − | + | If selecting No the following options will need to be manually set | |
| − | + | ||
| − | + | *'''URL:''' The full URL for the Jira instance against which the new request will be created. | |
| − | + | *'''Username:''' The Username of the account in Jira which the new comment will be created under. | |
| − | + | *'''Password:''' The Password for the user account in Jira which the new request comment will be added. | |
| − | + | ||
| − | + | In either case the following will also need to be configured manually. | |
| − | + | ||
| − | + | *'''Comment:''' Configure the message content which will be added to the Jira Request | |
| − | + | *'''Update Timeline:''' Leave this as Auto if you want the Service Manager Request Timeline to be updated to record the fact that a comment has been added to a request in Jira, and for the timeline update to contain a hyperlink to the newly created comment in the Jira request (as shown below) | |
| − | : | + | [[File:Jira_Comment.png|600px]] |
| − | + | ||
| − | :* ''' | + | This will add the Comment into the '''Comments''' tab of the Activity section on the Jira request as shown below. |
| − | : | + | [[File:Jira_Comment_Jira.png|600px]] |
| − | :* ''' | + | </div> |
| − | : | + | </div> |
| − | :* ''' | ||
| − | : | ||
| − | |||
| − | |||
| − | |||
| − | |||
| − | |||
| − | |||
| − | |||
| − | |||
| − | |||
| − | |||
| − | |||
| − | |||
| − | |||
| − | |||
| − | |||
| − | |||
| − | |||
| − | |||
| − | | | ||
| − | |||
| − | </div> | ||
| − | </div> | ||
| − | <!-- ****************************************************** START OF | + | <!-- ******************************************************** START OF NEW REQUEST ********************************************** --> |
<div class="mw-collapsible mw-collapsed" data-collapsetext="Show Less" data-expandtext="Read More" style="width:700px"> | <div class="mw-collapsible mw-collapsed" data-collapsetext="Show Less" data-expandtext="Read More" style="width:700px"> | ||
| − | <div id=" | + | <div id="integrationnewrequest"></div> |
| − | * Log New | + | * Log New Service Request |
<div class="mw-collapsible-content"> | <div class="mw-collapsible-content"> | ||
<div style="border:1px solid #e6e6e6; background:#f2f2f2; width:99%; padding:4px; margin-bottom:10px;"> | <div style="border:1px solid #e6e6e6; background:#f2f2f2; width:99%; padding:4px; margin-bottom:10px;"> | ||
| Line 1,262: | Line 2,109: | ||
|- valign="top" | |- valign="top" | ||
|style="width:700px"| | |style="width:700px"| | ||
| − | [[File: | + | [[File:bpmintegrationrequest.png|thumb|link=https://wiki.hornbill.com/images/a/a6/Bpmintegrationrequest.png|Log New Request]] |
| − | + | ==== Log New Service Request ==== | |
| − | + | This node can be used by other Hornbill apps to raise requests within Service Manager. | |
| + | ==== Options ==== | ||
:* ''' Summary''' | :* ''' Summary''' | ||
:: To add a summary to the new request, set to ''Manual'' and provide the required text for the summary | :: To add a summary to the new request, set to ''Manual'' and provide the required text for the summary | ||
| Line 1,270: | Line 2,118: | ||
:: To add a description to the new request, set to ''Manual'' and provide the required text for the description | :: To add a description to the new request, set to ''Manual'' and provide the required text for the description | ||
:* ''' Service ''' | :* ''' Service ''' | ||
| − | :: To add a Service to the new request, set to ''Manual'' and select a Service from the pick list | + | :: To add a Service to the new request, set to ''Manual'' and select a Service from the pick list |
:* ''' Catalog Item ''' | :* ''' Catalog Item ''' | ||
| − | :: To add a Catalog Item to the new request, set to ''Manual'' and provide the name of the Catalog Item | + | :: To add a Catalog Item to the new request, set to ''Manual'' and provide the name of the Catalog Item |
:* ''' Priority ''' | :* ''' Priority ''' | ||
:: To add a Priority to the new request, set to ''Manual'' and select a Priority from the pick list | :: To add a Priority to the new request, set to ''Manual'' and select a Priority from the pick list | ||
| Line 1,285: | Line 2,133: | ||
:* ''' Status ''' | :* ''' Status ''' | ||
:: To set the status on the new request, set to ''Manual'' and select a status from the pick list | :: To set the status on the new request, set to ''Manual'' and select a status from the pick list | ||
| − | + | :* '''System Timeline Update''' | |
| − | + | :: To include a Timeline entry in the new request to record the raising of the new request, set to ''Manual'' and select ''Yes'' | |
| − | + | :* ''' Manual Timeline Update ''' | |
| − | + | :: To provide a unique Timeline Update in the new request, set to ''Manual'' and click on the edit button to open the text window to add your unique timeline entry. | |
| − | + | :* ''' Visibility''' | |
| − | + | :: Set the Visibility of the Timeline Entry if one is provided. | |
| − | + | |} | |
| − | + | </div> | |
| − | + | </div> | |
| − | + | </div> | |
| − | + | <!-- **************************************END OF OPERATION DOCUMENTATION***************************************************** --> | |
| − | + | ||
| − | + | ====Linked Requests==== | |
| − | + | Use the Linked Requests node to automatically post updates and resolve linked Requests. Linked requests are those that have been linked using the Link Action Item on a request form. | |
| − | + | ||
| − | + | <!-- ******************************* START OF RESOLVE LINKED REQUESTS ******************************************************** --> | |
| − | |||
| − | |||
| − | |||
| − | |||
| − | :* ''' System Timeline Update ''' | ||
| − | :: To include a Timeline entry in the new request to record the raising of the new request, set to ''Manual'' and select ''Yes'' | ||
| − | :* ''' Manual Timeline Update ''' | ||
| − | :: To provide a unique Timeline Update in the new request, set to ''Manual'' and click on the edit button to open the text window to add your unique timeline entry. | ||
| − | :* ''' Visibility''' | ||
| − | :: Set the Visibility of the Timeline Entry if one is provided. | ||
| − | |} | ||
| − | </div> | ||
| − | </div> | ||
| − | </div> | ||
| − | <!-- ****************************************************** | ||
<div class="mw-collapsible mw-collapsed" data-collapsetext="Show Less" data-expandtext="Read More" style="width:700px"> | <div class="mw-collapsible mw-collapsed" data-collapsetext="Show Less" data-expandtext="Read More" style="width:700px"> | ||
| − | + | * Resolve Linked Requests | |
| − | * | ||
<div class="mw-collapsible-content"> | <div class="mw-collapsible-content"> | ||
<div style="border:1px solid #e6e6e6; background:#f2f2f2; width:99%; padding:4px; margin-bottom:10px;"> | <div style="border:1px solid #e6e6e6; background:#f2f2f2; width:99%; padding:4px; margin-bottom:10px;"> | ||
| Line 1,324: | Line 2,156: | ||
|- valign="top" | |- valign="top" | ||
|style="width:700px"| | |style="width:700px"| | ||
| − | [[File: | + | [[File:bpmresolvelinkedrequest.png|thumb|link=https://wiki.hornbill.com/images/1/19/Bpmresolvelinkedrequest.png|Resolve Linked Requests]] |
| − | + | ||
| − | + | ==== Resolve Linked Requests ==== | |
| − | + | This option allows you at specific times in a process to resolve linked requests. The options include defining the update text which will be added to the linked requests, as well as setting granular options to decide which linked request types should be updated. For example you may only want the Incidents from the Problem to receive the update, and not the Change, which the Problem is also linked too. | |
| − | + | ||
| − | :* ''' | + | ==== Options ==== |
| − | :: | + | :* '''Request ID''' |
| − | :* ''' | + | :: This value is automatically applied. Leave this setting as ''Auto'' |
| − | :: | + | :* '''Request Type''' |
| − | + | :: When set, only the request type that is selected will be resolved. When not set, all linked requests will be resolved | |
| − | + | :* '''Status''' | |
| − | :* ''' | + | :: Select the status that you wish to set the linked requests to. Either '''Resolve''' or '''Close''' |
| − | :: | + | :* '''Visibility''' |
| − | + | :: Choose what level of visibility will be automatically applied to this update. Choosing anything other than '''Customer''' will result in the customer not seeing the update in the timeline of their requests on the Service or Customer Portals. | |
| − | + | :* '''System Timeline Update''' | |
| − | :* ''' | + | ::Select if the default system text will be added to the timeline for this action |
| − | :: | + | :* '''Manual Timeline Update''' |
| − | + | ::Select Yes to override the default System timeline Text, and add your own text which will appear in the timeline update for this action | |
| − | + | :* '''Stop Timers''' | |
| − | :* ''' | + | :: If there are Service Level Target Timers (Response or Resolution) on the linked request, these timers will be stopped and the Target marked |
| − | :: | + | :* '''Notify Owner''' |
| − | :* ''' | + | :: Notify the owner of any linked request when resolved. The type of notification will be based on the Service Manager application settings |
| − | :: | + | ::: '''guest.app.requests.notification.notificationType.teamLinkedRequestResolveAction''' |
| − | :* ''' | + | ::: '''guest.app.requests.notification.notificationType.teamLinkedRequestResolveAction''' |
| − | :: | + | :* '''Email Customer''' |
| − | + | :: Send an email to Customer of the linked requests. Requires that the Mailbox Name and Email Template are selected | |
| − | + | :* '''Mailbox Name''' | |
| − | :* ''' | + | :: Name of the mailbox from which to send a customer email when the Email Customer option is set to ''Yes'' |
| − | :: | + | :* '''Email Template''' |
| − | + | :: Name of the Email Template to use when the Email Customer option is set to ''Yes'' | |
| − | + | |} | |
| − | : | ||
| − | :: | ||
| − | : | ||
| − | :: | ||
| − | :* ''' | ||
| − | :: | ||
| − | |||
| − | |||
| − | :* ''' | ||
| − | :: | ||
| − | |||
| − | |||
| − | :* ''' | ||
| − | :: | ||
| − | |||
| − | |||
| − | |||
| − | |||
| − | |} | ||
</div> | </div> | ||
</div> | </div> | ||
</div> | </div> | ||
| − | <!-- | + | <!-- **************************************START OF UPDATE LINKED REQUESTS***************************************************** --> |
<div class="mw-collapsible mw-collapsed" data-collapsetext="Show Less" data-expandtext="Read More" style="width:700px"> | <div class="mw-collapsible mw-collapsed" data-collapsetext="Show Less" data-expandtext="Read More" style="width:700px"> | ||
| − | + | * Update Linked Requests | |
| − | * | ||
<div class="mw-collapsible-content"> | <div class="mw-collapsible-content"> | ||
<div style="border:1px solid #e6e6e6; background:#f2f2f2; width:99%; padding:4px; margin-bottom:10px;"> | <div style="border:1px solid #e6e6e6; background:#f2f2f2; width:99%; padding:4px; margin-bottom:10px;"> | ||
| Line 1,387: | Line 2,199: | ||
|- valign="top" | |- valign="top" | ||
|style="width:700px"| | |style="width:700px"| | ||
| − | [[File: | + | [[File:bpmupdatelinkedrequests.png|thumb|link=https://wiki.hornbill.com/images/6/64/Bpmupdatelinkedrequests.png|Update Linked Requests]] |
| + | |||
| + | ==== Update Linked Requests ==== | ||
| + | This option allows you at specific times in a process to update linked requests. The options include defining the update text which will be added to the linked requests, as well as setting granular options to decide which linked request types should be updated. For example you may only want the Incidents from the Problem to receive the update, and not the Change, which the Problem is also linked too. | ||
| + | |||
| + | ==== Options ==== | ||
:* '''Request ID''' | :* '''Request ID''' | ||
| − | :: This is | + | :: This value is automatically applied. Leave this setting as ''Auto'' |
| − | :* ''' | + | :* '''Content''' |
| − | :: | + | :: Provide the text that you would like to include in the update |
| − | :* ''' | + | :* '''Visibility''' |
| − | : | + | :* Set the visibility level for the update. Decide if this is only for the team, or if it should be a customer facing update which the customer can view via the timeline of the requests on the portals. |
| − | + | :* '''Request Type''' | |
| − | + | :: Select a specific request type where only the linked requests of this type will be updated | |
| − | :* ''' | + | :* '''Update Closed Requests''' |
| − | :: | + | :: Set if the update should also be applied to any linked requests which have a closed status. |
| − | :* ''' | + | :* '''System Timeline Update''' |
| − | :: | + | :: Select if the default system text will be added to the timeline for this action |
| − | :* ''' | + | :* '''Manual Timeline Update''' |
| − | :: | + | :: Select Yes to override the default System timeline Text, and add your own text which will appear in the timeline update for this action |
| − | :* ''' | + | |} |
| − | :: | + | </div> |
| − | + | </div> | |
| − | + | </div> | |
| − | + | <!-- **************************************END OF OPERATION***************************************************** --> | |
| − | + | ||
| − | + | <!-- ****************************************************************************************************************************** --> | |
| − | + | <!-- * * --> | |
| − | + | <!-- * Log Requests * --> | |
| − | + | <!-- * * --> | |
| − | + | <!-- ****************************************************************************************************************************** --> | |
| − | + | ==== Log Requests ==== | |
| − | + | Use the Log Request to automatically raise another request at a particular point in the workflow. | |
| − | + | <!-- ****************************************************************************************************************************** --> | |
| − | + | <!-- * Log New Change * --> | |
| − | + | <!-- ****************************************************************************************************************************** --> | |
| − | + | <div class="mw-collapsible mw-collapsed" data-collapsetext="Show Less" data-expandtext="Read More" style="width:700px"> | |
| − | + | <div id="LogNewChange"></div> | |
| − | + | * Log New Change | |
| − | + | <div class="mw-collapsible-content"> | |
| − | |||
| − | |||
| − | |||
| − | |||
| − | |||
| − | |||
| − | |||
| − | |||
| − | |||
| − | |||
| − | |||
| − | |||
| − | |||
| − | |||
| − | |||
| − | |||
| − | < | ||
| − | |||
| − | |||
| − | <!-- ****************************************************** | ||
| − | <div class="mw-collapsible mw-collapsed" data-collapsetext="Show Less" data-expandtext="Read More" style="width:700px"> | ||
| − | <div id=" | ||
| − | * Log New | ||
| − | <div class="mw-collapsible-content"> | ||
<div style="border:1px solid #e6e6e6; background:#f2f2f2; width:99%; padding:4px; margin-bottom:10px;"> | <div style="border:1px solid #e6e6e6; background:#f2f2f2; width:99%; padding:4px; margin-bottom:10px;"> | ||
::{| | ::{| | ||
|- valign="top" | |- valign="top" | ||
|style="width:700px"| | |style="width:700px"| | ||
| − | [[File: | + | [[File:bpmlognewchange.png|thumb|link=https://wiki.hornbill.com/images/d/da/Bpmlognewchange.png|Log New Change]] |
:* '''Request ID''' | :* '''Request ID''' | ||
| − | :: This is an automatic | + | :: This is an automatic option and should be set to ''Auto'' |
:* ''' Summary''' | :* ''' Summary''' | ||
:: To add a summary to the new request, set to ''Manual'' and provide the required text for the summary | :: To add a summary to the new request, set to ''Manual'' and provide the required text for the summary | ||
:* ''' Description''' | :* ''' Description''' | ||
:: To add a description to the new request, set to ''Manual'' and provide the required text for the description | :: To add a description to the new request, set to ''Manual'' and provide the required text for the description | ||
| + | {{bullet1|Customer (Co-worker)|The ID of the Customer to assign to the request}} | ||
| + | {{bullet1|Customer (Contact)| The ID of the Contact to assign to the request}} | ||
:* ''' Service ''' | :* ''' Service ''' | ||
:: To add a Service to the new request, set to ''Manual'' and select a Service from the pick list. If a Service is specified without a Catalog Item, the BPM workflow set against this request type on the Service Configuration will be used on the new request. | :: To add a Service to the new request, set to ''Manual'' and select a Service from the pick list. If a Service is specified without a Catalog Item, the BPM workflow set against this request type on the Service Configuration will be used on the new request. | ||
| Line 1,465: | Line 2,260: | ||
:* ''' Category ''' | :* ''' Category ''' | ||
:: To add a Request Category to the new request, set to ''Manual'' and click on the edit button to open the Category selector. | :: To add a Request Category to the new request, set to ''Manual'' and click on the edit button to open the Category selector. | ||
| + | :* ''' Change Type''' | ||
| + | :: To set a Change Type, set to ''Manual'' and select the change type from the pick list | ||
:* ''' Team ''' | :* ''' Team ''' | ||
:: To add a Team to the new request, set to ''Manual'' and select a team from the pick list | :: To add a Team to the new request, set to ''Manual'' and select a team from the pick list | ||
| Line 1,493: | Line 2,290: | ||
:* ''' Copy Status? ''' | :* ''' Copy Status? ''' | ||
:: To use the same Status as the originating request, set to ''Manual'' and select ''Yes'' | :: To use the same Status as the originating request, set to ''Manual'' and select ''Yes'' | ||
| + | :* ''' Copy Questions? ''' | ||
| + | :: To use the same answers to the questions section on the originating request, set to ''Manual'' and select ''Yes'' | ||
| + | {{Bullet1|Copy Assets|Copy the assets that are associated to the original request. Set to ''Manual'' and select ''Yes''}} | ||
:* ''' System Timeline Update ''' | :* ''' System Timeline Update ''' | ||
:: To include a Timeline entry in the new request to record the raising of the new request, set to ''Manual'' and select ''Yes'' | :: To include a Timeline entry in the new request to record the raising of the new request, set to ''Manual'' and select ''Yes'' | ||
| Line 1,503: | Line 2,303: | ||
</div> | </div> | ||
</div> | </div> | ||
| − | + | <!-- ****************************************************************************************************************************** --> | |
| − | <!-- ****************************************************** | + | <!-- * Log New Incident * --> |
| + | <!-- ****************************************************************************************************************************** --> | ||
<div class="mw-collapsible mw-collapsed" data-collapsetext="Show Less" data-expandtext="Read More" style="width:700px"> | <div class="mw-collapsible mw-collapsed" data-collapsetext="Show Less" data-expandtext="Read More" style="width:700px"> | ||
| − | <div id=" | + | <div id="LogNewIncident"></div> |
| − | * Log New | + | * Log New Incident |
<div class="mw-collapsible-content"> | <div class="mw-collapsible-content"> | ||
<div style="border:1px solid #e6e6e6; background:#f2f2f2; width:99%; padding:4px; margin-bottom:10px;"> | <div style="border:1px solid #e6e6e6; background:#f2f2f2; width:99%; padding:4px; margin-bottom:10px;"> | ||
| Line 1,513: | Line 2,314: | ||
|- valign="top" | |- valign="top" | ||
|style="width:700px"| | |style="width:700px"| | ||
| − | [[File: | + | [[File:lognewincident.png|thumb|link=https://wiki.hornbill.com/images/6/65/Lognewincident.png|Log New Incident]] |
:* '''Request ID''' | :* '''Request ID''' | ||
:: This is an automatic options and should be set to ''Auto'' | :: This is an automatic options and should be set to ''Auto'' | ||
| Line 1,520: | Line 2,321: | ||
:* ''' Description''' | :* ''' Description''' | ||
:: To add a description to the new request, set to ''Manual'' and provide the required text for the description | :: To add a description to the new request, set to ''Manual'' and provide the required text for the description | ||
| + | {{bullet1|Customer (Co-worker)|The ID of the Customer to assign to the request}} | ||
| + | {{bullet1|Customer (Contact)| The ID of the Contact to assign to the request}} | ||
:* ''' Service ''' | :* ''' Service ''' | ||
| − | :: To add a Service to the new request, set to ''Manual'' and select a Service from the pick list. If a Service is specified without a Catalog Item, the BPM workflow set against this request type will be used on the new request. | + | :: To add a Service to the new request, set to ''Manual'' and select a Service from the pick list. If a Service is specified without a Catalog Item, the BPM workflow set against this request type on the Service Configuration will be used on the new request. |
:* ''' Catalog Item ''' | :* ''' Catalog Item ''' | ||
:: To add a Catalog Item to the new request, set to ''Manual'' and provide the name of the Catalog Item. If both a Service and Catalog Item are specified, the BPM workflow set against the Catalog item will be used on the new request. | :: To add a Catalog Item to the new request, set to ''Manual'' and provide the name of the Catalog Item. If both a Service and Catalog Item are specified, the BPM workflow set against the Catalog item will be used on the new request. | ||
| Line 1,556: | Line 2,359: | ||
:* ''' Copy Status? ''' | :* ''' Copy Status? ''' | ||
:: To use the same Status as the originating request, set to ''Manual'' and select ''Yes'' | :: To use the same Status as the originating request, set to ''Manual'' and select ''Yes'' | ||
| + | :* ''' Copy Questions? ''' | ||
| + | :: To use the same answers to the questions section on the originating request, set to ''Manual'' and select ''Yes'' | ||
| + | {{Bullet1|Copy Assets|Copy the assets that are associated to the original request. Set to ''Manual'' and select ''Yes''}} | ||
:* ''' System Timeline Update ''' | :* ''' System Timeline Update ''' | ||
:: To include a Timeline entry in the new request to record the raising of the new request, set to ''Manual'' and select ''Yes'' | :: To include a Timeline entry in the new request to record the raising of the new request, set to ''Manual'' and select ''Yes'' | ||
| Line 1,566: | Line 2,372: | ||
</div> | </div> | ||
</div> | </div> | ||
| − | + | <!-- ****************************************************************************************************************************** --> | |
| − | + | <!-- * Log New Known Error * --> | |
| − | {{ | + | <!-- ****************************************************************************************************************************** --> |
| − | + | {{BPMAutomation|LogNewKnownError|Log New Known Error| | |
| − | + | [[File:Log_New_Known_Error.png|thumb|link=https://wiki.hornbill.com/images/c/c6/Log_New_Known_Error.png]]| | |
| − | + | Use this Hornbill Automation to create a new Known Error Record| | |
| − | + | {{bullet1|Request Id|This is a mandatory setting that uses a variable to hold the Request Id of the request that is using this BPM. This should be set to Auto}} | |
| − | + | {{bullet1|Summary|To add a summary to the new known error, set to ''Manual'' and provide the required text for the summary}} | |
| + | {{bullet1|Description|To add a description to the new known error, set to ''Manual'' and provide the required text for the description}} | ||
| + | {{bullet1|Service|To add a Service to the new known error, set to ''Manual'' and select a Service from the pick list. If a Service is specified without a Catalog Item, the BPM workflow set against this known error on the Service Configuration will be used on the new request.}} | ||
| + | {{bullet1|Catalog Item|To add a Catalog Item to the new known error, set to ''Manual'' and provide the name of the Catalog Item. If both a Service and Catalog Item are specified, the BPM workflow set against the Catalog item will be used on the new known error.}} | ||
| + | {{bullet1|Priority|To add a Priority to the new known error, set to ''Manual'' and select a Priority from the pick list}} | ||
| + | {{bullet1|Category|To add a Request Category to the new known error, set to ''Manual'' and click on the edit button to open the Category selector.}} | ||
| + | {{bullet1|Team|To add a Team to the new know error, set to ''Manual'' and select a team from the pick list}} | ||
| + | {{bullet1|Owner|To add an Owner to the new request, set to ''Manual'' and select start typing the name of the user and then select them from the pick list}} | ||
| + | {{bullet1|Site|To add a Site to the new know error, set to ''Manual'' and select a Site from the pick list}} | ||
| + | {{bullet1|Status|To set the status on the new request, set to ''Manual'' and select a status from the pick list}} | ||
| + | {{bullet1|Root Cause|To add a root cause to the known error, set to ''Manual'' and provide the root cause text or set using a variable}} | ||
| + | {{bullet1|Workaround|To add a workaround to the known error, set to ''Manual'' and provide the workaround text or set using a variable}} | ||
| + | {{bullet1|Copy Customer?|To use the same Customer as the originating request, set to ''Manual'' and select ''Yes''}} | ||
| + | {{bullet1|Copy Summary?|To use the same Summary as the originating request, set to ''Manual'' and select ''Yes''}} | ||
| + | {{bullet1|Copy Description?|To use the same Description as the originating request, set to ''Manual'' and select ''Yes''}} | ||
| + | {{bullet1|Copy Service?|To use the same Service as the originating request, set to ''Manual'' and select ''Yes''}} | ||
| + | {{bullet1|Copy Priority?|To use the same Priority as the originating request, set to ''Manual'' and select ''Yes''}} | ||
| + | {{bullet1|Copy Category?|To use the same Category as the originating request, set to ''Manual'' and select ''Yes''}} | ||
| + | {{bullet1|Copy Team?|To use the same Team as the originating request, set to ''Manual'' and select ''Yes''}} | ||
| + | {{bullet1|Copy Owner? |To use the same Owner as the originating request, set to ''Manual'' and select ''Yes''}} | ||
| + | {{bullet1|Copy Site?|To use the same Site as the originating request, set to ''Manual'' and select ''Yes''}} | ||
| + | {{bullet1|Copy Status?|To use the same Status as the originating request, set to ''Manual'' and select ''Yes''}} | ||
| + | {{bullet1|Copy Questions?|To use the same answers to the questions section from the originating request, set to ''Manual'' and select ''Yes''}} | ||
| + | {{bullet1|Copy Root Cause?|To use the same Root Cause as the originating problem record, set to ''Manual'' and select ''Yes''}} | ||
| + | {{bullet1|Copy Workaround?|To use the same Workaround as the originating problem record, set to ''Manual'' and select ''Yes''}} | ||
| + | {{Bullet1|Copy Assets|Copy the assets that are associated to the original request. Set to ''Manual'' and select ''Yes''}} | ||
| + | {{bullet1|System Timeline Update|To include a Timeline entry in the new known error to record the raising of the new request, set to ''Manual'' and select ''Yes''}} | ||
| + | {{bullet1|Manual Timeline Update |To provide a unique Timeline Update in the new known error, set to ''Manual'' and click on the edit button to open the text window to add your unique timeline entry.}} | ||
| + | {{bullet1|Visibility|Set the Visibility of the Timeline Entry if one is provided.}} | ||
| + | }} | ||
| + | <!-- ****************************************************************************************************************************** --> | ||
| + | <!-- * Log New Problem * --> | ||
| + | <!-- ****************************************************************************************************************************** --> | ||
<div class="mw-collapsible mw-collapsed" data-collapsetext="Show Less" data-expandtext="Read More" style="width:700px"> | <div class="mw-collapsible mw-collapsed" data-collapsetext="Show Less" data-expandtext="Read More" style="width:700px"> | ||
| − | * | + | <div id="LogNewProblem"></div> |
| + | * Log New Problem | ||
<div class="mw-collapsible-content"> | <div class="mw-collapsible-content"> | ||
| − | :* '''Request ID''' | + | <div style="border:1px solid #e6e6e6; background:#f2f2f2; width:99%; padding:4px; margin-bottom:10px;"> |
| − | :* ''' | + | ::{| |
| − | :* ''' | + | |- valign="top" |
| − | + | |style="width:700px"| | |
| − | + | [[File:bmplognewproblem.png|thumb|link=https://wiki.hornbill.com/images/b/bb/Bmplognewproblem.png|Log New Problem]] | |
| − | + | :* '''Request ID''' | |
| − | + | :: This is an automatic options and should be set to ''Auto'' | |
| − | + | :* ''' Summary''' | |
| − | + | :: To add a summary to the new request, set to ''Manual'' and provide the required text for the summary | |
| − | + | :* ''' Description''' | |
| − | + | :: To add a description to the new request, set to ''Manual'' and provide the required text for the description | |
| − | + | :* ''' Service ''' | |
| − | * | + | :: To add a Service to the new request, set to ''Manual'' and select a Service from the pick list. If a Service is specified without a Catalog Item, the BPM workflow set against this request type on the Service Configuration will be used on the new request. |
| − | + | :* ''' Catalog Item ''' | |
| − | : | + | :: To add a Catalog Item to the new request, set to ''Manual'' and provide the name of the Catalog Item. If both a Service and Catalog Item are specified, the BPM workflow set against the Catalog item will be used on the new request. |
| − | :: | + | :* ''' Priority ''' |
| − | :* ''' | + | :: To add a Priority to the new request, set to ''Manual'' and select a Priority from the pick list |
| − | :: | + | :* ''' Category ''' |
| − | :* ''' | + | :: To add a Request Category to the new request, set to ''Manual'' and click on the edit button to open the Category selector. |
| − | :: | + | :* ''' Team ''' |
| − | + | :: To add a Team to the new request, set to ''Manual'' and select a team from the pick list | |
| − | + | :* ''' Owner ''' | |
| − | + | :: To add an Owner to the new request, set to ''Manual'' and select start typing the name of the user and then select them from the pick list | |
| − | + | :* ''' Site ''' | |
| − | + | :: To add a Site to the new request, set to ''Manual'' and select a Site from the pick list | |
| − | * | + | :* ''' Status ''' |
| − | + | :: To set the status on the new request, set to ''Manual'' and select a status from the pick list | |
| − | :: | + | :* ''' Copy Customer? ''' |
| − | :* ''' | + | :: To use the same Customer as the originating request, set to ''Manual'' and select ''Yes'' |
| − | :: | + | :* ''' Copy Summary? ''' |
| − | :* ''' | + | :: To use the same Summary as the originating request, set to ''Manual'' and select ''Yes'' |
| − | :: | + | :* ''' Copy Description? ''' |
| − | :* ''' | + | :: To use the same Description as the originating request, set to ''Manual'' and select ''Yes'' |
| − | :: | + | :* ''' Copy Service? ''' |
| − | :* ''' | + | :: To use the same Service as the originating request, set to ''Manual'' and select ''Yes'' |
| − | :: | + | :* ''' Copy Priority? ''' |
| − | :* ''' | + | :: To use the same Priority as the originating request, set to ''Manual'' and select ''Yes'' |
| − | :: | + | :* ''' Copy Category? ''' |
| − | + | :: To use the same Category as the originating request, set to ''Manual'' and select ''Yes'' | |
| − | : | + | :* ''' Copy Team? ''' |
| − | + | :: To use the same Team as the originating request, set to ''Manual'' and select ''Yes'' | |
| − | + | :* ''' Copy Owner? ''' | |
| − | + | :: To use the same Owner as the originating request, set to ''Manual'' and select ''Yes'' | |
| − | + | :* ''' Copy Site? ''' | |
| − | + | :: To use the same Site as the originating request, set to ''Manual'' and select ''Yes'' | |
| − | * | + | :* ''' Copy Status? ''' |
| − | + | :: To use the same Status as the originating request, set to ''Manual'' and select ''Yes'' | |
| − | :: | + | :* ''' Copy Questions? ''' |
| − | + | :: To use the same answers to the questions section on the originating request, set to ''Manual'' and select ''Yes'' | |
| − | + | {{Bullet1|Copy Assets|Copy the assets that are associated to the original request. Set to ''Manual'' and select ''Yes''}} | |
| − | + | :* ''' System Timeline Update ''' | |
| − | + | :: To include a Timeline entry in the new request to record the raising of the new request, set to ''Manual'' and select ''Yes'' | |
| − | + | :* ''' Manual Timeline Update ''' | |
| − | + | :: To provide a unique Timeline Update in the new request, set to ''Manual'' and click on the edit button to open the text window to add your unique timeline entry. | |
| − | + | :* ''' Visibility''' | |
| − | + | :: Set the Visibility of the Timeline Entry if one is provided. | |
| − | + | |} | |
| − | |||
| − | |||
| − | |||
</div> | </div> | ||
| − | |||
| − | |||
| − | |||
| − | |||
| − | |||
| − | |||
| − | |||
</div> | </div> | ||
</div> | </div> | ||
| − | <!-- ************************************************************************************************************** --> | + | <!-- ****************************************************************************************************************************** --> |
| − | <!-- * | + | <!-- * Log New Release * --> |
| − | <!-- ************************************************************************************************************** --> | + | <!-- ****************************************************************************************************************************** --> |
<div class="mw-collapsible mw-collapsed" data-collapsetext="Show Less" data-expandtext="Read More" style="width:700px"> | <div class="mw-collapsible mw-collapsed" data-collapsetext="Show Less" data-expandtext="Read More" style="width:700px"> | ||
| − | <div id=" | + | <div id="LogNewRelease"></div> |
| − | * | + | * Log New Release |
<div class="mw-collapsible-content"> | <div class="mw-collapsible-content"> | ||
<div style="border:1px solid #e6e6e6; background:#f2f2f2; width:99%; padding:4px; margin-bottom:10px;"> | <div style="border:1px solid #e6e6e6; background:#f2f2f2; width:99%; padding:4px; margin-bottom:10px;"> | ||
| Line 1,658: | Line 2,487: | ||
|- valign="top" | |- valign="top" | ||
|style="width:700px"| | |style="width:700px"| | ||
| − | [[File: | + | [[File:bmplognewrelease.png|thumb|link=https://wiki.hornbill.com/images/e/ea/Bmplognewrelease.png|Log New Release]] |
| − | + | :* '''Request ID''' | |
| − | + | :: This is an automatic options and should be set to ''Auto'' | |
| − | + | :* ''' Summary''' | |
| − | + | :: To add a summary to the new request, set to ''Manual'' and provide the required text for the summary | |
| − | + | :* ''' Description''' | |
| − | :* ''' | + | :: To add a description to the new request, set to ''Manual'' and provide the required text for the description |
| − | :: | + | :* ''' Service ''' |
| − | :* ''' | + | :: To add a Service to the new request, set to ''Manual'' and select a Service from the pick list. If a Service is specified without a Catalog Item, the BPM workflow set against this request type on the Service Configuration will be used on the new request. |
| − | :: | + | :* ''' Catalog Item ''' |
| − | :* ''' | + | :: To add a Catalog Item to the new request, set to ''Manual'' and provide the name of the Catalog Item. If both a Service and Catalog Item are specified, the BPM workflow set against the Catalog item will be used on the new request. |
| − | :: | + | :* ''' Priority ''' |
| − | |} | + | :: To add a Priority to the new request, set to ''Manual'' and select a Priority from the pick list |
| − | + | :* ''' Category ''' | |
| − | + | :: To add a Request Category to the new request, set to ''Manual'' and click on the edit button to open the Category selector. | |
| − | + | {{Bullet1|Release Type|Set the Release Type for this Release. The options are driven from the 'releaseRequestType' Simple List.}} | |
| − | + | :* ''' Team ''' | |
| − | + | :: To add a Team to the new request, set to ''Manual'' and select a team from the pick list | |
| − | + | :* ''' Owner ''' | |
| − | + | :: To add an Owner to the new request, set to ''Manual'' and select start typing the name of the user and then select them from the pick list | |
| − | * | + | :* ''' Site ''' |
| − | + | :: To add a Site to the new request, set to ''Manual'' and select a Site from the pick list | |
| − | :: | + | :* ''' Status ''' |
| − | + | :: To set the status on the new request, set to ''Manual'' and select a status from the pick list | |
| − | + | :* ''' Copy Customer? ''' | |
| − | + | :: To use the same Customer as the originating request, set to ''Manual'' and select ''Yes'' | |
| − | + | :* ''' Copy Summary? ''' | |
| − | + | :: To use the same Summary as the originating request, set to ''Manual'' and select ''Yes'' | |
| − | + | :* ''' Copy Description? ''' | |
| − | + | :: To use the same Description as the originating request, set to ''Manual'' and select ''Yes'' | |
| − | + | :* ''' Copy Service? ''' | |
| − | * | + | :: To use the same Service as the originating request, set to ''Manual'' and select ''Yes'' |
| − | + | :* ''' Copy Priority? ''' | |
| − | + | :: To use the same Priority as the originating request, set to ''Manual'' and select ''Yes'' | |
| − | :: | + | :* ''' Copy Category? ''' |
| − | + | :: To use the same Category as the originating request, set to ''Manual'' and select ''Yes'' | |
| − | + | :* ''' Copy Team? ''' | |
| − | + | :: To use the same Team as the originating request, set to ''Manual'' and select ''Yes'' | |
| − | + | :* ''' Copy Owner? ''' | |
| − | + | :: To use the same Owner as the originating request, set to ''Manual'' and select ''Yes'' | |
| − | + | :* ''' Copy Site? ''' | |
| − | + | :: To use the same Site as the originating request, set to ''Manual'' and select ''Yes'' | |
| − | + | :* ''' Copy Status? ''' | |
| − | :* ''' | + | :: To use the same Status as the originating request, set to ''Manual'' and select ''Yes'' |
| − | :: | + | :* ''' Copy Questions? ''' |
| − | :* ''' | + | :: To use the same answers to the questions section on the originating request, set to ''Manual'' and select ''Yes'' |
| − | :: | + | {{Bullet1|Copy Assets|Copy the assets that are associated to the original request. Set to ''Manual'' and select ''Yes''}} |
| − | :* ''' | + | :* ''' System Timeline Update ''' |
| − | :: Set | + | :: To include a Timeline entry in the new request to record the raising of the new request, set to ''Manual'' and select ''Yes'' |
| − | |} | + | :* ''' Manual Timeline Update ''' |
| − | </div> | + | :: To provide a unique Timeline Update in the new request, set to ''Manual'' and click on the edit button to open the text window to add your unique timeline entry. |
| − | + | :* ''' Visibility''' | |
| − | + | :: Set the Visibility of the Timeline Entry if one is provided. | |
| − | + | |} | |
| − | + | </div> | |
| − | |||
| − | |||
| − | |||
| − | |||
| − | |||
| − | |||
</div> | </div> | ||
</div> | </div> | ||
| − | + | <!-- ****************************************************************************************************************************** --> | |
| + | <!-- * Log New Request * --> | ||
| + | <!-- ****************************************************************************************************************************** --> | ||
<div class="mw-collapsible mw-collapsed" data-collapsetext="Show Less" data-expandtext="Read More" style="width:700px"> | <div class="mw-collapsible mw-collapsed" data-collapsetext="Show Less" data-expandtext="Read More" style="width:700px"> | ||
| − | + | <div id="LogNewRequest"></div> | |
| − | + | * Log New Request | |
| − | |||
| − | |||
| − | |||
| − | |||
| − | |||
| − | |||
| − | |||
| − | |||
| − | <div id=" | ||
| − | * | ||
<div class="mw-collapsible-content"> | <div class="mw-collapsible-content"> | ||
<div style="border:1px solid #e6e6e6; background:#f2f2f2; width:99%; padding:4px; margin-bottom:10px;"> | <div style="border:1px solid #e6e6e6; background:#f2f2f2; width:99%; padding:4px; margin-bottom:10px;"> | ||
| Line 1,740: | Line 2,555: | ||
|- valign="top" | |- valign="top" | ||
|style="width:700px"| | |style="width:700px"| | ||
| − | [[File: | + | [[File:bmplognewrequest.png|thumb|link=https://wiki.hornbill.com/images/0/05/Bmplognewrequest.png|Log New Request]] |
| − | + | :* '''Request ID''' | |
| − | + | :: This is an automatic options and should be set to ''Auto'' | |
| − | + | :* ''' Summary''' | |
| − | + | :: To add a summary to the new request, set to ''Manual'' and provide the required text for the summary | |
| − | + | :* ''' Description''' | |
| − | :* ''' | + | :: To add a description to the new request, set to ''Manual'' and provide the required text for the description |
| − | :: This is | + | {{bullet1|Customer (Co-worker)|The ID of the Customer to assign to the request}} |
| − | :* ''' | + | {{bullet1|Customer (Contact)| The ID of the Contact to assign to the request}} |
| − | :: | + | :* ''' Service ''' |
| − | :* ''' | + | :: To add a Service to the new request, set to ''Manual'' and select a Service from the pick list. If a Service is specified without a Catalog Item, the BPM workflow set against this request type will be used on the new request. |
| − | :: | + | :* ''' Catalog Item ''' |
| − | :* ''' | + | :: To add a Catalog Item to the new request, set to ''Manual'' and provide the name of the Catalog Item. If both a Service and Catalog Item are specified, the BPM workflow set against the Catalog item will be used on the new request. |
| − | :: | + | :* ''' Priority ''' |
| − | :* ''' | + | :: To add a Priority to the new request, set to ''Manual'' and select a Priority from the pick list |
| − | :: | + | :* ''' Category ''' |
| − | + | :: To add a Request Category to the new request, set to ''Manual'' and click on the edit button to open the Category selector. | |
| − | + | :* ''' Team ''' | |
| − | + | :: To add a Team to the new request, set to ''Manual'' and select a team from the pick list | |
| − | + | :* ''' Owner ''' | |
| − | + | :: To add an Owner to the new request, set to ''Manual'' and select start typing the name of the user and then select them from the pick list | |
| − | + | :* ''' Site ''' | |
| − | + | :: To add a Site to the new request, set to ''Manual'' and select a Site from the pick list | |
| − | * | + | :* ''' Status ''' |
| − | + | :: To set the status on the new request, set to ''Manual'' and select a status from the pick list | |
| − | : | + | :* ''' Copy Customer? ''' |
| − | :: | + | :: To use the same Customer as the originating request, set to ''Manual'' and select ''Yes'' |
| − | + | :* ''' Copy Summary? ''' | |
| − | + | :: To use the same Summary as the originating request, set to ''Manual'' and select ''Yes'' | |
| − | + | :* ''' Copy Description? ''' | |
| − | + | :: To use the same Description as the originating request, set to ''Manual'' and select ''Yes'' | |
| − | + | :* ''' Copy Service? ''' | |
| − | + | :: To use the same Service as the originating request, set to ''Manual'' and select ''Yes'' | |
| − | * | + | :* ''' Copy Priority? ''' |
| − | + | :: To use the same Priority as the originating request, set to ''Manual'' and select ''Yes'' | |
| − | : | + | :* ''' Copy Category? ''' |
| − | :: | + | :: To use the same Category as the originating request, set to ''Manual'' and select ''Yes'' |
| − | + | :* ''' Copy Team? ''' | |
| − | + | :: To use the same Team as the originating request, set to ''Manual'' and select ''Yes'' | |
| − | + | :* ''' Copy Owner? ''' | |
| − | + | :: To use the same Owner as the originating request, set to ''Manual'' and select ''Yes'' | |
| − | + | :* ''' Copy Site? ''' | |
| − | + | :: To use the same Site as the originating request, set to ''Manual'' and select ''Yes'' | |
| − | * | + | :* ''' Copy Status? ''' |
| − | + | :: To use the same Status as the originating request, set to ''Manual'' and select ''Yes'' | |
| − | :: | + | :* ''' Copy Questions? ''' |
| − | + | :: To use the same answers to the questions section on the originating request, set to ''Manual'' and select ''Yes'' | |
| − | + | {{Bullet1|Copy Assets|Copy the assets that are associated to the original request. Set to ''Manual'' and select ''Yes''}} | |
| − | + | :* ''' System Timeline Update ''' | |
| − | + | :: To include a Timeline entry in the new request to record the raising of the new request, set to ''Manual'' and select ''Yes'' | |
| − | + | :* ''' Manual Timeline Update ''' | |
| − | + | :: To provide a unique Timeline Update in the new request, set to ''Manual'' and click on the edit button to open the text window to add your unique timeline entry. | |
| − | * | + | :* ''' Visibility''' |
| − | + | :: Set the Visibility of the Timeline Entry if one is provided. | |
| − | :: | + | |} |
| − | + | </div> | |
| − | |||
</div> | </div> | ||
</div> | </div> | ||
| − | |||
| − | |||
| − | |||
| − | |||
| − | [[File: | + | {{infobox|Using these options in your business processes, please be aware of where you are invoking them / placing them in the workflow, and in turn which business processes are going to be invoked against the new Incident or Service Request raised. Please avoid scenario's where one business process may invoke the logging of a new request, where the new request's business process immediately is configured to log a new request which again has a business process which again logs another request immediately creating a loop. The result of which may be a lot of unwanted requests. In the event this occurs, disable the causing business process and resolve the issue.}} |
| − | + | <!-- ****************************************************************************************************************************** --> | |
| − | + | <!-- * * --> | |
| + | <!-- * Questions * --> | ||
| + | <!-- * * --> | ||
| + | <!-- ****************************************************************************************************************************** --> | ||
| + | |||
| + | === Questions === | ||
| + | <!-- ****************************************************************************************************************************** --> | ||
| + | <!-- * Delete Questions * --> | ||
| + | <!-- ****************************************************************************************************************************** --> | ||
| + | {{BPMAutomation|Delete_Questions|Delete Questions| | ||
| + | [[File:bpmdeletequestions.png|thumb|link=https://wiki.hornbill.com/images/2/26/Bpmdeletequestions.png]]| | ||
| + | This Hornbill Automation will delete the entire Questions section on a request. This can be used to remove this information once it has performed its use and it no longer required. | | ||
| + | {{bullet1|Request Id|In almost all cases, this should be set to ''Auto'' which will take the global variable for the request ID that the BPM is associated and apply all selected options to this request}} | ||
| + | {{bullet1|System Timeline Update|Select if the default system text will be added to the timeline for this action}} | ||
| + | {{bullet1|Manual Timeline Update|Select Yes to override the default System timeline Text, and add your own text which will appear in the timeline update for this action}} | ||
| + | {{bullet1|Timeline Visibility|Choose what level of visibility will be automatically applied to this update. Choosing anything other than Customer will result in the customer not seeing the update in the timeline of their requests on the Service or Customer Portals}} | ||
| + | }} | ||
| − | < | + | <!-- ****************************************************************************************************************************** --> |
| − | * | + | <!-- * * --> |
| − | < | + | <!-- * Request Service * --> |
| − | + | <!-- * * --> | |
| + | <!-- ****************************************************************************************************************************** --> | ||
| − | + | ===Request Service=== | |
| − | |||
| − | |||
| + | Use the Request Service node, if you wish to automate the availability status setting of the service associated to a request, or to automate adding related services of the request service to the request. | ||
| + | <!-- ****************************************************************************************************************************** --> | ||
| + | <!-- * Add related Services * --> | ||
| + | <!-- ****************************************************************************************************************************** --> | ||
<div class="mw-collapsible mw-collapsed" data-collapsetext="Show Less" data-expandtext="Read More" style="width:700px"> | <div class="mw-collapsible mw-collapsed" data-collapsetext="Show Less" data-expandtext="Read More" style="width:700px"> | ||
| − | * | + | * Add Related Services |
<div class="mw-collapsible-content"> | <div class="mw-collapsible-content"> | ||
| − | :: | + | :* '''Request ID''' - This is an automatic option and should be set to ''Auto'' |
| + | :* '''Relationship Type''' - Select which services to relate to the request, based on their relationship type to the request service. | ||
| + | :* '''System Timeline Update''' - Select if the default system text will be added to the timeline for this action | ||
| + | :* '''Manual Timeline Update''' - Select Yes to override the default System timeline Text, and add your own text which will appear in the timeline update for this action | ||
| + | :* '''Visibility''' - Choose what level of visibility will be automatically applied to this update. Choosing anything other than Customer will result in the customer not seeing the update in the timeline of their requests on the Service or Customer Portals. | ||
| − | [[File: | + | [[File:update_related_services_bpm.png|centre|600px]] |
</div> | </div> | ||
</div> | </div> | ||
| − | + | <!-- ****************************************************************************************************************************** --> | |
| + | <!-- * Update Service Status * --> | ||
| + | <!-- ****************************************************************************************************************************** --> | ||
<div class="mw-collapsible mw-collapsed" data-collapsetext="Show Less" data-expandtext="Read More" style="width:700px"> | <div class="mw-collapsible mw-collapsed" data-collapsetext="Show Less" data-expandtext="Read More" style="width:700px"> | ||
| − | * | + | * Update Service Status |
<div class="mw-collapsible-content"> | <div class="mw-collapsible-content"> | ||
| − | : | + | :* '''Request ID''' - This is an automatic options and should be set to ''Auto'' |
| − | + | :* '''Status''' - Select the Status to set the Request Service's Availability too, or choose No Status if no Status is required to be displayed for the Service. | |
| − | + | :* '''Status Message''' - An optional message to be displayed alongside the Status - this will be visible to both analysts supporting the service, and customers subscribed to the service. | |
| − | + | [[File:Update_Request_Service_Status.png|centre|600px]] | |
| − | :* ''' | ||
| − | |||
| − | :* ''' | ||
| − | |||
| − | |||
| − | [[File: | ||
| − | |||
</div> | </div> | ||
| − | < | + | <!-- ****************************************************************************************************************************** --> |
| − | * | + | <!-- * * --> |
| − | < | + | <!-- * Suspend Requests * --> |
| − | + | <!-- * * --> | |
| + | <!-- ****************************************************************************************************************************** --> | ||
| − | + | ===Suspend=== | |
| − | |||
| − | |||
| − | < | + | Use the Suspend nodes if you wish to suspend the progress of the workflow until a defined action is performed manually on the Request. This could include waiting for a Priority to be set, a Customer added, Ownership set or the Resolution defined. Configuration options include the ability to specify the context (which Action Bar icon) the Request will appear in whilst waiting for the Suspend (manual action) to be performed. |
| − | * Wait for Request | + | <!-- ****************************************************************************************************************************** --> |
| − | < | + | <!-- * Await Expiry * --> |
| − | ::Requests > Suspend > | + | <!-- ****************************************************************************************************************************** --> |
| + | {{BPMAutomation|Await_Expiry|Await Expiry| | ||
| + | [[File:bpmwaitforexpiry.png|thumb|link=https://wiki.hornbill.com/images/2/29/Bpmwaitforexpiry.png]]| | ||
| + | Use this suspend node to suspend a Request's workflow until the expire period has been reached.| | ||
| + | {{bullet1|Request Id|In almost all cases, this should be set to ''Auto'' which will take the global variable for the request ID that the BPM is associated and apply all selected options to this request}} | ||
| + | {{bullet1|Action Focus|Sets the Action Item on a request that will be in focus.}} | ||
| + | {{bullet1|Expire Period|The length of time to wait until the node expires and the workflow will automatically continue. This is based on the Working Time Calendar defined in the setting '''guest.app.timer.defaultCalendar'''. If you wish to use a date/time for expiry, set this option to "ignore" and set the'Expire Date/Time' option below instead.}} | ||
| + | {{bullet1|Expiry Date/Time|This option determines when the node expires. A date/time value must be supplied (e.g. 2040-01-01T12:00:00Z) which can be injected from the Variable Picker. If the "expire period" option has been set, any value in this 'Expire Date/Time' option will be disregarded.}} | ||
| + | {{bullet1|Add Notice|Select Yes to add a notice to the top of the request}} | ||
| + | {{bullet1|Notice Type|The type of notice (Alert or Information). The default value is "Information".}} | ||
| + | {{bullet1|Notice Text|The text that will be displayed. This has a limit of 255 characters}} | ||
| + | {{bullet1|Notice Visibility|The visibility of the notice (Portals | Service Desk | Both). The default value is "Service Desk"}} | ||
| + | }} | ||
| + | <!-- ****************************************************************************************************************************** --> | ||
| + | <!-- * Wait for List of Request Authorisers * --> | ||
| + | <!-- ****************************************************************************************************************************** --> | ||
| + | {{BPMAutomation|Wait_for_Request_Authorisers|Wait for List of Request Authorisers| | ||
| + | [[File:bpmwaitforlistofapprovers.png|thumb|link=https://wiki.hornbill.com/images/8/89/Bpmwaitforlistofapprovers.png]]| | ||
| + | Use this Hornbill Automation to present an Authorization Action on a request form that lets you manually assign authorisers at a particular point in the BPM Workflow. Once all authorisers have been submitted, an authorisation task will be sent to all the selected users (''Requests > Suspend > List of Request Authorisers'')| | ||
| + | {{bullet1|Request Id|In almost all cases, this should be set to ''Auto'' which will take the global variable for the request ID that the BPM is associated and apply all selected options to this request}} | ||
| + | {{bullet1|Action Focus|Sets the Action Item on a request that will be in focus.}} | ||
| + | {{bullet1|Expire Period|The length of time to wait until the node expires and the workflow will automatically continue. This is based on the Working Time Calendar defined in the setting '''guest.app.timer.defaultCalendar'''.}} | ||
| + | {{bullet1|Authorisation Type|There are three available Authorization Types. ''Individual'' - Only one of the selected authorizers will be required to approve the authorization in order to proceed. ''Majority'' - At least half of the selected authorizers will be required to approve the authorization in order to proceed. ''Unanimous'' - All of the selected authorizers must approve the authorization in order to proceed.}} | ||
| + | {{bullet1|Use Previous Authorisers|If a list of authorisers had previously been selected in a preceding authorisation, selecting 'Yes' will reuse this list of authorisers}} | ||
| + | {{bullet1|Service Owner|Selecting ''Yes'' will automatically include the owner of the service that the requests is raised against, to the list of authorizers}} | ||
| + | {{bullet1|Linked Services Owners|Selecting ''Yes'' will automatically include the owners of the services that are linked to the request, to the list of authorizers}} | ||
| + | {{bullet1|Linked Assets Owners|Selecting ''Yes'' will automatically include the owners of the assets that are linked to the request, to the list of authorizers}} | ||
| + | {{bullet1|Add Notice|Select Yes to add a notice to the top of the request}} | ||
| + | {{bullet1|Notice Type|The type of notice (Alert or Information). The default value is "Information".}} | ||
| + | {{bullet1|Notice Text|The text that will be displayed. This has a limit of 255 characters}} | ||
| + | {{bullet1|Notice Visibility|The visibility of the notice (Portals | Service Desk | Both). The default value is "Service Desk"}} | ||
| − | [[File: | + | :[[File:Information.png|14px|text-top|Information]] Once the authorisers have been submited the ''Auto Assign Authorisation'' BPM node is used to distribute the authorisation tasks. The ''Auto Assign Authorisation'' BPM Node must follow the ''Wait for List of Request Authorisors'' BPM Node, either immediately after or later on in the workflow at the point when you want the authorisations to be sent out. |
| − | < | + | }} |
| − | + | <!-- ****************************************************************************************************************************** --> | |
| − | + | <!-- * Wait for Attachment * --> | |
| − | + | <!-- ****************************************************************************************************************************** --> | |
| − | * | + | {{BPMAutomation|Wait_for_Attachment|Wait for Attachment| |
| − | + | [[File:bpmwaitforattachment.png|thumb|link=https://wiki.hornbill.com/images/6/67/Bpmwaitforattachment.png]]| | |
| − | + | Use this Hornbill Automation to suspend a Request's workflow until an attachment has been added to the request| | |
| − | + | {{bullet1|Request Id|In almost all cases, this should be set to ''Auto'' which will take the global variable for the request ID that the BPM is associated and apply all selected options to this request}} | |
| − | + | {{bullet1|Action Focus|Sets the Action Item on a request that will be in focus.}} | |
| − | + | {{bullet1|Expire Period|The length of time to wait until the node expires and the workflow will automatically continue. This is based on the Working Time Calendar defined in the setting '''guest.app.timer.defaultCalendar'''.}} | |
| − | + | {{bullet1|Add Notice|Select Yes to add a notice to the top of the request}} | |
| − | + | {{bullet1|Notice Type|The type of notice (Alert or Information). The default value is "Information".}} | |
| − | + | {{bullet1|Notice Text|The text that will be displayed. This has a limit of 255 characters}} | |
| − | + | {{bullet1|Notice Visibility|The visibility of the notice (Portals | Service Desk | Both). The default value is "Service Desk"}} | |
| − | + | }} | |
| − | + | <!-- ****************************************************************************************************************************** --> | |
| − | * | + | <!-- * Wait for Request Closure * --> |
| − | + | <!-- ****************************************************************************************************************************** --> | |
| − | + | {{BPMAutomation|Wait_for_Request_Closure|Wait for Request Closure| | |
| − | + | [[File:bpmwaitforclosure.png|thumb|link=https://wiki.hornbill.com/images/0/0a/Bpmwaitforclosure.png]]| | |
| − | + | Use this Hornbill Automation to suspend a Request's workflow until the request has a status of ''closed''.| | |
| − | + | {{bullet1|Request Id|In almost all cases, this should be set to ''Auto'' which will take the global variable for the request ID that the BPM is associated and apply all selected options to this request}} | |
| − | + | {{bullet1|Action Focus|Sets the Action Item on a request that will be in focus.}} | |
| − | + | {{bullet1|Expire Period|The length of time to wait until the node expires and the workflow will automatically continue. This is based on the Working Time Calendar defined in the setting '''guest.app.timer.defaultCalendar'''.}} | |
| − | + | {{bullet1|Add Notice|Select Yes to add a notice to the top of the request}} | |
| − | + | {{bullet1|Notice Type|The type of notice (Alert or Information). The default value is "Information".}} | |
| − | + | {{bullet1|Notice Text|The text that will be displayed. This has a limit of 255 characters}} | |
| − | + | {{bullet1|Notice Visibility|The visibility of the notice (Portals | Service Desk | Both). The default value is "Service Desk"}} | |
| − | + | }} | |
| − | + | <!-- ****************************************************************************************************************************** --> | |
| − | + | <!-- * Wait for Request Closure Category * --> | |
| − | + | <!-- ****************************************************************************************************************************** --> | |
| − | + | {{BPMAutomation|Wait_for_Request_Closure_Category|Wait for Request Closure Category| | |
| − | + | [[File:bpmwaitforclosurecategory.png|thumb|link=https://wiki.hornbill.com/images/2/2b/Bpmwaitforclosurecategory.png]]| | |
| − | : | + | Use this Hornbill Automation to suspend a Request's workflow until the Closure Category has been set.| |
| − | + | {{bullet1|Request Id|In almost all cases, this should be set to ''Auto'' which will take the global variable for the request ID that the BPM is associated and apply all selected options to this request}} | |
| − | + | {{bullet1|Action Focus|Sets the Action Item on a request that will be in focus.}} | |
| − | + | {{bullet1|Expire Period|The length of time to wait until the node expires and the workflow will automatically continue. This is based on the Working Time Calendar defined in the setting '''guest.app.timer.defaultCalendar'''.}} | |
| − | + | {{bullet1|Add Notice|Select Yes to add a notice to the top of the request}} | |
| − | + | {{bullet1|Notice Type|The type of notice (Alert or Information). The default value is "Information".}} | |
| − | + | {{bullet1|Notice Text|The text that will be displayed. This has a limit of 255 characters}} | |
| − | + | {{bullet1|Notice Visibility|The visibility of the notice (Portals | Service Desk | Both). The default value is "Service Desk"}} | |
| − | + | }} | |
| − | + | <!-- ****************************************************************************************************************************** --> | |
| − | + | <!-- * Wait for Customer * --> | |
| − | + | <!-- ****************************************************************************************************************************** --> | |
| − | + | {{BPMAutomation|Wait_for_Customer|Wait for Customer| | |
| − | + | [[File:bpmwaitforcustomer.png|thumb|link=https://wiki.hornbill.com/images/a/a2/Bpmwaitforcustomer.png]]| | |
| − | < | + | Use this Hornbill Automation to suspend a Request's workflow until the Customer has been set.| |
| − | < | + | {{bullet1|Request Id|In almost all cases, this should be set to ''Auto'' which will take the global variable for the request ID that the BPM is associated and apply all selected options to this request}} |
| − | + | {{bullet1|Action Focus|Sets the Action Item on a request that will be in focus.}} | |
| − | + | {{bullet1|Expire Period|The length of time to wait until the node expires and the workflow will automatically continue. This is based on the Working Time Calendar defined in the setting '''guest.app.timer.defaultCalendar'''.}} | |
| − | + | {{bullet1|Add Notice|Select Yes to add a notice to the top of the request}} | |
| − | + | {{bullet1|Notice Type|The type of notice (Alert or Information). The default value is "Information".}} | |
| − | + | {{bullet1|Notice Text|The text that will be displayed. This has a limit of 255 characters}} | |
| − | + | {{bullet1|Notice Visibility|The visibility of the notice (Portals | Service Desk | Both). The default value is "Service Desk"}} | |
| − | + | }} | |
| − | + | <!-- ***************************************************************************************************************************** --> | |
| − | + | <!-- * Wait for Feedback * --> | |
| − | + | <!-- ***************************************************************************************************************************** --> | |
| − | + | {{BPMAutomation|SuspendAndWaitForFeedback|Wait for Feedback| | |
| − | {{ | + | [[File:bpmswaitforfeedback.png|thumb|link=https://wiki.hornbill.com/images/8/83/Bpmswaitforfeedback.png]]| |
| − | + | Use this Hornbill Automation to suspend a Request's workflow until the Customer has provided feedback on the request.| | |
| − | + | {{bullet1|Request Id|In almost all cases, this should be set to ''Auto'' which will take the global variable for the request ID that the BPM is associated and apply all selected options to this request}} | |
| − | + | {{bullet1|Action Focus|Sets the Action Item on a request that will be in focus.}} | |
| − | {{ | + | {{bullet1|Expire Period|The length of time to wait until the node expires and the workflow will automatically continue. This is based on the Working Time Calendar defined in the setting '''guest.app.timer.defaultCalendar'''.}} |
| − | {{ | + | {{bullet1|Add Notice|Select Yes to add a notice to the top of the request}} |
| − | {{ | + | {{bullet1|Notice Type|The type of notice (Alert or Information). The default value is "Information".}} |
| − | |} | + | {{bullet1|Notice Text|The text that will be displayed. This has a limit of 255 characters}} |
| − | + | {{bullet1|Notice Visibility|The visibility of the notice (Portals | Service Desk | Both). The default value is "Service Desk"}} | |
| − | + | }} | |
| − | + | <!-- ************************************************************************************************************** --> | |
| − | + | <!-- * Wait for Request Description * --> | |
| + | <!-- ************************************************************************************************************** --> | ||
| + | {{BPMAutomation|Wait_for_Request_Description|Wait for Request Description| | ||
| + | [[File:bpmwaitfordescription.png|thumb|link=https://wiki.hornbill.com/images/a/ad/Bpmwaitfordescription.png]]| | ||
| + | Use this Hornbill Automation to suspend a Request's workflow until a description has been provided on the request.| | ||
| + | {{bullet1|Request Id|In almost all cases, this should be set to ''Auto'' which will take the global variable for the request ID that the BPM is associated and apply all selected options to this request}} | ||
| + | {{bullet1|Action Focus|Sets the Action Item on a request that will be in focus.}} | ||
| + | {{bullet1|Expire Period|The length of time to wait until the node expires and the workflow will automatically continue. This is based on the Working Time Calendar defined in the setting '''guest.app.timer.defaultCalendar'''.}} | ||
| + | {{bullet1|Add Notice|Select Yes to add a notice to the top of the request}} | ||
| + | {{bullet1|Notice Type|The type of notice (Alert or Information). The default value is "Information".}} | ||
| + | {{bullet1|Notice Text|The text that will be displayed. This has a limit of 255 characters}} | ||
| + | {{bullet1|Notice Visibility|The visibility of the notice (Portals | Service Desk | Both). The default value is "Service Desk"}} | ||
| + | }} | ||
| + | <!-- ************************************************************************************************************** --> | ||
| + | <!-- * Wait for Document * --> | ||
| + | <!-- ************************************************************************************************************** --> | ||
| + | {{BPMAutomation|Wait_for_Document|Wait for Document| | ||
| + | [[File:bpmwaitfordocument.png|thumb|link=]]| | ||
| + | Use this Hornbill Automation to suspend a Request's workflow until a document from Document Manager has been linked to the request| | ||
| + | {{bullet1|Request Id|In almost all cases, this should be set to ''Auto'' which will take the global variable for the request ID that the BPM is associated and apply all selected options to this request}} | ||
| + | {{bullet1|Action Focus|Sets the Action Item on a request that will be in focus.}} | ||
| + | {{bullet1|Expire Period|The length of time to wait until the node expires and the workflow will automatically continue. This is based on the Working Time Calendar defined in the setting '''guest.app.timer.defaultCalendar'''.}} | ||
| + | {{bullet1|Add Notice|Select Yes to add a notice to the top of the request}} | ||
| + | {{bullet1|Notice Type|The type of notice (Alert or Information). The default value is "Information".}} | ||
| + | {{bullet1|Notice Text|The text that will be displayed. This has a limit of 255 characters}} | ||
| + | {{bullet1|Notice Visibility|The visibility of the notice (Portals | Service Desk | Both). The default value is "Service Desk"}} | ||
| + | }} | ||
| + | <!-- ************************************************************************************************************** --> | ||
| + | <!-- * Wait for Request Email * --> | ||
| + | <!-- ************************************************************************************************************** --> | ||
| + | {{BPMAutomation|waitForRequestEmail|Wait for Request Email| | ||
| + | [[File:bpmwaitforrequestemail.png|thumb|link=https://wiki.hornbill.com/images/a/a1/Bpmwaitforrequestemail.png]]| | ||
| + | Use this Hornbill Automation to suspend a Request's workflow until an email has been sent from the request.| | ||
| + | {{bullet1|Request Id|In almost all cases, this should be set to ''Auto'' which will take the global variable for the request ID that the BPM is associated and apply all selected options to this request}} | ||
| + | {{bullet1|Action Focus|Sets the Action Item on a request that will be in focus.}} | ||
| + | {{bullet1|Expire Period|The length of time to wait until the node expires and the workflow will automatically continue. This is based on the Working Time Calendar defined in the setting '''guest.app.timer.defaultCalendar'''.}} | ||
| + | {{bullet1|Add Notice|Select Yes to add a notice to the top of the request}} | ||
| + | {{bullet1|Notice Type|The type of notice (Alert or Information). The default value is "Information".}} | ||
| + | {{bullet1|Notice Text|The text that will be displayed. This has a limit of 255 characters}} | ||
| + | {{bullet1|Notice Visibility|The visibility of the notice (Portals | Service Desk | Both). The default value is "Service Desk"}} | ||
| + | }} | ||
| + | <!-- **************************************************************************************************************************** --> | ||
| + | <!-- * Wait for External Reference * --> | ||
| + | <!-- **************************************************************************************************************************** --> | ||
| + | {{BPMAutomation|Wait_for_External_Reference|Wait for External Reference| | ||
| + | [[File:bpmwaitforexternalreference.png|thumb|link=https://wiki.hornbill.com/images/9/9c/Bpmwaitforexternalreference.png]]| | ||
| + | Use this Hornbill Automation to suspend a Request's workflow until an external reference has been provided.| | ||
| + | {{bullet1|Request Id|In almost all cases, this should be set to ''Auto'' which will take the global variable for the request ID that the BPM is associated and apply all selected options to this request}} | ||
| + | {{bullet1|Action Focus|Sets the Action Item on a request that will be in focus.}} | ||
| + | {{bullet1|Expire Period|The length of time to wait until the node expires and the workflow will automatically continue. This is based on the Working Time Calendar defined in the setting '''guest.app.timer.defaultCalendar'''.}} | ||
| + | {{bullet1|Add Notice|Select Yes to add a notice to the top of the request}} | ||
| + | {{bullet1|Notice Type|The type of notice (Alert or Information). The default value is "Information".}} | ||
| + | {{bullet1|Notice Text|The text that will be displayed. This has a limit of 255 characters}} | ||
| + | {{bullet1|Notice Visibility|The visibility of the notice (Portals | Service Desk | Both). The default value is "Service Desk"}} | ||
| + | }} | ||
| + | <!-- ***************************************************************************************************************************** --> | ||
| + | <!-- * Wait for Impact Assessment * --> | ||
| + | <!-- ***************************************************************************************************************************** --> | ||
| + | {{BPMAutomation|Wait_for_Impact_Assessment|Wait for Impact Assessment| | ||
| + | [[File:bpmwaitforimpactassessment.png|thumb|link=https://wiki.hornbill.com/images/c/c9/Bpmwaitforimpactassessment.png]]| | ||
| + | Use this Hornbill Automation to suspend a Request's workflow until an Impact Assessment has been completed| | ||
| + | {{bullet1|Request Id|In almost all cases, this should be set to ''Auto'' which will take the global variable for the request ID that the BPM is associated and apply all selected options to this request}} | ||
| + | {{bullet1|Action Focus|Sets the Action Item on a request that will be in focus.}} | ||
| + | {{bullet1|Expire Period|The length of time to wait until the node expires and the workflow will automatically continue. This is based on the Working Time Calendar defined in the setting '''guest.app.timer.defaultCalendar'''.}} | ||
| + | {{bullet1|Add Notice|Select Yes to add a notice to the top of the request}} | ||
| + | {{bullet1|Notice Type|The type of notice (Alert or Information). The default value is "Information".}} | ||
| + | {{bullet1|Notice Text|The text that will be displayed. This has a limit of 255 characters}} | ||
| + | {{bullet1|Notice Visibility|The visibility of the notice (Portals | Service Desk | Both). The default value is "Service Desk"}} | ||
| + | }} | ||
| + | <!-- ***************************************************************************************************************************** --> | ||
| + | <!-- * Wait for Linked Asset * --> | ||
| + | <!-- ***************************************************************************************************************************** --> | ||
| + | {{BPMAutomation|Wait_for_Linked_Assets|Wait for Linked Assets| | ||
| + | [[File:bpmwaitforlinkedassets.png|thumb|link=https://wiki.hornbill.com/images/d/df/Bpmwaitforlinkedassets.png]]| | ||
| + | Use this Hornbill Automation to suspend a Request's workflow until one or more Assets have been linked to the request| | ||
| + | {{bullet1|Request Id|In almost all cases, this should be set to ''Auto'' which will take the global variable for the request ID that the BPM is associated and apply all selected options to this request}} | ||
| + | {{bullet1|Action Focus|Sets the Action Item on a request that will be in focus.}} | ||
| + | {{bullet1|Expire Period|The length of time to wait until the node expires and the workflow will automatically continue. This is based on the Working Time Calendar defined in the setting '''guest.app.timer.defaultCalendar'''.}} | ||
| + | {{bullet1|Add Notice|Select Yes to add a notice to the top of the request}} | ||
| + | {{bullet1|Notice Type|The type of notice (Alert or Information). The default value is "Information".}} | ||
| + | {{bullet1|Notice Text|The text that will be displayed. This has a limit of 255 characters}} | ||
| + | {{bullet1|Notice Visibility|The visibility of the notice (Portals | Service Desk | Both). The default value is "Service Desk"}} | ||
| + | }} | ||
| + | <!-- ****************************************************************************************************************************** --> | ||
| + | <!-- * Wait for Linked Request * --> | ||
| + | <!-- ****************************************************************************************************************************** --> | ||
| + | {{BPMAutomation|waitForLinkedRequest|Wait for Linked Request| | ||
| + | [[File:bpmwaitforlinkedrequest.png|thumb|link=https://wiki.hornbill.com/images/5/51/Bpmwaitforlinkedrequest.png]]| | ||
| + | Use this Hornbill Automation to suspend a Request's workflow until a linked request has been added| | ||
| + | {{bullet1|Request Id|In almost all cases, this should be set to ''Auto'' which will take the global variable for the request ID that the BPM is associated and apply all selected options to this request}} | ||
| + | {{bullet1|Request Type|This limits the suspend to only wait for updates from linked requests of the selected type}} | ||
| + | {{bullet1|Linked Request ID|This limits the suspend to only wait for updates from a linked request with provided Request ID. This can use variables to automatically populate this information.}} | ||
| + | {{bullet1|Contains|Include a string of text which will match the text within the linked request's timeline}} | ||
| + | {{bullet1|Expire Period|The length of time to wait until the node expires and the workflow will automatically continue. This is based on the Working Time Calendar defined in the setting '''guest.app.timer.defaultCalendar'''.}} | ||
| + | {{bullet1|Add Notice|Select Yes to add a notice to the top of the request}} | ||
| + | {{bullet1|Notice Type|The type of notice (Alert or Information). The default value is "Information".}} | ||
| + | {{bullet1|Notice Text|The text that will be displayed. This has a limit of 255 characters}} | ||
| + | {{bullet1|Notice Visibility|The visibility of the notice (Portals | Service Desk | Both). The default value is "Service Desk"}} | ||
| + | }} | ||
| + | <!-- ************************************************************************************************************** --> | ||
| + | <!-- * Wait for Linked Requests Completion * --> | ||
| + | <!-- ************************************************************************************************************** --> | ||
| + | {{BPMAutomation|waitForLinkedRequestsCompletion|Wait for Linked Requests Completion| | ||
| + | [[File:bpmwaitforlinkedrequestscompletion.png|thumb|link=https://wiki.hornbill.com/images/0/05/Bpmwaitforlinkedrequestscompletion.png]]| | ||
| + | This automation suspends the workflow and waits for linked requests to be of a specified status before being allowed to continue.| | ||
| + | {{bullet1|Request Id|In almost all cases, this should be set to ''Auto'' which will take the global variable for the request ID that the BPM is associated and apply all selected options to this request}} | ||
| + | {{bullet1|Resolved linked requests are completed|(Yes, No) "resolved" request status constitutes the completion of a linked request (Default: Yes).}} | ||
| + | {{bullet1|Closed linked requests are completed|(Yes, No) "closed" request status constitutes the completion of a linked request (Default: Yes)}} | ||
| + | {{bullet1|Cancelled linked requests are completed|(Yes, No) "cancelled" request status constitutes the completion of a linked request (Default: Yes)}} | ||
| + | {{bullet1|Action Focus| This option determines the Action Tab that a Request will focus on while the process is suspended.}} | ||
| + | {{bullet1|Expire Period|The length of time to wait until the node expires and the workflow will automatically continue. This is based on the Working Time Calendar defined in the setting '''guest.app.timer.defaultCalendar'''.}} | ||
| + | {{bullet1|Add Notice|Select Yes to add a notice to the top of the request}} | ||
| + | {{bullet1|Notice Type|The type of notice (Alert or Information). The default value is "Information".}} | ||
| + | {{bullet1|Notice Text|The text that will be displayed. This has a limit of 255 characters}} | ||
| + | {{bullet1|Notice Visibility|The visibility of the notice (Portals | Service Desk | Both). The default value is "Service Desk"}} | ||
| + | }} | ||
| + | <!-- ************************************************************************************************************** --> | ||
| + | <!-- * Wait for Linked Request Update * --> | ||
| + | <!-- ************************************************************************************************************** --> | ||
| + | {{BPMAutomation|waitForLinkedRequestUpdate|Wait for Linked Request Update| | ||
| + | [[File:bpmwaitforlinkedrequestupdate.png|thumb|link=https://wiki.hornbill.com/images/f/fc/Bpmwaitforlinkedrequestupdate.png]]| | ||
| + | Use this Hornbill Automation to suspend a Request's workflow until an update has been made on a linked request.| | ||
| + | {{bullet1|Request Id|In almost all cases, this should be set to ''Auto'' which will take the global variable for the request ID that the BPM is associated and apply all selected options to this request}} | ||
| + | {{bullet1|Request Type|This limits the suspend to only wait for updates from linked requests of the selected type}} | ||
| + | {{bullet1|Linked Request ID|This limits the suspend to only wait for updates from a linked request with provided Request ID. This can use variables to automatically populate this information.}} | ||
| + | {{bullet1|Contains|Include a string of text which will match the text within the linked request's timeline}} | ||
| + | {{bullet1|Expire Period|The length of time to wait until the node expires and the workflow will automatically continue. This is based on the Working Time Calendar defined in the setting '''guest.app.timer.defaultCalendar'''.}} | ||
| + | {{bullet1|Add Notice|Select Yes to add a notice to the top of the request}} | ||
| + | {{bullet1|Notice Type|The type of notice (Alert or Information). The default value is "Information".}} | ||
| + | {{bullet1|Notice Text|The text that will be displayed. This has a limit of 255 characters}} | ||
| + | {{bullet1|Notice Visibility|The visibility of the notice (Portals | Service Desk | Both). The default value is "Service Desk"}} | ||
| + | }} | ||
| + | <!-- ***************************************************************************************************************************** --> | ||
| + | <!-- * Wait for Linked Services * --> | ||
| + | <!-- ***************************************************************************************************************************** --> | ||
| + | {{BPMAutomation|Wait_for_Linked_Services|Wait for Linked Services| | ||
| + | [[File:bpmwaitforlinkedservice.png|thumb|link=https://wiki.hornbill.com/images/6/61/Bpmwaitforlinkedservice.png]]| | ||
| + | Use this Hornbill Automation to suspend a Request's workflow until an external reference has been provided.| | ||
| + | {{bullet1|Request Id|In almost all cases, this should be set to ''Auto'' which will take the global variable for the request ID that the BPM is associated and apply all selected options to this request}} | ||
| + | {{bullet1|Action Focus|Sets the Action Item on a request that will be in focus.}} | ||
| + | {{bullet1|Expire Period|The length of time to wait until the node expires and the workflow will automatically continue. This is based on the Working Time Calendar defined in the setting '''guest.app.timer.defaultCalendar'''.}} | ||
| + | {{bullet1|Add Notice|Select Yes to add a notice to the top of the request}} | ||
| + | {{bullet1|Notice Type|The type of notice (Alert or Information). The default value is "Information".}} | ||
| + | {{bullet1|Notice Text|The text that will be displayed. This has a limit of 255 characters}} | ||
| + | {{bullet1|Notice Visibility|The visibility of the notice (Portals | Service Desk | Both). The default value is "Service Desk"}} | ||
| + | }} | ||
| + | <!-- ****************************************************************************************************************************** --> | ||
| + | <!-- * Wait for New Request Owner * --> | ||
| + | <!-- ****************************************************************************************************************************** --> | ||
| + | {{BPMAutomation|Wait_for_New_Request_Owner|Wait for New Request Owner| | ||
| + | [[File:bpmwaitfornewrequestowner.png|thumb|link=https://wiki.hornbill.com/images/5/54/Bpmwaitfornewrequestowner.png]]| | ||
| + | Use this Hornbill Automation to suspend a Request's workflow until the ownership of the request has been changed from one owner to another.| | ||
| + | {{bullet1|Request Id|In almost all cases, this should be set to ''Auto'' which will take the global variable for the request ID that the BPM is associated and apply all selected options to this request}} | ||
| + | {{bullet1|Action Focus|Sets the Action Item on a request that will be in focus.}} | ||
| + | {{bullet1|Expire Period|The length of time to wait until the node expires and the workflow will automatically continue. This is based on the Working Time Calendar defined in the setting '''guest.app.timer.defaultCalendar'''.}} | ||
| + | {{bullet1|Add Notice|Select Yes to add a notice to the top of the request}} | ||
| + | {{bullet1|Notice Type|The type of notice (Alert or Information). The default value is "Information".}} | ||
| + | {{bullet1|Notice Text|The text that will be displayed. This has a limit of 255 characters}} | ||
| + | {{bullet1|Notice Visibility|The visibility of the notice (Portals | Service Desk | Both). The default value is "Service Desk"}} | ||
| + | }} | ||
| + | <!-- ****************************************************************************************************************************** --> | ||
| + | <!-- * Wait for Request Off Hold * --> | ||
| + | <!-- ****************************************************************************************************************************** --> | ||
| + | {{BPMAutomation|Wait_for_Request_Off_Hold|Wait for Request Off Hold| | ||
| + | [[File:bpmwaitforoffhold.png|thumb|link=https://wiki.hornbill.com/images/3/3d/Bpmwaitforoffhold.png]]| | ||
| + | Use this Hornbill Automation to suspend a Request's workflow until the request status has come off hold.| | ||
| + | {{bullet1|Request Id|In almost all cases, this should be set to ''Auto'' which will take the global variable for the request ID that the BPM is associated and apply all selected options to this request}} | ||
| + | {{bullet1|Action Focus|Sets the Action Item on a request that will be in focus.}} | ||
| + | {{bullet1|Expire Period|The length of time to wait until the node expires and the workflow will automatically continue. This is based on the Working Time Calendar defined in the setting '''guest.app.timer.defaultCalendar'''.}} | ||
| + | {{bullet1|Add Notice|Select Yes to add a notice to the top of the request}} | ||
| + | {{bullet1|Notice Type|The type of notice (Alert or Information). The default value is "Information".}} | ||
| + | {{bullet1|Notice Text|The text that will be displayed. This has a limit of 255 characters}} | ||
| + | {{bullet1|Notice Visibility|The visibility of the notice (Portals | Service Desk | Both). The default value is "Service Desk"}} | ||
| + | }} | ||
| + | <!-- ****************************************************************************************************************************** --> | ||
| + | <!-- * Wait for Request Owner * --> | ||
| + | <!-- ****************************************************************************************************************************** --> | ||
| + | {{BPMAutomation|Wait_for_Request_Owner|Wait for Request Owner| | ||
| + | [[File:bpmwaitforowner.png|thumb|link=https://wiki.hornbill.com/images/e/ec/Bpmwaitforowner.png]]| | ||
| + | Use this Hornbill Automation to suspend a Request's workflow until an owner has been assigned to the request.| | ||
| + | {{bullet1|Request Id|In almost all cases, this should be set to ''Auto'' which will take the global variable for the request ID that the BPM is associated and apply all selected options to this request}} | ||
| + | {{bullet1|Action Focus|Sets the Action Item on a request that will be in focus.}} | ||
| + | {{bullet1|Expire Period|The length of time to wait until the node expires and the workflow will automatically continue. This is based on the Working Time Calendar defined in the setting '''guest.app.timer.defaultCalendar'''.}} | ||
| + | {{bullet1|Add Notice|Select Yes to add a notice to the top of the request}} | ||
| + | {{bullet1|Notice Type|The type of notice (Alert or Information). The default value is "Information".}} | ||
| + | {{bullet1|Notice Text|The text that will be displayed. This has a limit of 255 characters}} | ||
| + | {{bullet1|Notice Visibility|The visibility of the notice (Portals | Service Desk | Both). The default value is "Service Desk"}} | ||
| + | }} | ||
| + | <!-- ****************************************************************************************************************************** --> | ||
| + | <!-- * Wait for Request Priority * --> | ||
| + | <!-- ****************************************************************************************************************************** --> | ||
| + | {{BPMAutomation|Wait_for_Request_Priority|Wait for Request Priority| | ||
| + | [[File:bpmwaitforpriority.png|thumb|link=https://wiki.hornbill.com/images/b/b5/Bpmwaitforpriority.png]]| | ||
| + | Use this Hornbill Automation to suspend a Request's workflow until a priority has been set on the request.| | ||
| + | {{bullet1|Request Id|In almost all cases, this should be set to ''Auto'' which will take the global variable for the request ID that the BPM is associated and apply all selected options to this request}} | ||
| + | {{bullet1|Action Focus|Sets the Action Item on a request that will be in focus.}} | ||
| + | {{bullet1|Expire Period|The length of time to wait until the node expires and the workflow will automatically continue. This is based on the Working Time Calendar defined in the setting '''guest.app.timer.defaultCalendar'''.}} | ||
| + | {{bullet1|Add Notice|Select Yes to add a notice to the top of the request}} | ||
| + | {{bullet1|Notice Type|The type of notice (Alert or Information). The default value is "Information".}} | ||
| + | {{bullet1|Notice Text|The text that will be displayed. This has a limit of 255 characters}} | ||
| + | {{bullet1|Notice Visibility|The visibility of the notice (Portals | Service Desk | Both). The default value is "Service Desk"}} | ||
| + | }} | ||
| + | <!-- ****************************************************************************************************************************** --> | ||
| + | <!-- * Wait for Request Category * --> | ||
| + | <!-- ****************************************************************************************************************************** --> | ||
| + | {{BPMAutomation|Wait_for_Request_Category|Wait for Request Category| | ||
| + | [[File:bpmwaitforrequestcategory.png|thumb|link=https://wiki.hornbill.com/images/b/b2/Bpmwaitforrequestcategory.png]]| | ||
| + | Use this Hornbill Automation to suspend a Request's workflow until a category has been set on the request.| | ||
| + | {{bullet1|Request Id|In almost all cases, this should be set to ''Auto'' which will take the global variable for the request ID that the BPM is associated and apply all selected options to this request}} | ||
| + | {{bullet1|Action Focus|Sets the Action Item on a request that will be in focus.}} | ||
| + | {{bullet1|Expire Period|The length of time to wait until the node expires and the workflow will automatically continue. This is based on the Working Time Calendar defined in the setting '''guest.app.timer.defaultCalendar'''.}} | ||
| + | {{bullet1|Add Notice|Select Yes to add a notice to the top of the request}} | ||
| + | {{bullet1|Notice Type|The type of notice (Alert or Information). The default value is "Information".}} | ||
| + | {{bullet1|Notice Text|The text that will be displayed. This has a limit of 255 characters}} | ||
| + | {{bullet1|Notice Visibility|The visibility of the notice (Portals | Service Desk | Both). The default value is "Service Desk"}} | ||
| + | }} | ||
| + | <!-- ****************************************************************************************************************************** --> | ||
| + | <!-- * Wait for Request Resolution * --> | ||
| + | <!-- ****************************************************************************************************************************** --> | ||
| + | {{BPMAutomation|Wait_for_Request_Resolution|Wait for Request Resolution| | ||
| + | [[File:bpmwaitforrequestresolution.png|thumb|link=https://wiki.hornbill.com/images/f/f5/Bpmwaitforrequestresolution.png]]| | ||
| + | Use this Hornbill Automation to suspend a Request's workflow until the request status has been set to resolved.| | ||
| + | {{bullet1|Request Id|In almost all cases, this should be set to ''Auto'' which will take the global variable for the request ID that the BPM is associated and apply all selected options to this request}} | ||
| + | {{bullet1|Action Focus|Sets the Action Item on a request that will be in focus.}} | ||
| + | {{bullet1|Expire Period|The length of time to wait until the node expires and the workflow will automatically continue. This is based on the Working Time Calendar defined in the setting '''guest.app.timer.defaultCalendar'''.}} | ||
| + | {{bullet1|Add Notice|Select Yes to add a notice to the top of the request}} | ||
| + | {{bullet1|Notice Type|The type of notice (Alert or Information). The default value is "Information".}} | ||
| + | {{bullet1|Notice Text|The text that will be displayed. This has a limit of 255 characters}} | ||
| + | {{bullet1|Notice Visibility|The visibility of the notice (Portals | Service Desk | Both). The default value is "Service Desk"}} | ||
| + | }} | ||
| + | <!-- ****************************************************************************************************************************** --> | ||
| + | <!-- * Wait for Request Site * --> | ||
| + | <!-- ****************************************************************************************************************************** --> | ||
| + | {{BPMAutomation|Wait_for_Request_Site|Wait for Request Site| | ||
| + | [[File:bpmwaitforrequestsite.png|thumb|link=https://wiki.hornbill.com/images/4/4b/Bpmwaitforrequestsite.png]]| | ||
| + | Use this Hornbill Automation to suspend a Request's workflow until a site has been linked to the request.| | ||
| + | {{bullet1|Request Id|In almost all cases, this should be set to ''Auto'' which will take the global variable for the request ID that the BPM is associated and apply all selected options to this request}} | ||
| + | {{bullet1|Action Focus|Sets the Action Item on a request that will be in focus.}} | ||
| + | {{bullet1|Expire Period|The length of time to wait until the node expires and the workflow will automatically continue. This is based on the Working Time Calendar defined in the setting '''guest.app.timer.defaultCalendar'''.}} | ||
| + | {{bullet1|Add Notice|Select Yes to add a notice to the top of the request}} | ||
| + | {{bullet1|Notice Type|The type of notice (Alert or Information). The default value is "Information".}} | ||
| + | {{bullet1|Notice Text|The text that will be displayed. This has a limit of 255 characters}} | ||
| + | {{bullet1|Notice Visibility|The visibility of the notice (Portals | Service Desk | Both). The default value is "Service Desk"}} | ||
| + | }} | ||
| + | <!-- ****************************************************************************************************************************** --> | ||
| + | <!-- * Wait for Status Change * --> | ||
| + | <!-- ****************************************************************************************************************************** --> | ||
| + | {{BPMAutomation|Wait_for_Status_Change|Wait for Status Change| | ||
| + | [[File:bpmwaitforstatuschange.png|thumb|link=https://wiki.hornbill.com/images/0/04/Bpmwaitforstatuschange.png]]| | ||
| + | Use this Hornbill Automation to suspend a Request's workflow until the status of the request has changed from one status to another.| | ||
| + | {{bullet1|Request Id|In almost all cases, this should be set to ''Auto'' which will take the global variable for the request ID that the BPM is associated and apply all selected options to this request}} | ||
| + | {{bullet1|Action Focus|Sets the Action Item on a request that will be in focus.}} | ||
| + | {{bullet1|From Status|The workflow will only continue when the request is changed from this status}} | ||
| + | {{bullet1|Expire Period|The length of time to wait until the node expires and the workflow will automatically continue. This is based on the Working Time Calendar defined in the setting '''guest.app.timer.defaultCalendar'''.}} | ||
| + | {{bullet1|Add Notice|Select Yes to add a notice to the top of the request}} | ||
| + | {{bullet1|Notice Type|The type of notice (Alert or Information). The default value is "Information".}} | ||
| + | {{bullet1|Notice Text|The text that will be displayed. This has a limit of 255 characters}} | ||
| + | {{bullet1|Notice Visibility|The visibility of the notice (Portals | Service Desk | Both). The default value is "Service Desk"}} | ||
| + | }} | ||
| + | <!-- ****************************************************************************************************************************** --> | ||
| + | <!-- * Wait for Request Summary * --> | ||
| + | <!-- ****************************************************************************************************************************** --> | ||
| + | {{BPMAutomation|Wait_for_Request_Summary|Wait for Request Summary| | ||
| + | [[File:bpmwaitforrequestsummary.png|thumb|link=https://wiki.hornbill.com/images/4/47/Bpmwaitforrequestsummary.png]]| | ||
| + | Use this Hornbill Automation to suspend a Request's workflow until the summary has bee set against the request| | ||
| + | {{bullet1|Request Id|In almost all cases, this should be set to ''Auto'' which will take the global variable for the request ID that the BPM is associated and apply all selected options to this request}} | ||
| + | {{bullet1|Action Focus|Sets the Action Item on a request that will be in focus.}} | ||
| + | {{bullet1|Expire Period|The length of time to wait until the node expires and the workflow will automatically continue. This is based on the Working Time Calendar defined in the setting '''guest.app.timer.defaultCalendar'''.}} | ||
| + | {{bullet1|Add Notice|Select Yes to add a notice to the top of the request}} | ||
| + | {{bullet1|Notice Type|The type of notice (Alert or Information). The default value is "Information".}} | ||
| + | {{bullet1|Notice Text|The text that will be displayed. This has a limit of 255 characters}} | ||
| + | {{bullet1|Notice Visibility|The visibility of the notice (Portals | Service Desk | Both). The default value is "Service Desk"}} | ||
| + | }} | ||
| + | <!-- ****************************************************************************************************************************** --> | ||
| + | <!-- * Wait for Request Team * --> | ||
| + | <!-- ****************************************************************************************************************************** --> | ||
| + | {{BPMAutomation|Wait_for_Request_Team|Wait for Request Team| | ||
| + | [[File:bpmwaitforrequestteam.png|thumb|link=https://wiki.hornbill.com/images/4/46/Bpmwaitforrequestteam.png]]| | ||
| + | Use this Hornbill Automation to suspend a Request's workflow until an team has been assigned to the request.| | ||
| + | {{bullet1|Request Id|In almost all cases, this should be set to ''Auto'' which will take the global variable for the request ID that the BPM is associated and apply all selected options to this request}} | ||
| + | {{bullet1|Action Focus|Sets the Action Item on a request that will be in focus.}} | ||
| + | {{bullet1|Expire Period|The length of time to wait until the node expires and the workflow will automatically continue. This is based on the Working Time Calendar defined in the setting '''guest.app.timer.defaultCalendar'''.}} | ||
| + | {{bullet1|Add Notice|Select Yes to add a notice to the top of the request}} | ||
| + | {{bullet1|Notice Type|The type of notice (Alert or Information). The default value is "Information".}} | ||
| + | {{bullet1|Notice Text|The text that will be displayed. This has a limit of 255 characters}} | ||
| + | {{bullet1|Notice Visibility|The visibility of the notice (Portals | Service Desk | Both). The default value is "Service Desk"}} | ||
| + | }} | ||
| + | <!-- ****************************************************************************************************************************** --> | ||
| + | <!-- * Wait for Request Update * --> | ||
| + | <!-- ****************************************************************************************************************************** --> | ||
| + | {{BPMAutomation|Wait_for_Request_Update|Wait for Request Update| | ||
| + | [[File:bpmwaitforrequestupdate.png|thumb|link=https://wiki.hornbill.com/images/c/c2/Bpmwaitforrequestupdate.png]]| | ||
| + | Use this Hornbill Automation to suspend a Request's workflow until an update, using the Update Action has been added to the request.| | ||
| + | {{bullet1|Request Id|In almost all cases, this should be set to ''Auto'' which will take the global variable for the request ID that the BPM is associated and apply all selected options to this request}} | ||
| + | {{bullet1|Action Focus|Sets the Action Item on a request that will be in focus.}} | ||
| + | {{bullet1|Expire Period|The length of time to wait until the node expires and the workflow will automatically continue. This is based on the Working Time Calendar defined in the setting '''guest.app.timer.defaultCalendar'''.}} | ||
| + | {{bullet1|Add Notice|Select Yes to add a notice to the top of the request}} | ||
| + | {{bullet1|Notice Type|The type of notice (Alert or Information). The default value is "Information".}} | ||
| + | {{bullet1|Notice Text|The text that will be displayed. This has a limit of 255 characters}} | ||
| + | {{bullet1|Notice Visibility|The visibility of the notice (Portals | Service Desk | Both). The default value is "Service Desk"}} | ||
| + | }} | ||
| + | |||
| + | <!-- ****************************************************************************************************************************** --> | ||
| + | <!-- * * --> | ||
| + | <!-- * Update Request * --> | ||
| + | <!-- * * --> | ||
| + | <!-- ****************************************************************************************************************************** --> | ||
| + | |||
| + | ===Update Request=== | ||
| + | Use the Update Request node to automatically update the values of specific Request attributes at any stage in the process. Examples being updating the Logging or Closing Categories of a Request. | ||
<div class="mw-collapsible mw-collapsed" data-collapsetext="Show Less" data-expandtext="Read More" style="width:700px"> | <div class="mw-collapsible mw-collapsed" data-collapsetext="Show Less" data-expandtext="Read More" style="width:700px"> | ||
| − | * | + | * Logging Category |
<div class="mw-collapsible-content"> | <div class="mw-collapsible-content"> | ||
| − | ::Requests > Update Request > | + | ::Requests > Update Request > Logging Category |
| − | + | Specify the logging category which will associated to the request. This is typically used where the category of the request is known based on the business process being associated against a specific request catalog item, and as such the analyst is not required to make a manual assessment and categorisation. | |
| − | [[File: | + | [[File:updateRequestCategoryNew.jpg|700px]] |
| − | :* ''' | + | :* '''Category''' - This option will prompt you to select a Category. If supplied, "Category (From Variable)" option will be ignored. |
| − | :* ''' | + | :* '''Category (From Variable)''' - This option requires you to provide the Id of a Category (Value of h_id column in h_sys_profiles table). This can be used when a field that is driven by a Simple List made up of Categories is set up in a Progressive Capture. This option should only be supplied if "Category" option is not set. |
| − | :* ''' | + | :* '''System Timeline Update''' - Select if the default system text will be added to the timeline for this action |
| − | :* '''System Timeline Update''' - Select if the default system text will be added to the timeline for this action | + | :* '''Manual Timeline Update''' - Select Yes to override the default System timeline Text, and add your own text which will appear in the timeline update for this action |
| + | :* '''Visibility''' - Choose what level of visibility will be automatically applied to this update. Choosing anything other than '''Customer''' will result in the customer not seeing the update in the timeline of their requests on the Service or Customer Portals. | ||
| + | </div> | ||
| + | </div> | ||
| + | |||
| + | <div class="mw-collapsible mw-collapsed" data-collapsetext="Show Less" data-expandtext="Read More" style="width:700px"> | ||
| + | * Closure Category | ||
| + | <div class="mw-collapsible-content"> | ||
| + | ::Requests > Update Request > Closure Category | ||
| + | |||
| + | Specify the closure category which will be associated to the request. This is typically used where the business process is set to automatically resolve or close and the analyst is not required to manually resolve and specify a closure category. | ||
| + | |||
| + | [[File:Closure_Category.png|600px]] | ||
| + | :* '''Category''' - This option will prompt you to select a Category. If supplied, "Category (From Variable)" option will be ignored. | ||
| + | :* '''Category (From Variable)''' - This option requires you to provide the Id of a Category (Value of h_id column in h_sys_profiles table). This can be used when a field that is driven by a Simple List made up of Categories is set up in a Progressive Capture. This option should only be supplied if "Category" option is not set. | ||
| + | :* '''System Timeline Update''' - Select if the default system text will be added to the timeline for this action | ||
:* '''Manual Timeline Update''' - Select Yes to override the default System timeline Text, and add your own text which will appear in the timeline update for this action | :* '''Manual Timeline Update''' - Select Yes to override the default System timeline Text, and add your own text which will appear in the timeline update for this action | ||
:* '''Visibility''' - Choose what level of visibility will be automatically applied to this update. Choosing anything other than '''Customer''' will result in the customer not seeing the update in the timeline of their requests on the Service or Customer Portals. | :* '''Visibility''' - Choose what level of visibility will be automatically applied to this update. Choosing anything other than '''Customer''' will result in the customer not seeing the update in the timeline of their requests on the Service or Customer Portals. | ||
| Line 1,949: | Line 3,130: | ||
</div> | </div> | ||
| − | <!-- ***************************** | + | <!-- ******************************************************************************************* --> |
| − | <div class="mw-collapsible mw-collapsed" data-collapsetext="Show Less" data-expandtext="Read More" style="width:700px" id=" | + | <div class="mw-collapsible mw-collapsed" data-collapsetext="Show Less" data-expandtext="Read More" style="width:700px"> |
| − | * | + | <div id="UpdateCustomer"></div> |
| + | * Update Customer | ||
<div class="mw-collapsible-content"> | <div class="mw-collapsible-content"> | ||
<div style="border:1px solid #e6e6e6; background:#f2f2f2; width:99%; padding:4px; margin-bottom:10px;"> | <div style="border:1px solid #e6e6e6; background:#f2f2f2; width:99%; padding:4px; margin-bottom:10px;"> | ||
| Line 1,957: | Line 3,139: | ||
|- valign="top" | |- valign="top" | ||
|style="width:700px"| | |style="width:700px"| | ||
| − | [[File:updaterequestdetailsbpm.png|thumb|link=https://wiki.hornbill.com/images/9/9e/Updaterequestdetailsbpm.png|Update Request Details BPM]] Use this operation to update the Summary and Description of a request. You can either add a new summary or description or append to the existing values. | + | [[File:bpmupdatecustomer.png|thumb|Update Customer|link=https://wiki.hornbill.com/images/f/f5/Bpmupdatecustomer.png]] |
| − | :* '''Request Id''' | + | ==== Update Customer ==== |
| + | Use this node to automatically add or update a request with a Customer | ||
| + | ==== Options ==== | ||
| + | {{Bullet1|Request ID|This is a mandatory setting that uses a variable to hold the Request Id of the request that is using this BPM. This should be set to Auto}} | ||
| + | {{Bullet1|Co-Worker|Select a Co-worker that will be used as the customer of the request}} | ||
| + | {{Bullet1|Contact|Select a Contact that will be used as the customer of the request}} | ||
| + | {{Bullet1|Co-worker (From Variable)|Use a variable to populated the customer, based on a Co-worker ID}} | ||
| + | {{Bullet1|Contact (From Variable)|Use a variable to populate the customer, based on a contact ID}} | ||
| + | {{Bullet1|System Timeline Update|Select if the default system text will be added to the timeline for this action}} | ||
| + | {{Bullet1|Manual Timeline Update|Select Yes to override the default System timeline Text, and add your own text which will appear in the timeline update for this action}} | ||
| + | {{Bullet1|Visibility|Choose what level of visibility will be automatically applied to this update. Choosing anything other than Customer will result in the customer not seeing the update in the timeline of their requests on the Service or Customer Portals.}} | ||
| + | |} | ||
| + | </div> | ||
| + | </div> | ||
| + | </div> | ||
| + | <!-- ****************************************************************************************************************************** --> | ||
| + | <!-- * Update Custom Fields * --> | ||
| + | <!-- ****************************************************************************************************************************** --> | ||
| + | {{BPMAutomation|updateCustomFields|Update Custom Fields| | ||
| + | [[File:updateCustomFields.png|thumb|link=https://wiki.hornbill.com/images/4/49/UpdateCustomFields.png]]| | ||
| + | This provides the ability to update any or all of the custom fields of a request. The input box is single line only and values should be restricted to 255 characters which is the defined max length for all custom fields. When populating custom fields please pay attention to the type of value you are populating, and ensure this is compatible with the type of field you have specified for the corresponding custom field in the request type and service form designer in the user interface.| | ||
| + | {{bullet1|Custom Field A - T & Custom Field 21 to 40|Populate the required custom field(s) with the value(s) that you wish to update the custom field(s) with. This can be text and/or attributes from the Variable Picker.}} | ||
| + | {{bullet1|Append Text|This determines if the supplied value of the custom field, should append any existing value of the custom field. By default this is set to replace any existing value, with the value defined here.}} | ||
| + | {{bullet1|Format Checkbox Value|This option determines whether the value from a checkbox (i.e. Outcome Field from a Human Task) is formatted to remove the square brackets and double quotes. By default, this option is set to "No".}} | ||
| + | {{bullet1|System Timeline Update|Select if the default system text will be added to the timeline for this action.}} | ||
| + | {{bullet1|Manual Timeline Update|Select Yes to override the default System timeline Text, and add your own text which will appear in the timeline update for this action.}} | ||
| + | {{bullet1|Visibility|Choose what level of visibility will be automatically applied to this update. Choosing anything other than '''Customer''' will result in the customer not seeing the update in the timeline of their requests on the Service or Customer Portals.}} | ||
| + | }} | ||
| + | |||
| + | <!-- **************************************************** START OF UPDATE DETAILS ************************************************************** --> | ||
| + | <div class="mw-collapsible mw-collapsed" data-collapsetext="Show Less" data-expandtext="Read More" style="width:700px" id="Details"> | ||
| + | * Details | ||
| + | <div class="mw-collapsible-content"> | ||
| + | <div style="border:1px solid #e6e6e6; background:#f2f2f2; width:99%; padding:4px; margin-bottom:10px;"> | ||
| + | ::{| | ||
| + | |- valign="top" | ||
| + | |style="width:700px"| | ||
| + | [[File:updaterequestdetailsbpm.png|thumb|link=https://wiki.hornbill.com/images/9/9e/Updaterequestdetailsbpm.png|Update Request Details BPM]] Use this operation to update the Summary and Description of a request. You can either add a new summary or description or append to the existing values. | ||
| + | :* '''Request Id''' | ||
:: This is a mandatory setting that uses a variable to hold the Request Id of the request that is using this BPM. This should be set to ''Auto''. | :: This is a mandatory setting that uses a variable to hold the Request Id of the request that is using this BPM. This should be set to ''Auto''. | ||
:* '''Summary''' | :* '''Summary''' | ||
| Line 2,088: | Line 3,308: | ||
</div> | </div> | ||
</div> | </div> | ||
| + | <!-- ****************************************************************************************************************************** --> | ||
| + | <!-- * Update Service * --> | ||
| + | <!-- ****************************************************************************************************************************** --> | ||
| + | {{BPMAutomation|Update_Service|Service| | ||
| + | [[File:bpm_update_service.png|thumb|link=https://wiki.hornbill.com/images/1/13/Bpm_update_service.png]]| | ||
| + | Use this Hornbill Automation to change the currently assigned Service and Request Catalog Item. This can be used in conjunction with assign operations to move a request that has been raised under the wrong service and team.| | ||
| + | {{bullet1|Request Id|This is a mandatory setting that uses a variable to hold the Request Id of the request that is using this BPM. This should be set to Auto}} | ||
| + | {{bullet1|Service|Select the Service that will be associated to the request}} | ||
| + | {{bullet1|Catalog Item|Select the Request Catalog Item that will be associated to the request}} | ||
| + | {{bullet1|Assess BPM|When set to 'Yes', the Request's process will be cancelled and a new instance of the new Service's or Catalog's process will be spawned. The process will not be cancelled if the new Service or Catalog's process is the same as the Request's current process.}} | ||
| + | {{bullet1|Update Timeline|Include a Timeline update on the request when this automation has completed}} | ||
| + | {{bullet1|Manual Timeline Update|Select Yes to override the default System timeline Text, and add your own text which will appear in the timeline update for this action}} | ||
| + | {{bullet1|Visibility|Choose what level of visibility will be automatically applied to this update. Choosing anything other than Customer will result in the customer not seeing the update in the timeline of their requests on the Service or Customer Portals}} | ||
| + | }} | ||
| + | <!-- ****************************************************************************************************************************** --> | ||
| + | <!-- * Update Service Level * --> | ||
| + | <!-- ****************************************************************************************************************************** --> | ||
<div class="mw-collapsible mw-collapsed" data-collapsetext="Show Less" data-expandtext="Read More" style="width:700px"> | <div class="mw-collapsible mw-collapsed" data-collapsetext="Show Less" data-expandtext="Read More" style="width:700px"> | ||
| Line 2,100: | Line 3,337: | ||
</div> | </div> | ||
</div> | </div> | ||
| + | |||
<!-- ************************************************************************************************************** --> | <!-- ************************************************************************************************************** --> | ||
<!-- * Update Site * --> | <!-- * Update Site * --> | ||
| Line 2,203: | Line 3,441: | ||
</div> | </div> | ||
| − | + | <!-- ****************************************************************************************************************************** --> | |
| + | <!-- * * --> | ||
| + | <!-- * Request Timers * --> | ||
| + | <!-- * * --> | ||
| + | <!-- ****************************************************************************************************************************** --> | ||
| + | |||
| + | ===Request Timers=== | ||
Use the Request Timer nodes at any stage in the process to either start or stop the Response and or Resolution timers. It is not a perquisite to have to use any timers within processes or to have to use both Response and Resolution timers when timers are used. | Use the Request Timer nodes at any stage in the process to either start or stop the Response and or Resolution timers. It is not a perquisite to have to use any timers within processes or to have to use both Response and Resolution timers when timers are used. | ||
| + | There are some settings that control the default behaviour of the Service Level Timers. The settings provided to pause or stop the resolution timer when resolving a request are as follows: | ||
| + | |||
| + | :* ''app.request.pauseResolutionTimerOnResolve'' (Default OFF) | ||
| + | :* ''app.request.resumeResolutionTimerOnReopen'' (Default OFF) | ||
| + | :* ''app.request.stopResolutionTimerOnResolve'' (Default ON) | ||
| + | :* ''app.request.stopResolutionTimerOnClose'' (Default OFF) | ||
| + | <br> | ||
| + | {{bullet1|Using settings to control resolution timers|You should choose the relevant settings to meet your needs, but note that app.request.stopResolutionTimerOnResolve will take precedence over app.request.pauseResolutionTimerOnResolve so ensure only the one you want to use is enabled.}} | ||
| + | |||
| + | {{bullet1|Using BPM nodes to control resolution timers|If you are using this BPM node to control resolution timers the four settings above should all be turned off; If any settings are enabled then they will take precedence over BPM actions. To enable pause/resume of a resolved request you can add the Timer > Pause Resolution Timer or Timer > Resume Resolution Timer BPM nodes as required in your BPM process.}} | ||
| + | <br> | ||
| + | <!-- ******************************************************************************************************************************* --> | ||
| + | <!-- * Start Resolution Timer --> | ||
| + | <!-- ******************************************************************************************************************************* --> | ||
<div class="mw-collapsible mw-collapsed" data-collapsetext="Show Less" data-expandtext="Read More" style="width:700px"> | <div class="mw-collapsible mw-collapsed" data-collapsetext="Show Less" data-expandtext="Read More" style="width:700px"> | ||
* Start Resolver Timer | * Start Resolver Timer | ||
| Line 2,217: | Line 3,475: | ||
</div> | </div> | ||
</div> | </div> | ||
| − | + | <!-- ******************************************************************************************************************************* --> | |
| + | <!-- * Stop Resolution Timer --> | ||
| + | <!-- ******************************************************************************************************************************* --> | ||
<div class="mw-collapsible mw-collapsed" data-collapsetext="Show Less" data-expandtext="Read More" style="width:700px"> | <div class="mw-collapsible mw-collapsed" data-collapsetext="Show Less" data-expandtext="Read More" style="width:700px"> | ||
* Stop Resolution Timer | * Stop Resolution Timer | ||
| Line 2,228: | Line 3,488: | ||
</div> | </div> | ||
</div> | </div> | ||
| − | + | <!-- ******************************************************************************************************************************* --> | |
| + | <!-- * Start Response Timer --> | ||
| + | <!-- ******************************************************************************************************************************* --> | ||
<div class="mw-collapsible mw-collapsed" data-collapsetext="Show Less" data-expandtext="Read More" style="width:700px"> | <div class="mw-collapsible mw-collapsed" data-collapsetext="Show Less" data-expandtext="Read More" style="width:700px"> | ||
* Start Response Timer | * Start Response Timer | ||
| Line 2,239: | Line 3,501: | ||
</div> | </div> | ||
</div> | </div> | ||
| − | + | <!-- ******************************************************************************************************************************* --> | |
| + | <!-- * Stop Response Timer --> | ||
| + | <!-- ******************************************************************************************************************************* --> | ||
<div class="mw-collapsible mw-collapsed" data-collapsetext="Show Less" data-expandtext="Read More" style="width:700px"> | <div class="mw-collapsible mw-collapsed" data-collapsetext="Show Less" data-expandtext="Read More" style="width:700px"> | ||
* Stop Response Timer | * Stop Response Timer | ||
| Line 2,250: | Line 3,514: | ||
</div> | </div> | ||
</div> | </div> | ||
| + | <!-- ******************************************************************************************************************************* --> | ||
| + | <!-- * Pause Resolution Timer --> | ||
| + | <!-- ******************************************************************************************************************************* --> | ||
| + | {{BPMAutomation|Pause_Resolution_Timer|Pause Resolution Timer| | ||
| + | [[File:Pause_Resolution_Timer.png|thumb|link=https://wiki.hornbill.com/images/5/58/Pause_Resolution_Timer.png]]| | ||
| + | Use this Hornbill Automation to pause the currently running Resolution Timer. This is particularly useful in 2 stage closers where the timer can be paused during the resolution stage and then resumed if the request is reopened| | ||
| + | {{bullet1|Request Id|This is a mandatory setting that uses a variable to hold the Request Id of the request that is using this BPM. This should be set to ''Auto''}} | ||
| + | }} | ||
| + | <!-- ******************************************************************************************************************************* --> | ||
| + | <!-- * Resume Resolution Timer --> | ||
| + | <!-- ******************************************************************************************************************************* --> | ||
| + | {{BPMAutomation|Resume_Resolution_Timer|Resume Resolution Timer| | ||
| + | [[File:Resume_Resolution_Timer.png|thumb|link=https://wiki.hornbill.com/images/c/c0/Resume_Resolution_Timer.png]]| | ||
| + | Use this Hornbill Automation to resume Resolution Timer that has been paused. This is particularly useful in 2 stage closers where the timer can be paused during the resolution stage and then resumed if the request is reopened| | ||
| + | {{bullet1|Request Id|This is a mandatory setting that uses a variable to hold the Request Id of the request that is using this BPM. This should be set to ''Auto''}} | ||
| + | }} | ||
| + | |||
| + | ==Services== | ||
| + | |||
| + | Operations specific to services related to the request service | ||
| + | <!-- ****************************************************************************************************************************** --> | ||
| + | <!-- * Update Related services * --> | ||
| + | <!-- ****************************************************************************************************************************** --> | ||
| + | {{BPMAutomation|Update_Realated_Services|Update Related Services| | ||
| + | [[File:Update_Related_Services_BPM.png|thumb|link=https://wiki.hornbill.com/images/9/9e/Bpmaddcommenttoboard.png]]| | ||
| + | Use this node to update the status of services related to a request at the required stage in a process, this is different from the service the request is logged against| | ||
| + | {{bullet1|RequestId|This is an automatic option and should be set to Auto}} | ||
| + | {{bullet1|Relationship Type|Select which services to update the status of, based on their relationship type to the request service}} | ||
| + | {{bullet1|Status|The Status to set the related services too}} | ||
| + | {{bullet1|Status Message|Any message to be visible alongside the Status of the related services}} | ||
| + | {{bullet1|System Timeline Update|Select if the default system text will be added to the timeline for this action}} | ||
| + | {{bullet1|Manual Timeline Update|Select Yes to override the default System timeline Text, and add your own text which will appear in the timeline update for this action}} | ||
| + | {{bullet1|Visibility|Choose what level of visibility will be automatically applied to this update. Choosing anything other than Customer will result in the customer not seeing the update in the timeline of their requests on the Service or Customer Portals.}} | ||
| + | |||
| + | }} | ||
| + | |||
| + | ==Assets== | ||
| + | |||
| + | Automations specific to an asset entity which can be used as part of Auto Tasks on an asset. | ||
| + | <!-- ****************************************************************************************************************************** --> | ||
| + | <!-- * Get Asset Information * --> | ||
| + | <!-- ****************************************************************************************************************************** --> | ||
| + | {{BPMAutomation|Get_Asset_Information|Get Asset Information| | ||
| + | [[File:Get_Asset_Information_BPM.png|thumb|link=https://wiki.hornbill.com/images/9/9e/Bpmgeetassetinfo.png]]| | ||
| + | Use this node to get information about a specified asset.| | ||
| + | {{bullet1|Asset Id|This is an automatic option and should be set to Auto when used with an asset entity.}} | ||
| + | |||
| + | }} | ||
| − | [[Category:Service Manager]] | + | [[Category:Service Manager]][[Category:HDOC]] |
| + | <!-- http://127.0.0.1:3000/service-manager-config/customize/bpm/service-manager-business-processes --> | ||
Latest revision as of 17:57, 10 October 2023
| Home > Administration > Service Manager > Business Process Workflow | Index |
IntroductionThe Service Manager Business Process Workflow is used to automate the processing of the requests that have been raised. This page contains information on the Service Manager automated tasks that can be used in the Business Process Designer to build unique and powerful processes for your requests. |
|
Boards
Please Note: Service Manager Boards have now been deprecated and replaced with Hornbill Board Manager. The available Board Manager business process operations are outlined here. Use the Boards nodes to automatically add, move or remove a Request from an existing Board. Requests can be added to one or multiple Boards in Service Manager, and can be moved between Lists on specified Boards automatically.
- Add Comment To Board
Add Comment To Board
Use this node to manually add a Comment card to a Service Manager Board at the required stage in a process.
Options
- Board
- The name of the Service Manager Board on which the Comment card will be added
- List
- The name of the list from the above specified board to which the Comment card will be added
- Comment
- The actual comment, as it will appear on the card on the Board
- Add Request to Board
Add Request to Board
This operation will automatically add a request to a selected Service Manager Board or move a request from one list to another. This particularly works well on a Board where users have been given View Access only and the BPM takes control of all the card movements.
Options
- Request Id
- This is a mandatory setting that uses a variable to hold the Request Id of the request that is using this BPM. This should be set to Auto
- Board
- The name of the Service Manager Board on which the Request card will be added
- List
- The name of the list from the above specified board to which the Request card will be added
- Remove Request from Board
Remove Request from Board
Use this option to remove a Request from a Service Manager Board at a specific stage in a process.
Options
- Request Id
- This is a mandatory setting that uses a variable to hold the Request Id of the request that is using this BPM. This should be set to Auto
- Board
- The name of the Service Manager Board from which the Request card will be removed
Change Requests
Use these nodes at any stage in a process to automate Change Request specific actions.
Get Information
- GetInformation
GetInformation
Use this Hornbill Automation to get extended change information from a Change Request.
Options
- Backout Plan
- Get the Backout Plan for the change
- Change Category
- Get the category set against the change
- Change Justification
- Get the Justification information from the change
- Change Type
- Get the Change Type
- Communication Plan
- Get the Communication Plan for the change
- Disruption Level
- Get the Disruption Level for the change
- End Time
- Get the time when the change is set to be completed
- Implementation Plan
- Get the Implementation Plan
- Is Scheduled
- Get information about if the change is scheduled or not
- Proposed End Time
- Get the proposed end time of the change
- Proposed Start Time
- Get the proposed start time of the change
- Security Implication
- Get any security implications that have been added to the change
- Start Time
- Get the start time for the change
- Support Plan
- Get the support plan for the change
- Test Plan
- Get the test plan for the change
Suspend
- Wait For Change Type
Wait For Change Type
Use this Hornbill Automation to suspend the Business Process until a Change Type has been set on the Change Request
Options
- Request Id
- This is a mandatory setting that uses a variable to hold the Request Id of the request that is using this BPM. This should be set to Auto
- Action Focus
- Sets the Action Item on a request that will be in focus when using this suspend node.
- Expire Period
- The length of time to wait until the node expires and the workflow will automatically continue. This is based on the Working Time Calendar defined in the setting guest.app.timer.defaultCalendar. When this date and time is reached, the BPM will automatically continue. An outcome of Expired will be provided to allow for a decision node to be placed after this operation to determine how the expired operation will be managed.
- Add Notice
- Select Yes to add a notice to the top of the request
- Notice Type
- The type of notice (Alert or Information). The default value is "Information".
- Notice Text
- The text that will be displayed. This has a limit of 255 characters
- Notice Visibility
- The visibility of the notice (Portals
- Wait For Request Schedule
Wait For Request Schedule
Use this node to pause the process and await the scheduling of the Change Request in the Change Calendar
Options
- Request Id
- This is a mandatory setting that uses a variable to hold the Request Id of the request that is using this BPM. This should be set to Auto
- Action Focus
- Sets the Action Item on a request that will be in focus when using this suspend node.
- Expire Period
- The length of time to wait until the node expires and the workflow will automatically continue. This is based on the Working Time Calendar defined in the setting guest.app.timer.defaultCalendar. When this date and time is reached, the BPM will automatically continue. An outcome of Expired will be provided to allow for a decision node to be placed after this operation to determine how the expired operation will be managed.
- Add Notice
- Select Yes to add a notice to the top of the request
- Notice Type
- The type of notice (Alert or Information). The default value is "Information".
- Notice Text
- The text that will be displayed. This has a limit of 255 characters
- Notice Visibility
- The visibility of the notice (Portals
Update Request
- Add to Change Calendar
Add to Change Calendar
Use this node to automatically add a change request to the Change Calendar. Use the configuration settings to set the start and end times for the change based on the time this node is invoked in the process. As an example if this node is the first action in a process, then it will use the log time as the Now time, and the Start and End times you configure will be based off that time.
Options
- Request ID
- This is a mandatory setting that uses a variable to hold the Request Id of the request that is using this BPM. This should be set to Auto
- Start Time From Now
- Set the Start Time for this change based on years, months, days, hours, or minutes from when this node is reached in the workflow
- End Time From Now
- Set the End Time for this change based on years, months, days, hours, or minutes from when this node is reached in the workflow
- Start Time (From Variable)
- Set the Start Time for this change from a BPM Variable
- End Time (From Variable)
- Set the End Time for this change from a BPM Variable
- Enforce Freeze Periods
- Set this to ensure that the Start or End Dates are not set within a Change Freeze Period
- Update Timeline
- Include a Timeline update on the request when this automation has completed
- Remove from Change Calendar
Remove from Change Calendar
Use this node to automatically remove the Change from the Change Calendar
Options
- Request Id
- This is a mandatory setting that uses a variable to hold the Request Id of the request that is using this BPM. This should be set to Auto
- Update Timeline
- Include a Timeline update on the request when this automation has completed
- Change Type
Change Type
Use this automation to update the Change Type field on the Change Request
Options
- Request ID
- This is a mandatory setting that uses a variable to hold the Request Id of the request that is using this BPM. This should be set to Auto
- Change Type
- Select from the pick list which type of Change will be set on this change
- Update Timeline
- Include a Timeline update on the request when this automation has completed
Known Errors
Use these nodes at any stage in a process to automate Known Error specific actions.
Get Information
- Known Error Details
Update Known Error
- Update Known Error Details
Update Known Error Details
Use this node to update the workaround and root cause on a Known Error record.
Options
- RequestID
- This is a mandatory setting that uses a variable to hold the Request Id of the request that is using this BPM. This should be set to Auto
- Root Cause
- Use this option to set the Root Cause of the known error record
- Workaround
- Use this optino to set the Workaround for the known error record
- System Timeline Update
- Select if the default system text will be added to the timeline for this action
- Manual Timeline Update
- Select Yes to override the default System timeline Text, and add your own text which will appear in the timeline update for this action
- Visibility
- Choose what level of visibility will be automatically applied to this update. Choosing anything other than Customer will result in the customer not seeing the update in the timeline of their requests on the Service or Customer Portals.
Problem Records
Use these nodes at any stage in a process to automate Problem Record specific actions.
Get Information
- Problem Details
Suspend
- Wait for Workaround
Wait for Workaround
Use this node to suspend the BPM Workflow and wait for a workaround to be added to the Problem Record.
Options
- RequestID
- This is a mandatory setting that uses a variable to hold the Request Id of the request that is using this BPM. This should be set to Auto
- Action Focus
- Sets the Action Item on a request that will be in focus while the process is suspended
- Expire Period
- The length of time to wait until the node expires and the workflow will automatically continue. This is based on the Working Time Calendar defined in the setting guest.app.timer.defaultCalendar. When this date and time is reached, the BPM will automatically continue. An outcome of Expired will be provided to allow for a decision node to be placed after this operation to determine how the expired operation will be managed.
- Add Notice
- Select Yes to add a notice to the top of the request
- Notice Type
- The type of notice (Alert or Information). The default value is "Information".
- Notice Text
- The text that will be displayed. This has a limit of 255 characters
- Notice Visibility
- The visibility of the notice (Portals
Update Problem
- Problem Details
Problem Details
Use this node to update the workaround and root cause on a Problem Record.
Options
- RequestID
- This is a mandatory setting that uses a variable to hold the Request Id of the request that is using this BPM. This should be set to Auto
- Root Cause
- Use this option to set the Root Cause of the problem record
- Workaround
- Use this optino to set the Workaround for the problem record
- System Timeline Update
- Select if the default system text will be added to the timeline for this action
- Manual Timeline Update
- Select Yes to override the default System timeline Text, and add your own text which will appear in the timeline update for this action
- Visibility
- Choose what level of visibility will be automatically applied to this update. Choosing anything other than Customer will result in the customer not seeing the update in the timeline of their requests on the Service or Customer Portals.
Releases
Use this node at any stage in a process to automate Release specific actions.
Suspend
- Wait for Release Type
Wait for Release Type
Use this Hornbill Automation to suspend the Business Process until a Release Type has been set on the Release record
Options
- Request Id
- This is a mandatory setting that uses a variable to hold the Request Id of the request that is using this BPM. This should be set to Auto
- Action Focus
- Sets the Action Item on a request that will be in focus when using this suspend node.
- Expire Period
- The length of time to wait until the node expires and the workflow will automatically continue. This is based on the Working Time Calendar defined in the setting guest.app.timer.defaultCalendar. When this date and time is reached, the BPM will automatically continue. An outcome of Expired will be provided to allow for a decision node to be placed after this operation to determine how the expired operation will be managed.
- Wait for Request Schedule
Wait for Request Schedule
Use this node to pause the process and await the scheduling of the Release in the Change Calendar
Options
- Request Id
- This is a mandatory setting that uses a variable to hold the Request Id of the request that is using this BPM. This should be set to Auto
- Action Focus
- Sets the Action Item on a request that will be in focus when using this suspend node.
- Expire Period
- The length of time to wait until the node expires and the workflow will automatically continue. This is based on the Working Time Calendar defined in the setting guest.app.timer.defaultCalendar. When this date and time is reached, the BPM will automatically continue. An outcome of Expired will be provided to allow for a decision node to be placed after this operation to determine how the expired operation will be managed.
Update Request
- Add to Change Calendar
Add to Change Calendar
Use this node to automatically add the Release to the Change Calendar
Options
- Request ID
- This is a mandatory setting that uses a variable to hold the Request Id of the request that is using this BPM. This should be set to Auto
- Start Time From Now
- Set the Start Time for this change based on years, months, days, hours, or minutes from when this node is reached in the workflow
- End Time From Now
- Set the End Time for this change based on years, months, days, hours, or minutes from when this node is reached in the workflow
- Start Time (From Variable)
- Set the Start Time for this change from a BPM Variable
- End Time (From Variable)
- Set the End Time for this change from a BPM Variable
- Enforce Freeze Periods
- Set this to ensure that the Start or End Dates are not set within a Change Freeze Period
- Update Timeline
- Include a Timeline update on the request when this automation has completed
- Remove from Change Calendar
Remove from Change Calendar
Use this node to automatically remove the Release from the Change Calendar
Options
- Request Id
- This is a mandatory setting that uses a variable to hold the Request Id of the request that is using this BPM. This should be set to Auto
- Update Timeline
- Include a Timeline update on the request when this automation has completed
- Release Type
Release Type
Use this node to update the Release Type
Options
- Request ID
- This is a mandatory setting that uses a variable to hold the Request Id of the request that is using this BPM. This should be set to Auto
- Release Type
- Select from the pick list which type of Release will be set on this release
- Update Timeline
- Include a Timeline update on the request when this automation has completed
Request Connections
Use the Request Connections node at any stage in a process to automatically add additional contact's and or co-worker's to a request and define their connection type to the request. Other options include automatically emailing connections of different types, and removing one or all connections at any stage.
- Add Connection
Add Connection
Use this node to add a connection to a request
Options
- Request ID
- This is a mandatory setting that uses a variable to hold the Request Id of the request that is using this BPM. This should be set to Auto
- Connection Type
- By Default this will include interested and Impacted but will also show any custom Connection Types which have been defined in the Simple Lists, and requestConnectionType option. Use this option to define what relationship the Connection will have to the request.
- Co-worker
- Choose which internal user will be added as a connection to the request
- Contact
- Choose which external user will be added to a connection to the request
- Co-worker(From Variable)
- Use the user id (h_user_id) from the h_sys_accounts table, or from the variable picker and picking the value returned from the user picker in a progressive capture custom form. Be sure to use the Raw value from the progressive capture outcome and not the Display Name
- Contact(From Variable)
- Use the contact id (h_pk_id) from the h_sys_contacts table or or from the variable picker and picking the value returned from the user picker in a progressive capture custom form. Be sure to use the Raw value from the progressive capture outcome and not the Display Name
- Update Timeline
- Include a Timeline update on the request when this node has completed
- Email Connections
Email Connections
Use this node to email connections of the request
Options
- Request Id
- This is a mandatory setting that uses a variable to hold the Request Id of the request that is using this BPM. This should be set to Auto
- Mailbox Name
- Specify the mailbox from which the email will be sent
- Email Template Entity
- This option can be set with the Entity name (e.g. Requests, ChangeRequests) that the supplied Email Template belongs to. The Entity name can be found in Templates Tile within the Hornbill Admin Tool. If not supplied, this option will be set to "Requests"
- Email Template
- Specify the email template which will be sent
- Recipients
- Specify if the email should be sent to All users, Internal users only, or External users only of the following Connection Type
- Connection Type
- Specify which connection types should receive the email notification
- Update Timeline
- Include a Timeline update on the request when this node has completed
- Remove All Connections
Remove All Connections
Use this node to remove connections from the request
Options
- Request Id
- The request id of the request the connection(s) are being removed from. This should be set to Auto
- Recipients
- Controls which request connections are removed. Set to Auto to remove all connections or filter by Connection Type
- Connection Type
- Specify which connection types should be removed from the request
- Update Timeline
- Include a Timeline update on the request when this node has completed
- Remove Connection
Remove Connection
Use this node to remove specific connections from the request.
Options
- Request Id
- The Request Id of the request the connection(s) are being removed from. This should be set to Auto
- CoWorker
- Choose which internal user will be removed from the request
- Contact
- Choose which external user will be removed from the request
- Update Timeline
- Include a Timeline update on the request when this node has completed
Request Members
Use the Request Members node at any stage in a process to automatically add or remove another analyst or subject matter expert into a Request. Members can be added even if they do not have the rights to view the request type, nor the requests which belong to the team against which the request belongs. The added Member's rights will be elevated just for the specific Request. Members can be notified about being added via Hornbill Notifications, and or email depending on the following Service Manager system setting: guest.app.requests.notification.notificationType.members
- Add Request Member
Add Request Member
Use this node to add Service Manager analysts to the request. This option allows you to automatically add additional analysts to the request to assist with the resolution or as interested parties.
Options
- Request Id
- The Request Id of the request the connection(s) are being removed from. This should be set to Auto
- Member
- This option can contain the Co-worker to be added as a Request member. If supplied, "Member (From Variable)" option will be ignored.
- Member (From Variable)
- This option can contain the Co-worker to be added as a Request member. If supplied, "Member (From Variable)" option will be ignored
- Remove Request Member
Remove Request Member
Use this option to remove members from a request.
Options
- Request Id
- The Request Id of the request the connection(s) are being removed from. This should be set to Auto
- Member
- This option can contain the Co-worker to be removed from the Request members. If supplied, "Member (From Variable)" option will be ignored
- Member (From Variable)
- This option can contain the Id of a Co-worker (h_user_id in h_sys_accounts table). This option should only be supplied if "Member" option is not set
Request Notices
Use this Hornbill Automation to add or remove a notice which is displayed at the top of the request.
- Add Notice
Add Notice
Use this Hornbill Automation to add a notice to the top of the request
Options
- Request ID
- The Request Id of the request the connection(s) are being removed from. This should be set to Auto
- Notice Type
- The type of notice (Alert or Information). The default value is "Information".
- Notice Text
- The text that will be displayed. This has a limit of 255 characters
- Notice Visibility
- The visibility of the notice (Portals
- System Timeline Update
- Select if the default system text will be added to the timeline for this action
- Manual Timeline Update
- Select Yes to override the default System timeline Text, and add your own text which will appear in the timeline update for this action
- Timeline Visibility
- Choose what level of visibility will be automatically applied to this update. Choosing anything other than Customer will result in the customer not seeing the update in the timeline of their requests on the Service or Customer Portals
- Remove Notice
Remove Notice
Use this Hornbill Automation to remove one or all notices on a request
Options
- Request ID
- The Request Id of the request the connection(s) are being removed from. This should be set to Auto
- Notice ID
- The ID of the notice that needs removing. This can be taken as a variable from the output of the Hornbill Automation that created the notice
- Notice Type
- This will remove notices of the selected type. Information or Alert
- Notice Text Contains
- Remove any notice that contains this text
- Notice Source
- Remove notices based on the source. Either BPM Workflow or Manually added notices.
- Notice Visibility
- Remove notices that are set to a particular Visibility. Portals, Service Desk, or Both
Requests
Access Control
Use the Access Control to lock or unlock the Details section or the Actions on a request. Only users with the appropriate application right (update locked requests) will be able to modify the details or use an Action once locked. This right has been added to the following roles: Incident Management Full Access, Change Management Full Access, Problem Management Full Access, Release Management Full Access, Service Request Full Access, and Service Desk Admin.
- Lock / Unlock Request Actions
Lock / Unlock Request Actions
Locks or Unlocks the selected Actions on on a request. This includes sections that are associated to the actions
Options
- Lock Update
- Prevents the manual adding of an update to the Timeline
- Lock Callback
- Prevents the use of the Phone action
- Lock Attach
- Prevents the use of the Attach Action and the Attachments section of the request
- Lock Link
- Prevents the linking of requests to this request and stops the removal of linked requests in the requests section
- Lock Linked Services
- Prevents the linking of Services to this request and stops the removal of linked Services in the requests section
- Lock Email
- Prevents the sending of email
- Lock Change Customer
- Prevents the changing of the customer
- Lock Assign
- Prevents the request from being manually assigned or re-assigned
- Lock Connections
- Prevents further Connections from being added the removal of existing connections in the Connections section
- Lock Escalate
- Prevents the manual changing of the Priority
- Lock Asset
- Prevents the adding or removing of an asset
- Lock Workaround
- Prevents the accepting of a workaround being added on a Known Error
- Lock Publish
- Prevents the publishing of a Problem or Known Error record to the Self Service Portal
- Lock Board
- Prevents the request from being added to a board
- Lock Schedule
- Prevents the scheduling of a Change Request
- Lock Solution
- Prevents the ability to accept a solution provided to an Incident from a Problem or Known Error
- Lock Resolve
- Prevents a request from manually being resolved
- Lock Cancel
- Prevents a request from being cancelled
- System Timeline Update
- Use the provide System Timeline Update to show that a lock or unlock has taken place
- Manual Timeline Update
- Provide a custom Timeline Update message when a lock or unlock has taken place
- Lock Request Details
Lock Request Details
Locks the Details section of a request from this point on in the workflow. Only users that have the update locked requests application right assigned to one of their roles will be able to update the request details.
Options
- System Timeline Update
- Select if the default system text will be added to the timeline for this action
- Manual Timeline Update
- Select Yes to override the default System timeline Text, and add your own text which will appear in the timeline update for this action
- Visibility
- Choose what level of visibility will be automatically applied to this update. Choosing anything other than Customer will result in the customer not seeing the update in the timeline of their requests on the Service or Customer Portals
- Unlock Request Details
Unlock Request Details
Unlocks the Details section of a request from this point on in the workflow. All users that have access to the request will be able to edit the Details section of the request.
Options
- System Timeline Update
- Select if the default system text will be added to the timeline for this action
- Manual Timeline Update
- Select Yes to override the default System timeline Text, and add your own text which will appear in the timeline update for this action
- Visibility
- Choose what level of visibility will be automatically applied to this update. Choosing anything other than Customer will result in the customer not seeing the update in the timeline of their requests on the Service or Customer Portals
Assessment
Use the Assessment node to initiate an Impact Assessment on a request
- Impact Assessment
Impact Assessment
This Hornbill Automation will present an Impact Assessment option on the Escalate Action of a request. When selected a user will be taken through a number of defined questions, and determined by their responses, an impact level will be automatically applied to the request.
Options
- Assessment
- The name of the assessment that you wish to run on the request
- System Timeline Update
- Select if the default system text will be added to the timeline for this action
- Manual Timeline Update
- Select Yes to override the default System timeline Text, and add your own text which will appear in the timeline update for this action
- Visibility
- Choose what level of visibility will be automatically applied to this update. Choosing anything other than Customer will result in the customer not seeing the update in the timeline of their requests on the Service or Customer Portals
Assets
Use these Hornbill Automations for managing assets that are associated to the request
- Add All Owned by Customer
Add All Owned by Customer
Add all assets that are owned by the customer to the request
Options
- Request Id
- This is a mandatory setting that uses a variable to hold the Request Id of the request that is using this BPM. This should be set to Auto
- System Timeline Update
- Indicates whether or not a system update is made to the request timeline. Default is No. This option is superseded by the Manual Timeline Update.
- Manual Timeline Update
- Freetext update to the request timeline. This supersedes the option System Timeline Update.
- Timeline Visibility
- The request timeline post visibility. If not specified, the application option value will be used.
- Add Generic Assets Owned by Customer
Add Generic Assets Owned by Customer
Add assets that are owned or used by the customer that belong to the General class of asset
Options
- Request Id
- This is a mandatory setting that uses a variable to hold the Request Id of the request that is using this BPM. This should be set to Auto
- Asset Type
- The type of Generic assets to associate to the request.
- System Timeline Update
- Indicates whether or not a system update is made to the request timeline. Default is No. This option is superseded by the Manual Timeline Update.
- Manual Timeline Update
- Freetext update to the request timeline. This supersedes the option System Timeline Update.
- Timeline Visibility
- The request timeline post visibility. If not specified, the application option value will be used.
- Used By
- Associate assets that are Used By the Request Customer, rather than Owned By.
- Add Computer System Assets Owned by Customer
Add Computer System Assets Owned by Customer
Add assets that are owned or used by the customer that belong to the Computer System class of asset
Options
- Request Id
- This is a mandatory setting that uses a variable to hold the Request Id of the request that is using this BPM. This should be set to Auto
- Asset Type
- The type of Computer System assets to associate to the request.
- System Timeline Update
- Indicates whether or not a system update is made to the request timeline. Default is No. This option is superseded by the Manual Timeline Update.
- Manual Timeline Update
- Freetext update to the request timeline. This supersedes the option System Timeline Update.
- Timeline Visibility
- The request timeline post visibility. If not specified, the application option value will be used.
- Used By
- Associate assets that are Used By the Request Customer, rather than Owned By.
- Add Computer Peripheral Assets Owned by Customer
Add Computer Peripheral Assets Owned by Customer
Add assets that are owned or used by the customer that belong to the Computer Peripheral class of asset
Options
- Request Id
- This is a mandatory setting that uses a variable to hold the Request Id of the request that is using this BPM. This should be set to Auto
- Asset Type
- The type of Computer Peripheral assets to associate to the request.
- System Timeline Update
- Indicates whether or not a system update is made to the request timeline. Default is No. This option is superseded by the Manual Timeline Update.
- Manual Timeline Update
- Freetext update to the request timeline. This supersedes the option System Timeline Update.
- Timeline Visibility
- The request timeline post visibility. If not specified, the application option value will be used.
- Used By
- Associate assets that are Used By the Request Customer, rather than Owned By.
- Add Mobile Device Assets Owned by Customer
Add Mobile Device Assets Owned by Customer
Add assets that are owned or used by the customer that belong to the Mobile Device class of asset
Options
- Request Id
- This is a mandatory setting that uses a variable to hold the Request Id of the request that is using this BPM. This should be set to Auto
- Asset Type
- The type of Mobile Device assets to associate to the request.
- System Timeline Update
- Indicates whether or not a system update is made to the request timeline. Default is No. This option is superseded by the Manual Timeline Update.
- Manual Timeline Update
- Freetext update to the request timeline. This supersedes the option System Timeline Update.
- Timeline Visibility
- The request timeline post visibility. If not specified, the application option value will be used.
- Used By
- Associate assets that are Used By the Request Customer, rather than Owned By.
- Add Network Device Assets Owned by Customer
Add Network Device Assets Owned by Customer
Add assets that are owned or used by the customer that belong to the Network Device class of asset
Options
- Request Id
- This is a mandatory setting that uses a variable to hold the Request Id of the request that is using this BPM. This should be set to Auto
- Asset Type
- The type of Network Device assets to associate to the request.
- System Timeline Update
- Indicates whether or not a system update is made to the request timeline. Default is No. This option is superseded by the Manual Timeline Update.
- Manual Timeline Update
- Freetext update to the request timeline. This supersedes the option System Timeline Update.
- Timeline Visibility
- The request timeline post visibility. If not specified, the application option value will be used.
- Used By
- Associate assets that are Used By the Request Customer, rather than Owned By.
- Add Printer Assets Owned by Customer
Add Printer Assets Owned by Customer
Add assets that are owned or used by the customer that belong to the Printer class of asset
Options
- Request Id
- This is a mandatory setting that uses a variable to hold the Request Id of the request that is using this BPM. This should be set to Auto
- Asset Type
- The type of Printer assets to associate to the request.
- System Timeline Update
- Indicates whether or not a system update is made to the request timeline. Default is No. This option is superseded by the Manual Timeline Update.
- Manual Timeline Update
- Freetext update to the request timeline. This supersedes the option System Timeline Update.
- Timeline Visibility
- The request timeline post visibility. If not specified, the application option value will be used.
- Used By
- Associate assets that are Used By the Request Customer, rather than Owned By.
- Add Software Assets Owned by Customer
Add Software Assets Owned by Customer
Add assets that are owned or used by the customer that belong to the Software class of asset
Options
- Request Id
- This is a mandatory setting that uses a variable to hold the Request Id of the request that is using this BPM. This should be set to Auto
- Asset Type
- The type of Software assets to associate to the request.
- System Timeline Update
- Indicates whether or not a system update is made to the request timeline. Default is No. This option is superseded by the Manual Timeline Update.
- Manual Timeline Update
- Freetext update to the request timeline. This supersedes the option System Timeline Update.
- Timeline Visibility
- The request timeline post visibility. If not specified, the application option value will be used.
- Used By
- Associate assets that are Used By the Request Customer, rather than Owned By.
- Add Telecoms Assets Owned by Customer
Add Telecoms Assets Owned by Customer
Add assets that are owned or used by the customer that belong to the Telecoms class of asset
Options
- Request Id
- This is a mandatory setting that uses a variable to hold the Request Id of the request that is using this BPM. This should be set to Auto
- Asset Type
- The type of Telecoms assets to associate to the request.
- System Timeline Update
- Indicates whether or not a system update is made to the request timeline. Default is No. This option is superseded by the Manual Timeline Update.
- Manual Timeline Update
- Freetext update to the request timeline. This supersedes the option System Timeline Update.
- Timeline Visibility
- The request timeline post visibility. If not specified, the application option value will be used.
- Used By
- Associate assets that are Used By the Request Customer, rather than Owned By.
- Create Generic Asset
Create Generic Asset
Creates a new General asset within Asset Management and links the new asset to the request from which it was created.
Options
- Request Id
- This is a mandatory setting that uses a variable to hold the Request Id of the request that is using this BPM. This should be set to Auto
- Operational State
- Update the operational state of the assets. Options include pre-production, operational, and retired
- State
- Update the state of the assets. Options include active, current, and archived
- Sub State
- Update the sub state of the asset
- Company
- Update the company that the assets should be associated to
- Name
- Update the name of the assets
- Notes
- Upldate the notes for the assets
- Owned By
- Update the owner of the assets
- Used By
- Update who uses the assets
- Department
- Update the department that the asset is associated to
- Description
- Update the asset description
- Booking
- Update if the asset is available for booking
- Purpose
- Update the purpose of the assets
- Last Audited Date
- Update the last audit date for the assets
- Location Type
- Update the type of location where the asset is
- Location
- Update the Location of the assets
- Country
- Update the country where the asset is located
- Building
- Update the building where the asset is located
- Room
- Update the room where the asset is
- Rack
- Update the rack where the asset is located
- U Height
- Update the U height location in the rack
- U Position
- Update the U position of the asset in the rack
- Site
- Update the site where the asset is located
- Floor
- Update the Floor where the asset is located
- Geo Location
- Update the Geo-location where the asset is located
- Static
- Update if the asset is a static or not
- Cost
- Update the cost of the asset
- Asset Tag
- Update the Asset Tag
- Order Number
- Update the Order number
- Invoice Number
- Update the Invoice number
- Maintenance Cost
- Update how much the annual maintenance cost of the asset is
- Maintenance Reference
- Update the Reference to the maintenance contract
- Supplier ID
- Update the ID of the asset supplier
- Supplier Contract
- Update the name of the Supplier Contract associated to the asset
- Product ID
- Update the Product ID
- Order Date
- Update the Order date
- Received Date
- Upldate the receive date
- Cost Center
- Update the cost center
- Acq. Method
- Update the method of how the asset was acquired
- Warranty Start
- Update the start of the warranty date
- Warranty Expires
- Update the warranty expiry date
- Supported By
- Update who supports this asset
- Maintenance Notice Period
- Update the notice period for Maintenance contract renewal
- Maintenance Termination Period
- Update the termination period for the asset
- Annual Maintenance Review Date
- Update the annual maintenance review date
- Scheduled Retired Date
- Update the date that the asset set to retire on
- Actual Retired Date
- Update the date that the asset was retired on
- Disposal Reason
- Update why the asset was disposed of
- Disposal Price
- Update how much it cost to dispose of the asset
- Disposal Code
- Update the disposal code
- Beneficiary
- Update who the beneficiary of the asset is
- Depreciation Method
- Update the depreciation method
- Depreciation Start Date
- Update when the asset cost starts deprecating
- Depreciation Value
- Update the current depreciation value
- Residual Value
- Update the residual value
- Create Computer System Asset
Create Computer System Asset
Creates a new Computer System asset within Asset Management and links the new asset to the request from which it was created.
Options
- Request Id
- This is a mandatory setting that uses a variable to hold the Request Id of the request that is using this BPM. This should be set to Auto
- Operational State
- Update the operational state of the assets. Options include pre-production, operational, and retired
- State
- Update the state of the assets. Options include active, current, and archived
- Sub State
- Update the sub state of the asset
- Company
- Update the company that the assets should be associated to
- Name
- Update the name of the assets
- Notes
- Upldate the notes for the assets
- Owned By
- Update the owner of the assets
- Used By
- Update who uses the assets
- Department
- Update the department that the asset is associated to
- Description
- Update the asset description
- Booking
- Update if the asset is available for booking
- Purpose
- Update the purpose of the assets
- Last Audited Date
- Update the last audit date for the assets
- Location Type
- Update the type of location where the asset is
- Location
- Update the Location of the assets
- Country
- Update the country where the asset is located
- Building
- Update the building where the asset is located
- Room
- Update the room where the asset is
- Rack
- Update the rack where the asset is located
- U Height
- Update the U height location in the rack
- U Position
- Update the U position of the asset in the rack
- Site
- Update the site where the asset is located
- Floor
- Update the Floor where the asset is located
- Geo Location
- Update the Geo-location where the asset is located
- Static
- Update if the asset is a static or not
- Cost
- Update the cost of the asset
- Asset Tag
- Update the Asset Tag
- Order Number
- Update the Order number
- Invoice Number
- Update the Invoice number
- Maintenance Cost
- Update how much the annual maintenance cost of the asset is
- Maintenance Reference
- Update the Reference to the maintenance contract
- Supplier ID
- Update the ID of the asset supplier
- Supplier Contract
- Update the name of the Supplier Contract associated to the asset
- Product ID
- Update the Product ID
- Order Date
- Update the Order date
- Received Date
- Upldate the receive date
- Cost Center
- Update the cost center
- Acq. Method
- Update the method of how the asset was acquired
- Warranty Start
- Update the start of the warranty date
- Warranty Expires
- Update the warranty expiry date
- Supported By
- Update who supports this asset
- Maintenance Notice Period
- Update the notice period for Maintenance contract renewal
- Maintenance Termination Period
- Update the termination period for the asset
- Annual Maintenance Review Date
- Update the annual maintenance review date
- Scheduled Retired Date
- Update the date that the asset set to retire on
- Actual Retired Date
- Update the date that the asset was retired on
- Disposal Reason
- Update why the asset was disposed of
- Disposal Price
- Update how much it cost to dispose of the asset
- Disposal Code
- Update the disposal code
- Beneficiary
- Update who the beneficiary of the asset is
- Depreciation Method
- Update the depreciation method
- Depreciation Start Date
- Update when the asset cost starts deprecating
- Depreciation Value
- Update the current depreciation value
- Residual Value
- Update the residual value
- Create Computer Peripheral Asset
Create Computer Peripheral Asset
Creates a new Computer Peripheral asset within Asset Management and links the new asset to the request from which it was created.
Options
- Request Id
- This is a mandatory setting that uses a variable to hold the Request Id of the request that is using this BPM. This should be set to Auto
- Operational State
- Update the operational state of the assets. Options include pre-production, operational, and retired
- State
- Update the state of the assets. Options include active, current, and archived
- Sub State
- Update the sub state of the asset
- Company
- Update the company that the assets should be associated to
- Name
- Update the name of the assets
- Notes
- Upldate the notes for the assets
- Owned By
- Update the owner of the assets
- Used By
- Update who uses the assets
- Department
- Update the department that the asset is associated to
- Description
- Update the asset description
- Booking
- Update if the asset is available for booking
- Purpose
- Update the purpose of the assets
- Last Audited Date
- Update the last audit date for the assets
- Location Type
- Update the type of location where the asset is
- Location
- Update the Location of the assets
- Country
- Update the country where the asset is located
- Building
- Update the building where the asset is located
- Room
- Update the room where the asset is
- Rack
- Update the rack where the asset is located
- U Height
- Update the U height location in the rack
- U Position
- Update the U position of the asset in the rack
- Site
- Update the site where the asset is located
- Floor
- Update the Floor where the asset is located
- Geo Location
- Update the Geo-location where the asset is located
- Static
- Update if the asset is a static or not
- Cost
- Update the cost of the asset
- Asset Tag
- Update the Asset Tag
- Order Number
- Update the Order number
- Invoice Number
- Update the Invoice number
- Maintenance Cost
- Update how much the annual maintenance cost of the asset is
- Maintenance Reference
- Update the Reference to the maintenance contract
- Supplier ID
- Update the ID of the asset supplier
- Supplier Contract
- Update the name of the Supplier Contract associated to the asset
- Product ID
- Update the Product ID
- Order Date
- Update the Order date
- Received Date
- Upldate the receive date
- Cost Center
- Update the cost center
- Acq. Method
- Update the method of how the asset was acquired
- Warranty Start
- Update the start of the warranty date
- Warranty Expires
- Update the warranty expiry date
- Supported By
- Update who supports this asset
- Maintenance Notice Period
- Update the notice period for Maintenance contract renewal
- Maintenance Termination Period
- Update the termination period for the asset
- Annual Maintenance Review Date
- Update the annual maintenance review date
- Scheduled Retired Date
- Update the date that the asset set to retire on
- Actual Retired Date
- Update the date that the asset was retired on
- Disposal Reason
- Update why the asset was disposed of
- Disposal Price
- Update how much it cost to dispose of the asset
- Disposal Code
- Update the disposal code
- Beneficiary
- Update who the beneficiary of the asset is
- Depreciation Method
- Update the depreciation method
- Depreciation Start Date
- Update when the asset cost starts deprecating
- Depreciation Value
- Update the current depreciation value
- Residual Value
- Update the residual value
- Create Mobile Device Asset
Create Mobile Device Asset
Creates a new Mobile Device asset within Asset Management and links the new asset to the request from which it was created.
Options
- Request Id
- This is a mandatory setting that uses a variable to hold the Request Id of the request that is using this BPM. This should be set to Auto
- Operational State
- Update the operational state of the assets. Options include pre-production, operational, and retired
- State
- Update the state of the assets. Options include active, current, and archived
- Sub State
- Update the sub state of the asset
- Company
- Update the company that the assets should be associated to
- Name
- Update the name of the assets
- Notes
- Upldate the notes for the assets
- Owned By
- Update the owner of the assets
- Used By
- Update who uses the assets
- Department
- Update the department that the asset is associated to
- Description
- Update the asset description
- Booking
- Update if the asset is available for booking
- Purpose
- Update the purpose of the assets
- Last Audited Date
- Update the last audit date for the assets
- Location Type
- Update the type of location where the asset is
- Location
- Update the Location of the assets
- Country
- Update the country where the asset is located
- Building
- Update the building where the asset is located
- Room
- Update the room where the asset is
- Rack
- Update the rack where the asset is located
- U Height
- Update the U height location in the rack
- U Position
- Update the U position of the asset in the rack
- Site
- Update the site where the asset is located
- Floor
- Update the Floor where the asset is located
- Geo Location
- Update the Geo-location where the asset is located
- Static
- Update if the asset is a static or not
- Cost
- Update the cost of the asset
- Asset Tag
- Update the Asset Tag
- Order Number
- Update the Order number
- Invoice Number
- Update the Invoice number
- Maintenance Cost
- Update how much the annual maintenance cost of the asset is
- Maintenance Reference
- Update the Reference to the maintenance contract
- Supplier ID
- Update the ID of the asset supplier
- Supplier Contract
- Update the name of the Supplier Contract associated to the asset
- Product ID
- Update the Product ID
- Order Date
- Update the Order date
- Received Date
- Upldate the receive date
- Cost Center
- Update the cost center
- Acq. Method
- Update the method of how the asset was acquired
- Warranty Start
- Update the start of the warranty date
- Warranty Expires
- Update the warranty expiry date
- Supported By
- Update who supports this asset
- Maintenance Notice Period
- Update the notice period for Maintenance contract renewal
- Maintenance Termination Period
- Update the termination period for the asset
- Annual Maintenance Review Date
- Update the annual maintenance review date
- Scheduled Retired Date
- Update the date that the asset set to retire on
- Actual Retired Date
- Update the date that the asset was retired on
- Disposal Reason
- Update why the asset was disposed of
- Disposal Price
- Update how much it cost to dispose of the asset
- Disposal Code
- Update the disposal code
- Beneficiary
- Update who the beneficiary of the asset is
- Depreciation Method
- Update the depreciation method
- Depreciation Start Date
- Update when the asset cost starts deprecating
- Depreciation Value
- Update the current depreciation value
- Residual Value
- Update the residual value
- Create Network Device Asset
Create Network Device Asset
Creates a new Network Device asset within Asset Management and links the new asset to the request from which it was created.
Options
- Request Id
- This is a mandatory setting that uses a variable to hold the Request Id of the request that is using this BPM. This should be set to Auto
- Operational State
- Update the operational state of the assets. Options include pre-production, operational, and retired
- State
- Update the state of the assets. Options include active, current, and archived
- Sub State
- Update the sub state of the asset
- Company
- Update the company that the assets should be associated to
- Name
- Update the name of the assets
- Notes
- Upldate the notes for the assets
- Owned By
- Update the owner of the assets
- Used By
- Update who uses the assets
- Department
- Update the department that the asset is associated to
- Description
- Update the asset description
- Booking
- Update if the asset is available for booking
- Purpose
- Update the purpose of the assets
- Last Audited Date
- Update the last audit date for the assets
- Location Type
- Update the type of location where the asset is
- Location
- Update the Location of the assets
- Country
- Update the country where the asset is located
- Building
- Update the building where the asset is located
- Room
- Update the room where the asset is
- Rack
- Update the rack where the asset is located
- U Height
- Update the U height location in the rack
- U Position
- Update the U position of the asset in the rack
- Site
- Update the site where the asset is located
- Floor
- Update the Floor where the asset is located
- Geo Location
- Update the Geo-location where the asset is located
- Static
- Update if the asset is a static or not
- Cost
- Update the cost of the asset
- Asset Tag
- Update the Asset Tag
- Order Number
- Update the Order number
- Invoice Number
- Update the Invoice number
- Maintenance Cost
- Update how much the annual maintenance cost of the asset is
- Maintenance Reference
- Update the Reference to the maintenance contract
- Supplier ID
- Update the ID of the asset supplier
- Supplier Contract
- Update the name of the Supplier Contract associated to the asset
- Product ID
- Update the Product ID
- Order Date
- Update the Order date
- Received Date
- Upldate the receive date
- Cost Center
- Update the cost center
- Acq. Method
- Update the method of how the asset was acquired
- Warranty Start
- Update the start of the warranty date
- Warranty Expires
- Update the warranty expiry date
- Supported By
- Update who supports this asset
- Maintenance Notice Period
- Update the notice period for Maintenance contract renewal
- Maintenance Termination Period
- Update the termination period for the asset
- Annual Maintenance Review Date
- Update the annual maintenance review date
- Scheduled Retired Date
- Update the date that the asset set to retire on
- Actual Retired Date
- Update the date that the asset was retired on
- Disposal Reason
- Update why the asset was disposed of
- Disposal Price
- Update how much it cost to dispose of the asset
- Disposal Code
- Update the disposal code
- Beneficiary
- Update who the beneficiary of the asset is
- Depreciation Method
- Update the depreciation method
- Depreciation Start Date
- Update when the asset cost starts deprecating
- Depreciation Value
- Update the current depreciation value
- Residual Value
- Update the residual value
- Create Printer Asset
Create Printer Asset
Creates a new Printer asset within Asset Management and links the new asset to the request from which it was created.
Options
- Request Id
- This is a mandatory setting that uses a variable to hold the Request Id of the request that is using this BPM. This should be set to Auto
- Operational State
- Update the operational state of the assets. Options include pre-production, operational, and retired
- State
- Update the state of the assets. Options include active, current, and archived
- Sub State
- Update the sub state of the asset
- Company
- Update the company that the assets should be associated to
- Name
- Update the name of the assets
- Notes
- Upldate the notes for the assets
- Owned By
- Update the owner of the assets
- Used By
- Update who uses the assets
- Department
- Update the department that the asset is associated to
- Description
- Update the asset description
- Booking
- Update if the asset is available for booking
- Purpose
- Update the purpose of the assets
- Last Audited Date
- Update the last audit date for the assets
- Location Type
- Update the type of location where the asset is
- Location
- Update the Location of the assets
- Country
- Update the country where the asset is located
- Building
- Update the building where the asset is located
- Room
- Update the room where the asset is
- Rack
- Update the rack where the asset is located
- U Height
- Update the U height location in the rack
- U Position
- Update the U position of the asset in the rack
- Site
- Update the site where the asset is located
- Floor
- Update the Floor where the asset is located
- Geo Location
- Update the Geo-location where the asset is located
- Static
- Update if the asset is a static or not
- Cost
- Update the cost of the asset
- Asset Tag
- Update the Asset Tag
- Order Number
- Update the Order number
- Invoice Number
- Update the Invoice number
- Maintenance Cost
- Update how much the annual maintenance cost of the asset is
- Maintenance Reference
- Update the Reference to the maintenance contract
- Supplier ID
- Update the ID of the asset supplier
- Supplier Contract
- Update the name of the Supplier Contract associated to the asset
- Product ID
- Update the Product ID
- Order Date
- Update the Order date
- Received Date
- Upldate the receive date
- Cost Center
- Update the cost center
- Acq. Method
- Update the method of how the asset was acquired
- Warranty Start
- Update the start of the warranty date
- Warranty Expires
- Update the warranty expiry date
- Supported By
- Update who supports this asset
- Maintenance Notice Period
- Update the notice period for Maintenance contract renewal
- Maintenance Termination Period
- Update the termination period for the asset
- Annual Maintenance Review Date
- Update the annual maintenance review date
- Scheduled Retired Date
- Update the date that the asset set to retire on
- Actual Retired Date
- Update the date that the asset was retired on
- Disposal Reason
- Update why the asset was disposed of
- Disposal Price
- Update how much it cost to dispose of the asset
- Disposal Code
- Update the disposal code
- Beneficiary
- Update who the beneficiary of the asset is
- Depreciation Method
- Update the depreciation method
- Depreciation Start Date
- Update when the asset cost starts deprecating
- Depreciation Value
- Update the current depreciation value
- Residual Value
- Update the residual value
- Get All Assets
Get All Assets
Get a comma delimited list of the asset names that have been associated with the request
Options
- Request Id
- This is a mandatory setting that uses a variable to hold the Request Id of the request that is using this BPM. This should be set to Auto
- Include Type
- When set to Yes, it will return the Type of each asset as well as the asset name
- Get All Generic Assets
Get All Generic Assets
Get a comma delimited list of the asset names that belong to the Generic Class of asset that have been associated with the request
Options
- Request Id
- This is a mandatory setting that uses a variable to hold the Request Id of the request that is using this BPM. This should be set to Auto
- Assets Type
- The type of Generic assets to to get a list of
- Include Type
- When set to Yes, it will return the Type of each asset as well as the asset name
- Get All Computer Peripheral Assets
Get All Computer Peripheral Assets
Get a comma delimited list of the asset names that belong to the Computer Peripheral Class of asset that have been associated with the request
Options
- Request Id
- This is a mandatory setting that uses a variable to hold the Request Id of the request that is using this BPM. This should be set to Auto
- Assets Type
- The type of Computer Peripheral assets to get a list of
- Include Type
- When set to Yes, it will return the Type of each asset as well as the asset name
- Get All Mobile Device Assets
Get All Mobile Device Assets
Get a comma delimited list of the asset names that belong to the Mobile Device Class of asset that have been associated with the request
Options
- Request Id
- This is a mandatory setting that uses a variable to hold the Request Id of the request that is using this BPM. This should be set to Auto
- Assets Type
- The type of Mobile Device assets to to get a list of
- Include Type
- When set to Yes, it will return the Type of each asset as well as the asset name
- Get All Network Device Assets
Get All Network Device Assets
Get a comma delimited list of the asset names that belong to the Network Device Class of asset that have been associated with the request
Options
- Request Id
- This is a mandatory setting that uses a variable to hold the Request Id of the request that is using this BPM. This should be set to Auto
- Assets Type
- The type of Network Device assets to get a list of
- Include Type
- When set to Yes, it will return the Type of each asset as well as the asset name
- Get All Printer Assets
Get All Printer Assets
Get a comma delimited list of the asset names that belong to the Printer Class of asset that have been associated with the request
Options
- Request Id
- This is a mandatory setting that uses a variable to hold the Request Id of the request that is using this BPM. This should be set to Auto
- Assets Type
- The type of Printer assets to get a list of
- Include Type
- When set to Yes, it will return the Type of each asset as well as the asset name
- Get All Software Assets
Get All Software Assets
Get a comma delimited list of the asset names that belong to the Software Class of asset that have been associated with the request
Options
- Request Id
- This is a mandatory setting that uses a variable to hold the Request Id of the request that is using this BPM. This should be set to Auto
- Assets Type
- The type of Software assets to get a list of
- Include Type
- When set to Yes, it will return the Type of each asset as well as the asset name
- Get All Telecoms Assets
Get All Telecoms Assets
Get a comma delimited list of the asset names that belong to the Telecoms Class of asset that have been associated with the request
Options
- Request Id
- This is a mandatory setting that uses a variable to hold the Request Id of the request that is using this BPM. This should be set to Auto
- Assets Type
- The type of Telecoms assets to get a list of
- Include Type
- When set to Yes, it will return the Type of each asset as well as the asset name
- Update All Assets - General Information
Update All Assets - General Information
Update the General Information attributes of all assets that are associated to the request
Options
- Request Id
- This is a mandatory setting that uses a variable to hold the Request Id of the request that is using this BPM. This should be set to Auto
- Operational State
- Update the operational state of the assets. Options include pre-production, operational, and retired
- State
- Update the state of the assets. Options include active, current, and archived
- Sub State
- Update the sub state of the asset
- Company
- Update the company that the assets should be associated to
- Name
- Update the name of the assets
- Notes
- Upldate the notes for the assets
- Owned By
- Update the owner of the assets
- Used By
- Update who uses the assets
- Department
- Update the department that the asset is associated to
- Description
- Update the asset description
- Booking
- Update if the asset is available for booking
- Purpose
- Update the purpose of the assets
- Last Audited Date
- Update the last audit date for the assets
- Location Type
- Update the type of location where the asset is
- Location
- Update the Location of the assets
- Country
- Update the country where the asset is located
- Building
- Update the building where the asset is located
- Room
- Update the room where the asset is
- Rack
- Update the rack where the asset is located
- U Height
- Update the U height location in the rack
- U Position
- Update the U position of the asset in the rack
- Site
- Update the site where the asset is located
- Floor
- Update the Floor where the asset is located
- Geo Location
- Update the Geo-location where the asset is located
- Static
- Update if the asset is a static or not
- Cost
- Update the cost of the asset
- Asset Tag
- Update the Asset Tag
- Order Number
- Update the Order number
- Invoice Number
- Update the Invoice number
- Maintenance Cost
- Update how much the annual maintenance cost of the asset is
- Maintenance Reference
- Update the Reference to the maintenance contract
- Supplier ID
- Update the ID of the asset supplier
- Supplier Contract
- Update the name of the Supplier Contract associated to the asset
- Product ID
- Update the Product ID
- Order Date
- Update the Order date
- Received Date
- Upldate the receive date
- Cost Center
- Update the cost center
- Acq. Method
- Update the method of how the asset was acquired
- Warranty Start
- Update the start of the warranty date
- Warranty Expires
- Update the warranty expiry date
- Supported By
- Update who supports this asset
- Maintenance Notice Period
- Update the notice period for Maintenance contract renewal
- Maintenance Termination Period
- Update the termination period for the asset
- Annual Maintenance Review Date
- Update the annual maintenance review date
- Scheduled Retired Date
- Update the date that the asset set to retire on
- Actual Retired Date
- Update the date that the asset was retired on
- Disposal Reason
- Update why the asset was disposed of
- Disposal Price
- Update how much it cost to dispose of the asset
- Disposal Code
- Update the disposal code
- Beneficiary
- Update who the beneficiary of the asset is
- Depreciation Method
- Update the depreciation method
- Depreciation Start Date
- Update when the asset cost starts deprecating
- Depreciation Value
- Update the current depreciation value
- Residual Value
- Update the residual value
- Update Computer Assets - Additional Properties
Update Computer Assets - Additional Properties
Update the Additional Properties attributes of assets belonging to the Computer class that are associated to the request
Options
- Request Id
- This is a mandatory setting that uses a variable to hold the Request Id of the request that is using this BPM. This should be set to Auto
- Update Computer Assets - General Information
Update Computer Assets - General Information
Update the General Information attributes of assets belonging to the Computer class that are associated to the request
Options
- Request Id
- This is a mandatory setting that uses a variable to hold the Request Id of the request that is using this BPM. This should be set to Auto
- Operational State
- Update the operational state of the assets. Options include pre-production, operational, and retired
- State
- Update the state of the assets. Options include active, current, and archived
- Sub State
- Update the sub state of the asset
- Company
- Update the company that the assets should be associated to
- Name
- Update the name of the assets
- Notes
- Upldate the notes for the assets
- Owned By
- Update the owner of the assets
- Used By
- Update who uses the assets
- Department
- Update the department that the asset is associated to
- Description
- Update the asset description
- Booking
- Update if the asset is available for booking
- Purpose
- Update the purpose of the assets
- Last Audited Date
- Update the last audit date for the assets
- Location Type
- Update the type of location where the asset is
- Location
- Update the Location of the assets
- Country
- Update the country where the asset is located
- Building
- Update the building where the asset is located
- Room
- Update the room where the asset is
- Rack
- Update the rack where the asset is located
- U Height
- Update the U height location in the rack
- U Position
- Update the U position of the asset in the rack
- Site
- Update the site where the asset is located
- Floor
- Update the Floor where the asset is located
- Geo Location
- Update the Geo-location where the asset is located
- Static
- Update if the asset is a static or not
- Cost
- Update the cost of the asset
- Asset Tag
- Update the Asset Tag
- Order Number
- Update the Order number
- Invoice Number
- Update the Invoice number
- Maintenance Cost
- Update how much the annual maintenance cost of the asset is
- Maintenance Reference
- Update the Reference to the maintenance contract
- Supplier ID
- Update the ID of the asset supplier
- Supplier Contract
- Update the name of the Supplier Contract associated to the asset
- Product ID
- Update the Product ID
- Order Date
- Update the Order date
- Received Date
- Upldate the receive date
- Cost Center
- Update the cost center
- Acq. Method
- Update the method of how the asset was acquired
- Warranty Start
- Update the start of the warranty date
- Warranty Expires
- Update the warranty expiry date
- Supported By
- Update who supports this asset
- Maintenance Notice Period
- Update the notice period for Maintenance contract renewal
- Maintenance Termination Period
- Update the termination period for the asset
- Annual Maintenance Review Date
- Update the annual maintenance review date
- Scheduled Retired Date
- Update the date that the asset set to retire on
- Actual Retired Date
- Update the date that the asset was retired on
- Disposal Reason
- Update why the asset was disposed of
- Disposal Price
- Update how much it cost to dispose of the asset
- Disposal Code
- Update the disposal code
- Beneficiary
- Update who the beneficiary of the asset is
- Depreciation Method
- Update the depreciation method
- Depreciation Start Date
- Update when the asset cost starts deprecating
- Depreciation Value
- Update the current depreciation value
- Residual Value
- Update the residual value
- Update Computer Peripheral Assets - Additional Properties
Update Computer Peripheral Assets - Additional Properties
Update the Additional Properties attributes of assets belonging to the Computer Peripheral class that are associated to the request
Options
- Request Id
- This is a mandatory setting that uses a variable to hold the Request Id of the request that is using this BPM. This should be set to Auto
- Update Computer Peripheral Assets - General Information
Update Computer Peripheral Assets - General Information
Update the General Information attributes of assets belonging to the Computer Peripheral class that are associated to the request
Options
- Request Id
- This is a mandatory setting that uses a variable to hold the Request Id of the request that is using this BPM. This should be set to Auto
- Operational State
- Update the operational state of the assets. Options include pre-production, operational, and retired
- State
- Update the state of the assets. Options include active, current, and archived
- Sub State
- Update the sub state of the asset
- Company
- Update the company that the assets should be associated to
- Name
- Update the name of the assets
- Notes
- Upldate the notes for the assets
- Owned By
- Update the owner of the assets
- Used By
- Update who uses the assets
- Department
- Update the department that the asset is associated to
- Description
- Update the asset description
- Booking
- Update if the asset is available for booking
- Purpose
- Update the purpose of the assets
- Last Audited Date
- Update the last audit date for the assets
- Location Type
- Update the type of location where the asset is
- Location
- Update the Location of the assets
- Country
- Update the country where the asset is located
- Building
- Update the building where the asset is located
- Room
- Update the room where the asset is
- Rack
- Update the rack where the asset is located
- U Height
- Update the U height location in the rack
- U Position
- Update the U position of the asset in the rack
- Site
- Update the site where the asset is located
- Floor
- Update the Floor where the asset is located
- Geo Location
- Update the Geo-location where the asset is located
- Static
- Update if the asset is a static or not
- Cost
- Update the cost of the asset
- Asset Tag
- Update the Asset Tag
- Order Number
- Update the Order number
- Invoice Number
- Update the Invoice number
- Maintenance Cost
- Update how much the annual maintenance cost of the asset is
- Maintenance Reference
- Update the Reference to the maintenance contract
- Supplier ID
- Update the ID of the asset supplier
- Supplier Contract
- Update the name of the Supplier Contract associated to the asset
- Product ID
- Update the Product ID
- Order Date
- Update the Order date
- Received Date
- Upldate the receive date
- Cost Center
- Update the cost center
- Acq. Method
- Update the method of how the asset was aquired
- Warranty Start
- Update the start of the warranty date
- Warranty Expires
- Update the warranty expiry date
- Supported By
- Update who supports this asset
- Maintenance Notice Period
- Update the notice period for Maintenance contract renewal
- Maintenance Termination Period
- Update the termination period for the asset
- Annual Maintenance Review Date
- Update the annual maintenance review date
- Scheduled Retired Date
- Update the date that the asset set to retire on
- Actual Retired Date
- Update the date that the asset was retired on
- Disposal Reason
- Update why the asset was disposed of
- Disposal Price
- Update how much it cost to dispose of the asset
- Disposal Code
- Update the desposal code
- Beneficiary
- Update who the beneficiary of the asset is
- Depreciation Method
- Update the depreciation method
- Depreciation Start Date
- Update when the asset cost starts deprecating
- Depreciation Value
- Update the current depreciation value
- Residual Value
- Update the residual value
- Update Mobile Device Assets - Additional Properties
Update Mobile Device Assets - Additional Properties
Update the Additional Properties attributes of assets belonging to the Mobile Device class that are associated to the request
Options
- Request Id
- This is a mandatory setting that uses a variable to hold the Request Id of the request that is using this BPM. This should be set to Auto
- Update Mobile Device Assets - General Information
Update Mobile Device Assets - General Information
Update the General Information attributes of assets belonging to the Mobile Device class that are associated to the request
Options
- Request Id
- This is a mandatory setting that uses a variable to hold the Request Id of the request that is using this BPM. This should be set to Auto
- Operational State
- Update the operational state of the assets. Options include pre-production, operational, and retired
- State
- Update the state of the assets. Options include active, current, and archived
- Sub State
- Update the sub state of the asset
- Company
- Update the company that the assets should be associated to
- Name
- Update the name of the assets
- Notes
- Upldate the notes for the assets
- Owned By
- Update the owner of the assets
- Used By
- Update who uses the assets
- Department
- Update the department that the asset is associated to
- Description
- Update the asset description
- Booking
- Update if the asset is available for booking
- Purpose
- Update the purpose of the assets
- Last Audited Date
- Update the last audit date for the assets
- Location Type
- Update the type of location where the asset is
- Location
- Update the Location of the assets
- Country
- Update the country where the asset is located
- Building
- Update the building where the asset is located
- Room
- Update the room where the asset is
- Rack
- Update the rack where the asset is located
- U Height
- Update the U height location in the rack
- U Position
- Update the U position of the asset in the rack
- Site
- Update the site where the asset is located
- Floor
- Update the Floor where the asset is located
- Geo Location
- Update the Geo-location where the asset is located
- Static
- Update if the asset is a static or not
- Cost
- Update the cost of the asset
- Asset Tag
- Update the Asset Tag
- Order Number
- Update the Order number
- Invoice Number
- Update the Invoice number
- Maintenance Cost
- Update how much the annual maintenance cost of the asset is
- Maintenance Reference
- Update the Reference to the maintenance contract
- Supplier ID
- Update the ID of the asset supplier
- Supplier Contract
- Update the name of the Supplier Contract associated to the asset
- Product ID
- Update the Product ID
- Order Date
- Update the Order date
- Received Date
- Upldate the receive date
- Cost Center
- Update the cost center
- Acq. Method
- Update the method of how the asset was acquired
- Warranty Start
- Update the start of the warranty date
- Warranty Expires
- Update the warranty expiry date
- Supported By
- Update who supports this asset
- Maintenance Notice Period
- Update the notice period for Maintenance contract renewal
- Maintenance Termination Period
- Update the termination period for the asset
- Annual Maintenance Review Date
- Update the annual maintenance review date
- Scheduled Retired Date
- Update the date that the asset set to retire on
- Actual Retired Date
- Update the date that the asset was retired on
- Disposal Reason
- Update why the asset was disposed of
- Disposal Price
- Update how much it cost to dispose of the asset
- Disposal Code
- Update the disposal code
- Beneficiary
- Update who the beneficiary of the asset is
- Depreciation Method
- Update the depreciation method
- Depreciation Start Date
- Update when the asset cost starts deprecating
- Depreciation Value
- Update the current depreciation value
- Residual Value
- Update the residual value
- Update Network Device Assets - Additional Properties
Update Network Device Assets - Additional Properties
Update the Additional Properties attributes of assets belonging to the Network Device class that are associated to the request
Options
- Request Id
- This is a mandatory setting that uses a variable to hold the Request Id of the request that is using this BPM. This should be set to Auto
- Update Network Device Assets - General Information
Update Network Device Assets - General Information
Update the General Information attributes of assets belonging to the Network Device class that are associated to the request
Options
- Request Id
- This is a mandatory setting that uses a variable to hold the Request Id of the request that is using this BPM. This should be set to Auto
- Operational State
- Update the operational state of the assets. Options include pre-production, operational, and retired
- State
- Update the state of the assets. Options include active, current, and archived
- Sub State
- Update the sub state of the asset
- Company
- Update the company that the assets should be associated to
- Name
- Update the name of the assets
- Notes
- Upldate the notes for the assets
- Owned By
- Update the owner of the assets
- Used By
- Update who uses the assets
- Department
- Update the department that the asset is associated to
- Description
- Update the asset description
- Booking
- Update if the asset is available for booking
- Purpose
- Update the purpose of the assets
- Last Audited Date
- Update the last audit date for the assets
- Location Type
- Update the type of location where the asset is
- Location
- Update the Location of the assets
- Country
- Update the country where the asset is located
- Building
- Update the building where the asset is located
- Room
- Update the room where the asset is
- Rack
- Update the rack where the asset is located
- U Height
- Update the U height location in the rack
- U Position
- Update the U position of the asset in the rack
- Site
- Update the site where the asset is located
- Floor
- Update the Floor where the asset is located
- Geo Location
- Update the Geo-location where the asset is located
- Static
- Update if the asset is a static or not
- Cost
- Update the cost of the asset
- Asset Tag
- Update the Asset Tag
- Order Number
- Update the Order number
- Invoice Number
- Update the Invoice number
- Maintenance Cost
- Update how much the annual maintenance cost of the asset is
- Maintenance Reference
- Update the Reference to the maintenance contract
- Supplier ID
- Update the ID of the asset supplier
- Supplier Contract
- Update the name of the Supplier Contract associated to the asset
- Product ID
- Update the Product ID
- Order Date
- Update the Order date
- Received Date
- Upldate the receive date
- Cost Center
- Update the cost center
- Acq. Method
- Update the method of how the asset was acquired
- Warranty Start
- Update the start of the warranty date
- Warranty Expires
- Update the warranty expiry date
- Supported By
- Update who supports this asset
- Maintenance Notice Period
- Update the notice period for Maintenance contract renewal
- Maintenance Termination Period
- Update the termination period for the asset
- Annual Maintenance Review Date
- Update the annual maintenance review date
- Scheduled Retired Date
- Update the date that the asset set to retire on
- Actual Retired Date
- Update the date that the asset was retired on
- Disposal Reason
- Update why the asset was disposed of
- Disposal Price
- Update how much it cost to dispose of the asset
- Disposal Code
- Update the disposal code
- Beneficiary
- Update who the beneficiary of the asset is
- Depreciation Method
- Update the depreciation method
- Depreciation Start Date
- Update when the asset cost starts deprecating
- Depreciation Value
- Update the current depreciation value
- Residual Value
- Update the residual value
- Update Printer Assets - Additional Properties
Update Printer Assets - Additional Properties
Update the Additional Properties attributes of assets belonging to the Printer class that are associated to the request
Options
- Request Id
- This is a mandatory setting that uses a variable to hold the Request Id of the request that is using this BPM. This should be set to Auto
- Update Printer Assets - General Information
Update Printer Assets - General Information
Update the General Information attributes of assets belonging to the Printer class that are associated to the request
Options
- Request Id
- This is a mandatory setting that uses a variable to hold the Request Id of the request that is using this BPM. This should be set to Auto
- Operational State
- Update the operational state of the assets. Options include pre-production, operational, and retired
- State
- Update the state of the assets. Options include active, current, and archived
- Sub State
- Update the sub state of the asset
- Company
- Update the company that the assets should be associated to
- Name
- Update the name of the assets
- Notes
- Upldate the notes for the assets
- Owned By
- Update the owner of the assets
- Used By
- Update who uses the assets
- Department
- Update the department that the asset is associated to
- Description
- Update the asset description
- Booking
- Update if the asset is available for booking
- Purpose
- Update the purpose of the assets
- Last Audited Date
- Update the last audit date for the assets
- Location Type
- Update the type of location where the asset is
- Location
- Update the Location of the assets
- Country
- Update the country where the asset is located
- Building
- Update the building where the asset is located
- Room
- Update the room where the asset is
- Rack
- Update the rack where the asset is located
- U Height
- Update the U height location in the rack
- U Position
- Update the U position of the asset in the rack
- Site
- Update the site where the asset is located
- Floor
- Update the Floor where the asset is located
- Geo Location
- Update the Geo-location where the asset is located
- Static
- Update if the asset is a static or not
- Cost
- Update the cost of the asset
- Asset Tag
- Update the Asset Tag
- Order Number
- Update the Order number
- Invoice Number
- Update the Invoice number
- Maintenance Cost
- Update how much the annual maintenance cost of the asset is
- Maintenance Reference
- Update the Reference to the maintenance contract
- Supplier ID
- Update the ID of the asset supplier
- Supplier Contract
- Update the name of the Supplier Contract associated to the asset
- Product ID
- Update the Product ID
- Order Date
- Update the Order date
- Received Date
- Upldate the receive date
- Cost Center
- Update the cost center
- Acq. Method
- Update the method of how the asset was acquired
- Warranty Start
- Update the start of the warranty date
- Warranty Expires
- Update the warranty expiry date
- Supported By
- Update who supports this asset
- Maintenance Notice Period
- Update the notice period for Maintenance contract renewal
- Maintenance Termination Period
- Update the termination period for the asset
- Annual Maintenance Review Date
- Update the annual maintenance review date
- Scheduled Retired Date
- Update the date that the asset set to retire on
- Actual Retired Date
- Update the date that the asset was retired on
- Disposal Reason
- Update why the asset was disposed of
- Disposal Price
- Update how much it cost to dispose of the asset
- Disposal Code
- Update the disposal code
- Beneficiary
- Update who the beneficiary of the asset is
- Depreciation Method
- Update the depreciation method
- Depreciation Start Date
- Update when the asset cost starts deprecating
- Depreciation Value
- Update the current depreciation value
- Residual Value
- Update the residual value
- Update Software Assets - Additional Properties
Update Software Assets - Additional Properties
Update the Additional Properties attributes of assets belonging to the Software class that are associated to the request
Options
- Request Id
- This is a mandatory setting that uses a variable to hold the Request Id of the request that is using this BPM. This should be set to Auto
- Update Software Assets - General Information
Update Software Assets - General Information
Update the General Information attributes of assets belonging to the Software class that are associated to the request
Options
- Request Id
- This is a mandatory setting that uses a variable to hold the Request Id of the request that is using this BPM. This should be set to Auto
- Operational State
- Update the operational state of the assets. Options include pre-production, operational, and retired
- State
- Update the state of the assets. Options include active, current, and archived
- Sub State
- Update the sub state of the asset
- Company
- Update the company that the assets should be associated to
- Name
- Update the name of the assets
- Notes
- Upldate the notes for the assets
- Owned By
- Update the owner of the assets
- Used By
- Update who uses the assets
- Department
- Update the department that the asset is associated to
- Description
- Update the asset description
- Booking
- Update if the asset is available for booking
- Purpose
- Update the purpose of the assets
- Last Audited Date
- Update the last audit date for the assets
- Location Type
- Update the type of location where the asset is
- Location
- Update the Location of the assets
- Country
- Update the country where the asset is located
- Building
- Update the building where the asset is located
- Room
- Update the room where the asset is
- Rack
- Update the rack where the asset is located
- U Height
- Update the U height location in the rack
- U Position
- Update the U position of the asset in the rack
- Site
- Update the site where the asset is located
- Floor
- Update the Floor where the asset is located
- Geo Location
- Update the Geo-location where the asset is located
- Static
- Update if the asset is a static or not
- Cost
- Update the cost of the asset
- Asset Tag
- Update the Asset Tag
- Order Number
- Update the Order number
- Invoice Number
- Update the Invoice number
- Maintenance Cost
- Update how much the annual maintenance cost of the asset is
- Maintenance Reference
- Update the Reference to the maintenance contract
- Supplier ID
- Update the ID of the asset supplier
- Supplier Contract
- Update the name of the Supplier Contract associated to the asset
- Product ID
- Update the Product ID
- Order Date
- Update the Order date
- Received Date
- Upldate the receive date
- Cost Center
- Update the cost center
- Acq. Method
- Update the method of how the asset was acquired
- Warranty Start
- Update the start of the warranty date
- Warranty Expires
- Update the warranty expiry date
- Supported By
- Update who supports this asset
- Maintenance Notice Period
- Update the notice period for Maintenance contract renewal
- Maintenance Termination Period
- Update the termination period for the asset
- Annual Maintenance Review Date
- Update the annual maintenance review date
- Scheduled Retired Date
- Update the date that the asset set to retire on
- Actual Retired Date
- Update the date that the asset was retired on
- Disposal Reason
- Update why the asset was disposed of
- Disposal Price
- Update how much it cost to dispose of the asset
- Disposal Code
- Update the disposal code
- Beneficiary
- Update who the beneficiary of the asset is
- Depreciation Method
- Update the depreciation method
- Depreciation Start Date
- Update when the asset cost starts deprecating
- Depreciation Value
- Update the current depreciation value
- Residual Value
- Update the residual value
- Update Telecoms Assets - General Information
Update Telecoms Assets - General Information
Update the General Information attributes of assets belonging to the Telecoms class that are associated to the request
Options
- Request Id
- This is a mandatory setting that uses a variable to hold the Request Id of the request that is using this BPM. This should be set to Auto
- Operational State
- Update the operational state of the assets. Options include pre-production, operational, and retired
- State
- Update the state of the assets. Options include active, current, and archived
- Sub State
- Update the sub state of the asset
- Company
- Update the company that the assets should be associated to
- Name
- Update the name of the assets
- Notes
- Upldate the notes for the assets
- Owned By
- Update the owner of the assets
- Used By
- Update who uses the assets
- Department
- Update the department that the asset is associated to
- Description
- Update the asset description
- Booking
- Update if the asset is available for booking
- Purpose
- Update the purpose of the assets
- Last Audited Date
- Update the last audit date for the assets
- Location Type
- Update the type of location where the asset is
- Location
- Update the Location of the assets
- Country
- Update the country where the asset is located
- Building
- Update the building where the asset is located
- Room
- Update the room where the asset is
- Rack
- Update the rack where the asset is located
- U Height
- Update the U height location in the rack
- U Position
- Update the U position of the asset in the rack
- Site
- Update the site where the asset is located
- Floor
- Update the Floor where the asset is located
- Geo Location
- Update the Geo-location where the asset is located
- Static
- Update if the asset is a static or not
- Cost
- Update the cost of the asset
- Asset Tag
- Update the Asset Tag
- Order Number
- Update the Order number
- Invoice Number
- Update the Invoice number
- Maintenance Cost
- Update how much the annual maintenance cost of the asset is
- Maintenance Reference
- Update the Reference to the maintenance contract
- Supplier ID
- Update the ID of the asset supplier
- Supplier Contract
- Update the name of the Supplier Contract associated to the asset
- Product ID
- Update the Product ID
- Order Date
- Update the Order date
- Received Date
- Upldate the receive date
- Cost Center
- Update the cost center
- Acq. Method
- Update the method of how the asset was acquired
- Warranty Start
- Update the start of the warranty date
- Warranty Expires
- Update the warranty expiry date
- Supported By
- Update who supports this asset
- Maintenance Notice Period
- Update the notice period for Maintenance contract renewal
- Maintenance Termination Period
- Update the termination period for the asset
- Annual Maintenance Review Date
- Update the annual maintenance review date
- Scheduled Retired Date
- Update the date that the asset set to retire on
- Actual Retired Date
- Update the date that the asset was retired on
- Disposal Reason
- Update why the asset was disposed of
- Disposal Price
- Update how much it cost to dispose of the asset
- Disposal Code
- Update the disposal code
- Beneficiary
- Update who the beneficiary of the asset is
- Depreciation Method
- Update the depreciation method
- Depreciation Start Date
- Update when the asset cost starts deprecating
- Depreciation Value
- Update the current depreciation value
- Residual Value
- Update the residual value
Assignment
Use the Assignment node to automatically assign a request to different Service Manager users or teams.
- Assign to Service Team
Assign to Service Team
Assign to Service Team assigns the request to the team that supports the service. If no team supports the service that the request is logged against then the request is not assigned. If more than one team supports the service, the request is assigned to the team that has supported the service the longest. This automated task does not assign the request to an individual within the team(s) supported by the service.
Options
- Request ID
- In almost all cases, this should be set to Auto which will take the global variable for the request ID that the BPM is associated and apply all selected options to this request
- Use Request Service
- Choose whether or not to use the service of the request. The default is No. If this parameter is set to Yes, it will override any other service specified as an input parameter
- Service
- The Service ID of the service which is supported by the team to be assigned to the request
- System Timeline Update
- Select if the default system text will be added to the timeline for this action
- Manual Timeline Update
- Select Yes to override the default System timeline Text, and add your own text which will appear in the timeline update for this action
- Visibility
- Choose what level of visibility will be automatically applied to this update. Choosing anything other than Customer will result in the customer not seeing the update in the timeline of their requests on the Service or Customer Portals
- Assign to Team
Assign to Team
Use this option to assign the request to a specified team.
Options
- Request ID
- In almost all cases, this should be set to Auto which will take the global variable for the request ID that the BPM is associated and apply all selected options to this request.
- Team
- Select a team from the list of available teams that have been defined under the Organizational Data in Administration
- Team (From Variable)
- Assign to a Team based on a variable that has been populated using Progressive Capture or through the Get Information nodes
- System Timeline Update
- Select if the default system text will be added to the timeline for this action
- Manual Timeline Update
- Select Yes to override the default System timeline Text, and add your own text which will appear in the timeline update for this action
- Visibility
- Choose what level of visibility will be automatically applied to this update. Choosing anything other than Customer will result in the customer not seeing the update in the timeline of their requests on the Service or Customer Portals
- Assign to Owner
Assign to Owner
Use this option to assign the request to a specific Service Manager analyst.
Options
- Request Id
- This is a mandatory setting that uses a variable to hold the Request Id of the request that is using this BPM. This should be set to Auto.
- Team
- The Team ID to be applied to the request
- Owner
- The user ID to be applied to the request
- System Timeline Update
- Select if the default system text will be added to the timeline for this action
- Manual Timeline Update
- Select Yes to override the default System timeline Text, and add your own text which will appear in the timeline update for this action
- Visibility
- Choose what level of visibility will be automatically applied to this update. Choosing anything other than Customer will result in the customer not seeing the update in the timeline of their requests on the Service or Customer Portals
- Assign to Owner (Variable)
Assign to Owner (Variable)
Use this option to assign the request to a specific Service Manager analyst using a dynamic value provided by a runtime variable that has been populated using Progressive Capture or through the Get Information nodes
Options
- Request ID
- In almost all cases, this should be set to Auto which will take the global variable for the request ID that the BPM is associated and apply all selected options to this request.
- Team
- Select a team from the list of available teams that have been defined under the Organizational Data in Administration. If no team specified and if the designated owner is a member of multiple teams, the team that gets assigned will be the first team in a list of owner teams ordered by team name.
- Owner
- Assign to an analyst based on a variable that has been populated using Progressive Capture or through the Get Information nodes
- System Timeline Update
- Select if the default system text will be added to the timeline for this action
- Manual Timeline Update
- Select Yes to override the default System timeline Text, and add your own text which will appear in the timeline update for this action
- Visibility
- Choose what level of visibility will be automatically applied to this update. Choosing anything other than Customer will result in the customer not seeing the update in the timeline of their requests on the Service or Customer Portals.
- Assign to Request Creator
Assign to Request Creator
Use this option to automatically assign the request to the Service Manager analyst who created / raised the request via Progressive Capture
Options
- Request Id
- This is a mandatory setting that uses a variable to hold the Request Id of the request that is using this BPM. This should be set to Auto.
- Team
- The Team ID to be applied to the request
- System Timeline Update
- Select if the default system text will be added to the timeline for this action
- Manual Timeline Update
- Select Yes to override the default System timeline Text, and add your own text which will appear in the timeline update for this action
- Visibility
- Choose what level of visibility will be automatically applied to this update. Choosing anything other than Customer will result in the customer not seeing the update in the timeline of their requests on the Service or Customer Portals.
- Assign to Most Available Analyst
Assign to Most Available Analyst
Using Assign to Most Available Analyst is a great way to automatically assign out requests to the members of a team. This operation works on the basis of capacity. The system will look through the members of the selected team and will assign the request to the member who has the least amount of open requests. If more than one team member have an equal number of open requests and have the least amount of assigned requests, the system will allocate the request to the team member who has had the greatest amount of time pass since their last assignment.
The system will take into account the user status which is found on their profile. If the user status is set to anything other than 'Available' that user/analyst/team member will not be considered as a request owner
Options
- Request Id
- This is a mandatory setting that uses a variable to hold the Request Id of the request that is using this BPM. This should be set to Auto.
- Team
- Select the team that you would like to participate in the Round Robin Assignment. This is a mandatory setting and must be set to Manual and have a team assigned.
- Include Offline Users
- This takes into account if the user is logged into Hornbill and have an active session. The default behavior (Auto) is to include offline users. Set this option to No if you don't want requests assigned to users that are not online. If all the team members are off-line, the request will be assigned to just the team. In order for this to work effectively when taking into account users logged in status, users will need to be disciplined in logging off Hornbill. Simply closing the browser window does not end a users session(s). We would also strongly recommend that you disable the allow multi-logon option on your instance, otherwise taking into consideration a users Logged On status will be unreliable.
- Exclude On-hold Requests
- If set to "Yes", when determining a user's availability, any requests that are on-hold will not be included when calculating availability. The default value is "No"
- System Timeline Update
- Select if the default system text will be added to the timeline for this action
- Manual Timeline Update
- Select Yes to override the default System timeline Text, and add your own text which will appear in the timeline update for this action
- Visibility
- Choose what level of visibility will be automatically applied to this update. Choosing anything other than Customer will result in the customer not seeing the update in the timeline of their requests on the Service or Customer Portals
- Assign on Round Robin Basis
Assign on Round Robin Basis
Using the Assign Round Robin is a great way to automatically assign out requests to the members of a team . The system will look through the members of the selected team and will assign the request to the member who has had the greatest amount of time pass since their last assignment. The system will take into account the user's status which is found on their profile. If the user's status is set to anything other than 'Available' that user will not be considered for assignment. This does not take into account the volume of requests assigned to each user.
Options
- Request Id
- This is a mandatory setting that uses a variable to hold the Request Id of the request that is using this BPM. This should be set to Auto
- Team
- Select the team that you would like to participate in the Round Robin Assignment. This is a mandatory setting and must be set to Manual and have a team assigned
- Include Offline Users
- This takes into account if the user is logged into Hornbill and have an active session. The default behavior (Auto) is to include offline users. Set this option to No if you don't want requests assigned to users that are not online. In order for Round Robin to work effectively when taking into account users login status, users must become disciplined in logging off Hornbill via the User menu located to the top right. Simply closing the browser window does not end a users session. We would also strongly recommend that you disable the allow multi-logon option on your instance, otherwise taking into consideration a users Logged On status will be unreliable.
- System Timeline Update
- Select if the default system text will be added to the timeline for this action
- Manual Timeline Update
- Select Yes to override the default System timeline Text, and add your own text which will appear in the timeline update for this action
- Visibility
- Choose what level of visibility will be automatically applied to this update. Choosing anything other than Customer will result in the customer not seeing the update in the timeline of their requests on the Service or Customer Portals
Authorisation Decision
Use the Authorisation Decision node to mark on a Change or Service Request form if an authorization decision has been made.
- Approved
Approved
Use this Authorisation Decision node to mark on a Change or Service Request as being approved. The status of Approved will be displayed in the Information panel on the request.
Options
- Request Id
- This is a mandatory setting that uses a variable to hold the Request Id of the request that is using this BPM. This should be set to Auto
- System Timeline Update
- Select if the default system text will be added to the timeline for this action
- Manual Timeline Update
- Select Yes to override the default System timeline Text, and add your own text which will appear in the timeline update for this action
- Visibility
- Choose what level of visibility will be automatically applied to this update. Choosing anything other than Customer will result in the customer not seeing the update in the timeline of their requests on the Service or Customer Portals.
- Rejected
Rejected
Use this Authorization Decision node to mark on a Change or Service Request as being rejected. The status of Rejected will be displayed in the Information panel on the request.
Options
- Request Id
- This is a mandatory setting that uses a variable to hold the Request Id of the request that is using this BPM. This should be set to Auto
- System Timeline Update
- Select if the default system text will be added to the timeline for this action
- Manual Timeline Update
- Select Yes to override the default System timeline Text, and add your own text which will appear in the timeline update for this action
- Visibility
- Choose what level of visibility will be automatically applied to this update. Choosing anything other than Customer will result in the customer not seeing the update in the timeline of their requests on the Service or Customer Portals.
- Clear
Clear
Use this Authorization Decision node to clear a previous authorization decision that was added to the request. Once cleared, the authorization decision will no longer show in the Information Panel.
Options
- Request Id
- This is a mandatory setting that uses a variable to hold the Request Id of the request that is using this BPM. This should be set to Auto
- System Timeline Update
- Select if the default system text will be added to the timeline for this action
- Manual Timeline Update
- Select Yes to override the default System timeline Text, and add your own text which will appear in the timeline update for this action
- Visibility
- Choose what level of visibility will be automatically applied to this update. Choosing anything other than Customer will result in the customer not seeing the update in the timeline of their requests on the Service or Customer Portals.
Collaboration
Use the Collaboration node to post an automated update onto a public workspace at any stage in a process. This will be visible to members of the specified workspace, on the timeline of the workspace and their News Feeds.
- Comment on Existing Public Workspace Post
Comment on Existing Public Workspace Post
Use this node to automate the adding of a comment to an existing Post in a workspace. It will always look to add the comment to the most recent post from the request in the workspace. An example use case for this node, is to include the Comment Update after key milestones such as Logged, In progress, Resolved, Closed or Change Accepted, Scheduled, Implemented, Reviewed. This will allow members of the workspace to stay informed about request progress without the need to monitor lists or queues. This node will only be applicable if the Post to Public Workspace Node has been used and a Post already exists from the request in a Workspace.
Options
- Request Id
- This is a mandatory setting that uses a variable to hold the Request Id of the request that is using this BPM. This should be set to Auto
- Workspace
- The ID of the workspace where the comment will be posted
- Content
- The content of the comment to be added to the post
- Update Timeline
- Include a Timeline update on the request when this automation has completed
- Comment on Request Source Post
Comment on Request Source Post
Use this option when the source of the request is from a post in order to post a comment back to this source post.
Options
- Request Id
- This is a mandatory setting that uses a variable to hold the Request Id of the request that is using this BPM. This should be set to Auto
- Content
- The content of the comment to be added to the post
- Include Id
- Include the Request Id in the comment which will include a link in the comment, back to the request
- Include Summary
- Include the Summary of the request in the comment as part of the link back to the request
- Update Timeline
- Include a Timeline update on the request when this automation has completed
- Post to Public Workspace
Post to Public Workspace
Use this node to add a new post to a specific workspace. This will allow you to post important information to Collaboration users pertaining to the request.
One example of it's use would be during a Change Request, to let interested parties / stakeholders (Workspace Members) know that the Change had been accepted, scheduled and would therefore be being deployed. The member's of the workspace may not be Service Manager subscribed users, but their Collaboration subscription would enable them to be kept informed about Change, Problem, or Major Incident notifications by receiving notifications about the automated Posting from this node to their workspaces.
Options
- Request Id
- This is a mandatory setting that uses a variable to hold the Request Id of the request that is using this BPM. This should be set to Auto
- Workspace
- The ID of the workspace where the comment will be posted
- Content
- The content of the comment to be added to the post
- Include Id
- Include the Request Id in the comment which will include a link in the comment, back to the request
- Include Summary
- Include the Summary of the request in the comment as part of the link back to the request
- Update Timeline
- Include a Timeline update on the request when this automation has completed
Email Notifications
Use the Email Notification nodes to send email templates to different Request stakeholders. Configuration options include recipient, which email template to use and which mailbox to send the email from.
- Email Contact
Email Contact
Use this node to send an email to a contact that has a contact record stored in Hornbill
Options
- Request ID
- In almost all cases, this should be set to Auto which will take the global variable for the request ID that the BPM is associated and apply all selected options to this request.
- Contact
- Select a contact from the searchable pick list. Only contacts that have records stored in Hornbill will be available
- CC
- Comma separated email addresses to send as Carbon Copy recipients
- BCC
- Comma separated email addresses to send as Blind Carbon Copy recipients
- Mailbox Name
- Select the Hornbill Mailbox from which you want this sent. If this is not set, it will use the default mailbox for the Service that the request has been raised under
- Email From
- Select the email address that you want listed as the sender.
- Email Template Entity
- Select the Entity from which you want to use the associated Email Templates. For example select the Change Request Entity to use email templates that contain variables which are specific to this entity. Leave this as Auto to use the default Request entity.
- Email Template
- Select the email template that you want to use for this email
- System Timeline Update
- Select if the default system text will be added to the timeline for this action
- Manual Timeline Update
- Select Yes to override the default System timeline Text, and add your own text which will appear in the timeline update for this action
- Visibility
- Choose what level of visibility will be automatically applied to this update. Choosing anything other than Customer will result in the customer not seeing the update in the timeline of their requests on the Service or Customer Portals.
- Email Co-worker
Email Co-worker
Use this node to send an email to a Co-worker that has a user account in Hornbill
Options
- Request ID
- In almost all cases, this should be set to Auto which will take the global variable for the request ID that the BPM is associated and apply all selected options to this request.
- Co-worker
- Select a Co-worker from the searchable pick list. Only Co-workers that have accounts in Hornbill will be available
- Co-worker (From Variable)
- Set a Co-worker from a variable
- CC
- Comma separated email addresses to send as Carbon Copy recipients
- BCC
- Comma separated email addresses to send as Blind Carbon Copy recipients
- Mailbox Name
- Select the Hornbill Mailbox from which you want this sent. If this is not set, it will use the default mailbox for the Service that the request has been raised under
- Email From
- Select the email address that you want listed as the sender.
- Email Template Entity
- Select the Entity from which you want to use the associated Email Templates. For example select the Change Request Entity to use email templates that contain variables which are specific to this entity. Leave this as Auto to use the default Request entity.
- Email Template
- Select the email template that you want to use for this email
- System Timeline Update
- Select if the default system text will be added to the timeline for this action
- Manual Timeline Update
- Select Yes to override the default System timeline Text, and add your own text which will appear in the timeline update for this action
- Visibility
- Choose what level of visibility will be automatically applied to this update. Choosing anything other than Customer will result in the customer not seeing the update in the timeline of their requests on the Service or Customer Portals.
- Email Customer
Email Customer
Use this node to send an email to the customer that is associated to the request
Options
- Request ID
- In almost all cases, this should be set to Auto which will take the global variable for the request ID that the BPM is associated and apply all selected options to this request.
- CC
- Comma separated email addresses to send as Carbon Copy recipients
- BCC
- Comma separated email addresses to send as Blind Carbon Copy recipients
- Mailbox Name
- Select the Hornbill Mailbox from which you want this sent. If this is not set, it will use the default mailbox for the Service that the request has been raised under
- Email From
- Select the email address that you want listed as the sender.
- Email Template Entity
- Select the Entity from which you want to use the associated Email Templates. For example select the Change Request Entity to use email templates that contain variables which are specific to this entity. Leave this as Auto to use the default Request entity
- Email Template
- Select the email template that you want to use for this email
- System Timeline Update
- Select if the default system text will be added to the timeline for this action
- Manual Timeline Update
- Select Yes to override the default System timeline Text, and add your own text which will appear in the timeline update for this action
- Visibility
- Choose what level of visibility will be automatically applied to this update. Choosing anything other than Customer will result in the customer not seeing the update in the timeline of their requests on the Service or Customer Portals.
- Email Customer Manager
Email Customer Manager
Use this node to send an email to the Manager of the customer that is associated to the request
Options
- Request ID
- In almost all cases, this should be set to Auto which will take the global variable for the request ID that the BPM is associated and apply all selected options to this request.
- CC
- Comma separated email addresses to send as Carbon Copy recipients
- BCC
- Comma separated email addresses to send as Blind Carbon Copy recipients
- Mailbox Name
- Select the Hornbill Mailbox from which you want this sent. If this is not set, it will use the default mailbox for the Service that the request has been raised under
- Email From
- Select the email address that you want listed as the sender.
- Email Template Entity
- Select the Entity from which you want to use the associated Email Templates. For example select the Change Request Entity to use email templates that contain variables which are specific to this entity. Leave this as Auto to use the default Request entity.
- Email Template
- Select the email template that you want to use for this email
- System Timeline Update
- Select if the default system text will be added to the timeline for this action
- Manual Timeline Update
- Select Yes to override the default System timeline Text, and add your own text which will appear in the timeline update for this action
- Visibility
- Choose what level of visibility will be automatically applied to this update. Choosing anything other than Customer will result in the customer not seeing the update in the timeline of their requests on the Service or Customer Portals.
- Email External Address
Email External Address
Use this node to send an email to one or more email addresses that are not available within Hornbill
Options
- Request ID
- In almost all cases, this should be set to Auto which will take the global variable for the request ID that the BPM is associated and apply all selected options to this request.
- External Addresses
- Add one or more email addresses that are not held within Hornbill. Multiple email address must be separated by a comma. Note: Please ensure there is no trailing comma. This will create an additional, empty, address which will cause an error.
- CC
- Comma separated email addresses to send as Carbon Copy recipients
- BCC
- Comma separated email addresses to send as Blind Carbon Copy recipients
- Mailbox Name
- Select the Hornbill Mailbox from which you want this sent. If this is not set, it will use the default mailbox for the Service that the request has been raised under
- Email From
- Select the email address that you want listed as the sender.
- Email Template Entity
- Select the Entity from which you want to use the associated Email Templates. For example select the Change Request Entity to use email templates that contain variables which are specific to this entity. Leave this as Auto to use the default Request entity.
- Email Template
- Select the email template that you want to use for this email
- System Timeline Update
- Select if the default system text will be added to the timeline for this action
- Manual Timeline Update
- Select Yes to override the default System timeline Text, and add your own text which will appear in the timeline update for this action
- Visibility
- Choose what level of visibility will be automatically applied to this update. Choosing anything other than Customer will result in the customer not seeing the update in the timeline of their requests on the Service or Customer Portals.
- Email Request Owner
Email Request Owner
Use this node to send an email to the owner of the request
Options
- Request ID
- In almost all cases, this should be set to Auto which will take the global variable for the request ID that the BPM is associated and apply all selected options to this request.
- CC
- Comma separated email addresses to send as Carbon Copy recipients
- BCC
- Comma separated email addresses to send as Blind Carbon Copy recipients
- Mailbox Name
- Select the Hornbill Mailbox from which you want this sent. If this is not set, it will use the default mailbox for the Service that the request has been raised under
- Email From
- Select the email address that you want listed as the sender.
- Email Template Entity
- Select the Entity from which you want to use the associated Email Templates. For example select the Change Request Entity to use email templates that contain variables which are specific to this entity. Leave this as Auto to use the default Request entity.
- Email Template
- Select the email template that you want to use for this email
- System Timeline Update
- Select if the default system text will be added to the timeline for this action
- Manual Timeline Update
- Select Yes to override the default System timeline Text, and add your own text which will appear in the timeline update for this action
- Visibility
- Choose what level of visibility will be automatically applied to this update. Choosing anything other than Customer will result in the customer not seeing the update in the timeline of their requests on the Service or Customer Portals.
Get Request Information
Use the Get Request Information node at any stage in a process and preceding another workflow node when you want to make the variables of the Request available. Variables may include Customer, Status, Site, Priority, or any Answers to Customer defined questions from different Progressive capture forms or attributes of the customer or organisation of the request the business process is running against.
- Catagory Details
- Customer Details
Customer Details
Use this option at the start of a stage or preceding a task, authorisation, or decision node to load the Customer's organisations details (variables) into the stage, and to make them available to other node operations where you may wish to specify or refer to Variable values from the customer of the request.
Options
- Request ID
- In almost all cases, this should be set to Auto which will take the global variable for the request ID that the BPM is associated and apply all selected options to this request.
- Source Email Details
Source Email Details
When the origin of a Request is an email (i.e. raised via Routing Rules or Email View), this option can be used to retrieve the details of the email message. This includes FROM address, TO address, subject, content, date sent and date received. You can use the Variable Picker or the Expressions Builder to make a decision on the retrieved details.
Options
- Request ID
- In almost all cases, this should be set to Auto which will take the global variable for the request ID that the BPM is associated and apply all selected options to this request.
- Organisation Details
Organisation Details
Use this option at the start of a stage or preceding a task, authorisation, or a decision node to load the Customer's Organisations details to make them available as variables to other node operations where you may wish to specify or refer to values from the customer's organisation associated to the request.
Options
- Request ID
- In almost all cases, this should be set to Auto which will take the global variable for the request ID that the BPM is associated and apply all selected options to this request.
- Owner Details
Owner Details
Use this operation when you need to use information about the owner of the request for making decisions or to populate other BPM operations with this data. This operation will populate a number of variables that represent the information about the owner of the request.
Options
- Request ID
- In almost all cases, this should be set to Auto which will take the global variable for the request ID that the BPM is associated and apply all selected options to this request.
- Request Details
Request Details
Use this operation when you need to use information held within a request for making decisions or to populate other BPM operations with this data. This operation will populate a number of variables that represent the information held within a request.
Options
- Request ID
- In almost all cases, this should be set to Auto which will take the global variable for the request ID that the BPM is associated and apply all selected options to this request.
- Progressive Capture Answers
Progressive Capture Answers
Use this option before a Decision node, if you want to load into the process the Answers from Progressive Capture Custom Forms. By selecting this option, you can load and make available the answers to progressive capture custom forms, to then evaluate in following Decision nodes.
An example of the use of this node could be if you have created a custom form which asked questions about a new start, and one of these questions was to determine which Department they would be joining, it is feasible in your business process that you may wish to check the answer value, and if it was Sales then branch in one direction, and if it was Accounts you may want to branch in another direction. Using the Get Request Information > Progressive Capture Answers will allow these answers to be evaluated in a supporting business process.
Options
- Request ID
- In almost all cases, this should be set to Auto which will take the global variable for the request ID that the BPM is associated and apply all selected options to this request.
- Service Details
Service Details
Use this operation to extract details of the service that is set against a request in order to use the Service Details to use with decision node outcomes within your workflow.
Options
- Request ID
- In almost all cases, this should be set to Auto which will take the global variable for the request ID that the BPM is associated and apply all selected options to this request.
- Site Details
Site Details
Use this operation when you need to use information held within a request for making decisions or to populate other BPM operations with this site details. This operation will populate a number of variables that represent the site information held within a request.
Options
- Request ID
- In almost all cases, this should be set to Auto which will take the global variable for the request ID that the BPM is associated and apply all selected options to this request.
- Team Details
Team Details
Use this operation when you need to get information about the team that the request is assigned to. This can be used for making decisions or to populate other BPM operations with this team details. Team Manager and Team Lead information can also be returned to help with notifications and assignments for important requests.
Options
- Request ID
- In almost all cases, this should be set to Auto which will take the global variable for the request ID that the BPM is associated and apply all selected options to this request.
Integration
Use the Integration node at any stage of a process, where you wish to invoke specific actions against a 3rd party application from the available list of applications.
- Create Jira Request
- Requests > Integration > Create Jira Request
Create a new request in a specific Jira instance and against a parent project. Using this option will create a new request in Jira, of the required type.
- This will pass the summary and description of the Service Manager request to the newly created request in Jira, and then pass back the Jira request id into the External Reference field on the Service Manager request if successful, as well as include an update in the request timeline if required, with a hyperlink to the request in Jira. If the request to raise a request fails, this will also be written to the Service Manager Timeline with the reason for the failure to create.
The following options need to be Configured:
- Request id: Leave as Auto to pick up on the Request id against which the process is running.
- Use App Settings: Set to Yes if you want to use the global values you can define in the system settings for Service Manager (Home > Service Manager > Application), select No if you want to manually set the values to use for this specific node.
If selecting Yes, the following system settings will need to have been set and will be used:
- guest.ui.app.com.hornbill.servicemanager.integration.jira.issueType: This is the Jira Issue type which will be created - Bug, Improvement, New Feature, Task or custom created on your Jira instance.
- guest.ui.app.com.hornbill.servicemanager.integration.jira.userName: The Username of the account in Jira which the new request will be created under.
- guest.ui.app.com.hornbill.servicemanager.integration.jira.password: The Password for the user account in Jira which the new request will be created under.
- guest.ui.app.com.hornbill.servicemanager.integration.jira.projectName: The Parent Project to which the new request will belong.
- guest.ui.app.com.hornbill.servicemanager.integration.jira.url: The full URL for the Jira instance against which the new request will be created.
If selecting No the following options will need to be manually set
- URL: The full URL for the Jira instance against which the new request will be created.
- Project Name: The Parent Project to which the new request will belong.
- Issue Type: This is the Jira Issue type which will be created - Bug, Improvement, New Feature, Task or custom created on your Jira instance.
- Username: The Username of the account in Jira which the new request will be created under.
- Password: The Password for the user account in Jira which the new request will be created under.
In either case the following can also be configured manually.
- Update Timeline: Leave this as Auto if you want the Service Manager Request Timeline to be updated to record the fact that a Request has been created in Jira, and for the update to contain a hyperlink to the newly created request in Jira (as shown below)
- Add Jira Request Comment
- Requests > Integration > Add Jira Request Comment
Add a comment to an existing Jira request.
- This option will allow for a predefined comment to be added to a specific Jira Request. The configured comment will be added to the Jira request id, which is held in the External Reference field of the Service Manager request, against which this node is invoked from it's underlying business process. In most cases this will have been created automatically by using the Create Jira Request earlier in the same business process, but the Jira Request id can have been added manually to the Service Manager request External Reference field as well.
The following options need to be Configured:
- Request id: Leave as Auto to pick up on the Request id against which the process is running.
- Use App Settings: Set to Yes if you want to use the global values you can define in the system settings for Service Manager (Home > Service Manager > Application), select No if you want to manually set the values to use for this specific node.
If selecting Yes, the following system settings will need to have been set and will be used:
- guest.ui.app.com.hornbill.servicemanager.integration.jira.userName: The Username of the account in Jira which the new comment will be created under.
- guest.ui.app.com.hornbill.servicemanager.integration.jira.password: The Password for the user account in Jira which the new comment will be created under.
- guest.ui.app.com.hornbill.servicemanager.integration.jira.url: The full URL for the Jira instance against which the new request comment will be added.
If selecting No the following options will need to be manually set
- URL: The full URL for the Jira instance against which the new request will be created.
- Username: The Username of the account in Jira which the new comment will be created under.
- Password: The Password for the user account in Jira which the new request comment will be added.
In either case the following will also need to be configured manually.
- Comment: Configure the message content which will be added to the Jira Request
- Update Timeline: Leave this as Auto if you want the Service Manager Request Timeline to be updated to record the fact that a comment has been added to a request in Jira, and for the timeline update to contain a hyperlink to the newly created comment in the Jira request (as shown below)
This will add the Comment into the Comments tab of the Activity section on the Jira request as shown below.
- Log New Service Request
Log New Service Request
This node can be used by other Hornbill apps to raise requests within Service Manager.
Options
- Summary
- To add a summary to the new request, set to Manual and provide the required text for the summary
- Description
- To add a description to the new request, set to Manual and provide the required text for the description
- Service
- To add a Service to the new request, set to Manual and select a Service from the pick list
- Catalog Item
- To add a Catalog Item to the new request, set to Manual and provide the name of the Catalog Item
- Priority
- To add a Priority to the new request, set to Manual and select a Priority from the pick list
- Category
- To add a Request Category to the new request, set to Manual and click on the edit button to open the Category selector.
- Team
- To add a Team to the new request, set to Manual and select a team from the pick list
- Owner
- To add an Owner to the new request, set to Manual and select start typing the name of the user and then select them from the pick list
- Site
- To add a Site to the new request, set to Manual and select a Site from the pick list
- Status
- To set the status on the new request, set to Manual and select a status from the pick list
- System Timeline Update
- To include a Timeline entry in the new request to record the raising of the new request, set to Manual and select Yes
- Manual Timeline Update
- To provide a unique Timeline Update in the new request, set to Manual and click on the edit button to open the text window to add your unique timeline entry.
- Visibility
- Set the Visibility of the Timeline Entry if one is provided.
Linked Requests
Use the Linked Requests node to automatically post updates and resolve linked Requests. Linked requests are those that have been linked using the Link Action Item on a request form.
- Resolve Linked Requests
Resolve Linked Requests
This option allows you at specific times in a process to resolve linked requests. The options include defining the update text which will be added to the linked requests, as well as setting granular options to decide which linked request types should be updated. For example you may only want the Incidents from the Problem to receive the update, and not the Change, which the Problem is also linked too.
Options
- Request ID
- This value is automatically applied. Leave this setting as Auto
- Request Type
- When set, only the request type that is selected will be resolved. When not set, all linked requests will be resolved
- Status
- Select the status that you wish to set the linked requests to. Either Resolve or Close
- Visibility
- Choose what level of visibility will be automatically applied to this update. Choosing anything other than Customer will result in the customer not seeing the update in the timeline of their requests on the Service or Customer Portals.
- System Timeline Update
- Select if the default system text will be added to the timeline for this action
- Manual Timeline Update
- Select Yes to override the default System timeline Text, and add your own text which will appear in the timeline update for this action
- Stop Timers
- If there are Service Level Target Timers (Response or Resolution) on the linked request, these timers will be stopped and the Target marked
- Notify Owner
- Notify the owner of any linked request when resolved. The type of notification will be based on the Service Manager application settings
- guest.app.requests.notification.notificationType.teamLinkedRequestResolveAction
- guest.app.requests.notification.notificationType.teamLinkedRequestResolveAction
- Email Customer
- Send an email to Customer of the linked requests. Requires that the Mailbox Name and Email Template are selected
- Mailbox Name
- Name of the mailbox from which to send a customer email when the Email Customer option is set to Yes
- Email Template
- Name of the Email Template to use when the Email Customer option is set to Yes
- Update Linked Requests
Update Linked Requests
This option allows you at specific times in a process to update linked requests. The options include defining the update text which will be added to the linked requests, as well as setting granular options to decide which linked request types should be updated. For example you may only want the Incidents from the Problem to receive the update, and not the Change, which the Problem is also linked too.
Options
- Request ID
- This value is automatically applied. Leave this setting as Auto
- Content
- Provide the text that you would like to include in the update
- Visibility
- Set the visibility level for the update. Decide if this is only for the team, or if it should be a customer facing update which the customer can view via the timeline of the requests on the portals.
- Request Type
- Select a specific request type where only the linked requests of this type will be updated
- Update Closed Requests
- Set if the update should also be applied to any linked requests which have a closed status.
- System Timeline Update
- Select if the default system text will be added to the timeline for this action
- Manual Timeline Update
- Select Yes to override the default System timeline Text, and add your own text which will appear in the timeline update for this action
Log Requests
Use the Log Request to automatically raise another request at a particular point in the workflow.
- Log New Change
- Request ID
- This is an automatic option and should be set to Auto
- Summary
- To add a summary to the new request, set to Manual and provide the required text for the summary
- Description
- To add a description to the new request, set to Manual and provide the required text for the description
- Customer (Co-worker)
- The ID of the Customer to assign to the request
- Customer (Contact)
- The ID of the Contact to assign to the request
- Service
- To add a Service to the new request, set to Manual and select a Service from the pick list. If a Service is specified without a Catalog Item, the BPM workflow set against this request type on the Service Configuration will be used on the new request.
- Catalog Item
- To add a Catalog Item to the new request, set to Manual and provide the name of the Catalog Item. If both a Service and Catalog Item are specified, the BPM workflow set against the Catalog item will be used on the new request.
- Priority
- To add a Priority to the new request, set to Manual and select a Priority from the pick list
- Category
- To add a Request Category to the new request, set to Manual and click on the edit button to open the Category selector.
- Change Type
- To set a Change Type, set to Manual and select the change type from the pick list
- Team
- To add a Team to the new request, set to Manual and select a team from the pick list
- Owner
- To add an Owner to the new request, set to Manual and select start typing the name of the user and then select them from the pick list
- Site
- To add a Site to the new request, set to Manual and select a Site from the pick list
- Status
- To set the status on the new request, set to Manual and select a status from the pick list
- Copy Customer?
- To use the same Customer as the originating request, set to Manual and select Yes
- Copy Summary?
- To use the same Summary as the originating request, set to Manual and select Yes
- Copy Description?
- To use the same Description as the originating request, set to Manual and select Yes
- Copy Service?
- To use the same Service as the originating request, set to Manual and select Yes
- Copy Priority?
- To use the same Priority as the originating request, set to Manual and select Yes
- Copy Category?
- To use the same Category as the originating request, set to Manual and select Yes
- Copy Team?
- To use the same Team as the originating request, set to Manual and select Yes
- Copy Owner?
- To use the same Owner as the originating request, set to Manual and select Yes
- Copy Site?
- To use the same Site as the originating request, set to Manual and select Yes
- Copy Status?
- To use the same Status as the originating request, set to Manual and select Yes
- Copy Questions?
- To use the same answers to the questions section on the originating request, set to Manual and select Yes
- Copy Assets
- Copy the assets that are associated to the original request. Set to Manual and select Yes
- System Timeline Update
- To include a Timeline entry in the new request to record the raising of the new request, set to Manual and select Yes
- Manual Timeline Update
- To provide a unique Timeline Update in the new request, set to Manual and click on the edit button to open the text window to add your unique timeline entry.
- Visibility
- Set the Visibility of the Timeline Entry if one is provided.
- Log New Incident
- Request ID
- This is an automatic options and should be set to Auto
- Summary
- To add a summary to the new request, set to Manual and provide the required text for the summary
- Description
- To add a description to the new request, set to Manual and provide the required text for the description
- Customer (Co-worker)
- The ID of the Customer to assign to the request
- Customer (Contact)
- The ID of the Contact to assign to the request
- Service
- To add a Service to the new request, set to Manual and select a Service from the pick list. If a Service is specified without a Catalog Item, the BPM workflow set against this request type on the Service Configuration will be used on the new request.
- Catalog Item
- To add a Catalog Item to the new request, set to Manual and provide the name of the Catalog Item. If both a Service and Catalog Item are specified, the BPM workflow set against the Catalog item will be used on the new request.
- Priority
- To add a Priority to the new request, set to Manual and select a Priority from the pick list
- Category
- To add a Request Category to the new request, set to Manual and click on the edit button to open the Category selector.
- Team
- To add a Team to the new request, set to Manual and select a team from the pick list
- Owner
- To add an Owner to the new request, set to Manual and select start typing the name of the user and then select them from the pick list
- Site
- To add a Site to the new request, set to Manual and select a Site from the pick list
- Status
- To set the status on the new request, set to Manual and select a status from the pick list
- Copy Customer?
- To use the same Customer as the originating request, set to Manual and select Yes
- Copy Summary?
- To use the same Summary as the originating request, set to Manual and select Yes
- Copy Description?
- To use the same Description as the originating request, set to Manual and select Yes
- Copy Service?
- To use the same Service as the originating request, set to Manual and select Yes
- Copy Priority?
- To use the same Priority as the originating request, set to Manual and select Yes
- Copy Category?
- To use the same Category as the originating request, set to Manual and select Yes
- Copy Team?
- To use the same Team as the originating request, set to Manual and select Yes
- Copy Owner?
- To use the same Owner as the originating request, set to Manual and select Yes
- Copy Site?
- To use the same Site as the originating request, set to Manual and select Yes
- Copy Status?
- To use the same Status as the originating request, set to Manual and select Yes
- Copy Questions?
- To use the same answers to the questions section on the originating request, set to Manual and select Yes
- Copy Assets
- Copy the assets that are associated to the original request. Set to Manual and select Yes
- System Timeline Update
- To include a Timeline entry in the new request to record the raising of the new request, set to Manual and select Yes
- Manual Timeline Update
- To provide a unique Timeline Update in the new request, set to Manual and click on the edit button to open the text window to add your unique timeline entry.
- Visibility
- Set the Visibility of the Timeline Entry if one is provided.
- Log New Known Error
Log New Known Error
Use this Hornbill Automation to create a new Known Error Record
Options
- Request Id
- This is a mandatory setting that uses a variable to hold the Request Id of the request that is using this BPM. This should be set to Auto
- Summary
- To add a summary to the new known error, set to Manual and provide the required text for the summary
- Description
- To add a description to the new known error, set to Manual and provide the required text for the description
- Service
- To add a Service to the new known error, set to Manual and select a Service from the pick list. If a Service is specified without a Catalog Item, the BPM workflow set against this known error on the Service Configuration will be used on the new request.
- Catalog Item
- To add a Catalog Item to the new known error, set to Manual and provide the name of the Catalog Item. If both a Service and Catalog Item are specified, the BPM workflow set against the Catalog item will be used on the new known error.
- Priority
- To add a Priority to the new known error, set to Manual and select a Priority from the pick list
- Category
- To add a Request Category to the new known error, set to Manual and click on the edit button to open the Category selector.
- Team
- To add a Team to the new know error, set to Manual and select a team from the pick list
- Owner
- To add an Owner to the new request, set to Manual and select start typing the name of the user and then select them from the pick list
- Site
- To add a Site to the new know error, set to Manual and select a Site from the pick list
- Status
- To set the status on the new request, set to Manual and select a status from the pick list
- Root Cause
- To add a root cause to the known error, set to Manual and provide the root cause text or set using a variable
- Workaround
- To add a workaround to the known error, set to Manual and provide the workaround text or set using a variable
- Copy Customer?
- To use the same Customer as the originating request, set to Manual and select Yes
- Copy Summary?
- To use the same Summary as the originating request, set to Manual and select Yes
- Copy Description?
- To use the same Description as the originating request, set to Manual and select Yes
- Copy Service?
- To use the same Service as the originating request, set to Manual and select Yes
- Copy Priority?
- To use the same Priority as the originating request, set to Manual and select Yes
- Copy Category?
- To use the same Category as the originating request, set to Manual and select Yes
- Copy Team?
- To use the same Team as the originating request, set to Manual and select Yes
- Copy Owner?
- To use the same Owner as the originating request, set to Manual and select Yes
- Copy Site?
- To use the same Site as the originating request, set to Manual and select Yes
- Copy Status?
- To use the same Status as the originating request, set to Manual and select Yes
- Copy Questions?
- To use the same answers to the questions section from the originating request, set to Manual and select Yes
- Copy Root Cause?
- To use the same Root Cause as the originating problem record, set to Manual and select Yes
- Copy Workaround?
- To use the same Workaround as the originating problem record, set to Manual and select Yes
- Copy Assets
- Copy the assets that are associated to the original request. Set to Manual and select Yes
- System Timeline Update
- To include a Timeline entry in the new known error to record the raising of the new request, set to Manual and select Yes
- Manual Timeline Update
- To provide a unique Timeline Update in the new known error, set to Manual and click on the edit button to open the text window to add your unique timeline entry.
- Visibility
- Set the Visibility of the Timeline Entry if one is provided.
- Log New Problem
- Request ID
- This is an automatic options and should be set to Auto
- Summary
- To add a summary to the new request, set to Manual and provide the required text for the summary
- Description
- To add a description to the new request, set to Manual and provide the required text for the description
- Service
- To add a Service to the new request, set to Manual and select a Service from the pick list. If a Service is specified without a Catalog Item, the BPM workflow set against this request type on the Service Configuration will be used on the new request.
- Catalog Item
- To add a Catalog Item to the new request, set to Manual and provide the name of the Catalog Item. If both a Service and Catalog Item are specified, the BPM workflow set against the Catalog item will be used on the new request.
- Priority
- To add a Priority to the new request, set to Manual and select a Priority from the pick list
- Category
- To add a Request Category to the new request, set to Manual and click on the edit button to open the Category selector.
- Team
- To add a Team to the new request, set to Manual and select a team from the pick list
- Owner
- To add an Owner to the new request, set to Manual and select start typing the name of the user and then select them from the pick list
- Site
- To add a Site to the new request, set to Manual and select a Site from the pick list
- Status
- To set the status on the new request, set to Manual and select a status from the pick list
- Copy Customer?
- To use the same Customer as the originating request, set to Manual and select Yes
- Copy Summary?
- To use the same Summary as the originating request, set to Manual and select Yes
- Copy Description?
- To use the same Description as the originating request, set to Manual and select Yes
- Copy Service?
- To use the same Service as the originating request, set to Manual and select Yes
- Copy Priority?
- To use the same Priority as the originating request, set to Manual and select Yes
- Copy Category?
- To use the same Category as the originating request, set to Manual and select Yes
- Copy Team?
- To use the same Team as the originating request, set to Manual and select Yes
- Copy Owner?
- To use the same Owner as the originating request, set to Manual and select Yes
- Copy Site?
- To use the same Site as the originating request, set to Manual and select Yes
- Copy Status?
- To use the same Status as the originating request, set to Manual and select Yes
- Copy Questions?
- To use the same answers to the questions section on the originating request, set to Manual and select Yes
- Copy Assets
- Copy the assets that are associated to the original request. Set to Manual and select Yes
- System Timeline Update
- To include a Timeline entry in the new request to record the raising of the new request, set to Manual and select Yes
- Manual Timeline Update
- To provide a unique Timeline Update in the new request, set to Manual and click on the edit button to open the text window to add your unique timeline entry.
- Visibility
- Set the Visibility of the Timeline Entry if one is provided.
- Log New Release
- Request ID
- This is an automatic options and should be set to Auto
- Summary
- To add a summary to the new request, set to Manual and provide the required text for the summary
- Description
- To add a description to the new request, set to Manual and provide the required text for the description
- Service
- To add a Service to the new request, set to Manual and select a Service from the pick list. If a Service is specified without a Catalog Item, the BPM workflow set against this request type on the Service Configuration will be used on the new request.
- Catalog Item
- To add a Catalog Item to the new request, set to Manual and provide the name of the Catalog Item. If both a Service and Catalog Item are specified, the BPM workflow set against the Catalog item will be used on the new request.
- Priority
- To add a Priority to the new request, set to Manual and select a Priority from the pick list
- Category
- To add a Request Category to the new request, set to Manual and click on the edit button to open the Category selector.
- Release Type
- Set the Release Type for this Release. The options are driven from the 'releaseRequestType' Simple List.
- Team
- To add a Team to the new request, set to Manual and select a team from the pick list
- Owner
- To add an Owner to the new request, set to Manual and select start typing the name of the user and then select them from the pick list
- Site
- To add a Site to the new request, set to Manual and select a Site from the pick list
- Status
- To set the status on the new request, set to Manual and select a status from the pick list
- Copy Customer?
- To use the same Customer as the originating request, set to Manual and select Yes
- Copy Summary?
- To use the same Summary as the originating request, set to Manual and select Yes
- Copy Description?
- To use the same Description as the originating request, set to Manual and select Yes
- Copy Service?
- To use the same Service as the originating request, set to Manual and select Yes
- Copy Priority?
- To use the same Priority as the originating request, set to Manual and select Yes
- Copy Category?
- To use the same Category as the originating request, set to Manual and select Yes
- Copy Team?
- To use the same Team as the originating request, set to Manual and select Yes
- Copy Owner?
- To use the same Owner as the originating request, set to Manual and select Yes
- Copy Site?
- To use the same Site as the originating request, set to Manual and select Yes
- Copy Status?
- To use the same Status as the originating request, set to Manual and select Yes
- Copy Questions?
- To use the same answers to the questions section on the originating request, set to Manual and select Yes
- Copy Assets
- Copy the assets that are associated to the original request. Set to Manual and select Yes
- System Timeline Update
- To include a Timeline entry in the new request to record the raising of the new request, set to Manual and select Yes
- Manual Timeline Update
- To provide a unique Timeline Update in the new request, set to Manual and click on the edit button to open the text window to add your unique timeline entry.
- Visibility
- Set the Visibility of the Timeline Entry if one is provided.
- Log New Request
- Request ID
- This is an automatic options and should be set to Auto
- Summary
- To add a summary to the new request, set to Manual and provide the required text for the summary
- Description
- To add a description to the new request, set to Manual and provide the required text for the description
- Customer (Co-worker)
- The ID of the Customer to assign to the request
- Customer (Contact)
- The ID of the Contact to assign to the request
- Service
- To add a Service to the new request, set to Manual and select a Service from the pick list. If a Service is specified without a Catalog Item, the BPM workflow set against this request type will be used on the new request.
- Catalog Item
- To add a Catalog Item to the new request, set to Manual and provide the name of the Catalog Item. If both a Service and Catalog Item are specified, the BPM workflow set against the Catalog item will be used on the new request.
- Priority
- To add a Priority to the new request, set to Manual and select a Priority from the pick list
- Category
- To add a Request Category to the new request, set to Manual and click on the edit button to open the Category selector.
- Team
- To add a Team to the new request, set to Manual and select a team from the pick list
- Owner
- To add an Owner to the new request, set to Manual and select start typing the name of the user and then select them from the pick list
- Site
- To add a Site to the new request, set to Manual and select a Site from the pick list
- Status
- To set the status on the new request, set to Manual and select a status from the pick list
- Copy Customer?
- To use the same Customer as the originating request, set to Manual and select Yes
- Copy Summary?
- To use the same Summary as the originating request, set to Manual and select Yes
- Copy Description?
- To use the same Description as the originating request, set to Manual and select Yes
- Copy Service?
- To use the same Service as the originating request, set to Manual and select Yes
- Copy Priority?
- To use the same Priority as the originating request, set to Manual and select Yes
- Copy Category?
- To use the same Category as the originating request, set to Manual and select Yes
- Copy Team?
- To use the same Team as the originating request, set to Manual and select Yes
- Copy Owner?
- To use the same Owner as the originating request, set to Manual and select Yes
- Copy Site?
- To use the same Site as the originating request, set to Manual and select Yes
- Copy Status?
- To use the same Status as the originating request, set to Manual and select Yes
- Copy Questions?
- To use the same answers to the questions section on the originating request, set to Manual and select Yes
- Copy Assets
- Copy the assets that are associated to the original request. Set to Manual and select Yes
- System Timeline Update
- To include a Timeline entry in the new request to record the raising of the new request, set to Manual and select Yes
- Manual Timeline Update
- To provide a unique Timeline Update in the new request, set to Manual and click on the edit button to open the text window to add your unique timeline entry.
- Visibility
- Set the Visibility of the Timeline Entry if one is provided.
- Using these options in your business processes, please be aware of where you are invoking them / placing them in the workflow, and in turn which business processes are going to be invoked against the new Incident or Service Request raised. Please avoid scenario's where one business process may invoke the logging of a new request, where the new request's business process immediately is configured to log a new request which again has a business process which again logs another request immediately creating a loop. The result of which may be a lot of unwanted requests. In the event this occurs, disable the causing business process and resolve the issue.
Questions
- Delete Questions
Delete Questions
This Hornbill Automation will delete the entire Questions section on a request. This can be used to remove this information once it has performed its use and it no longer required.
Options
- Request Id
- In almost all cases, this should be set to Auto which will take the global variable for the request ID that the BPM is associated and apply all selected options to this request
- System Timeline Update
- Select if the default system text will be added to the timeline for this action
- Manual Timeline Update
- Select Yes to override the default System timeline Text, and add your own text which will appear in the timeline update for this action
- Timeline Visibility
- Choose what level of visibility will be automatically applied to this update. Choosing anything other than Customer will result in the customer not seeing the update in the timeline of their requests on the Service or Customer Portals
Request Service
Use the Request Service node, if you wish to automate the availability status setting of the service associated to a request, or to automate adding related services of the request service to the request.
- Add Related Services
- Request ID - This is an automatic option and should be set to Auto
- Relationship Type - Select which services to relate to the request, based on their relationship type to the request service.
- System Timeline Update - Select if the default system text will be added to the timeline for this action
- Manual Timeline Update - Select Yes to override the default System timeline Text, and add your own text which will appear in the timeline update for this action
- Visibility - Choose what level of visibility will be automatically applied to this update. Choosing anything other than Customer will result in the customer not seeing the update in the timeline of their requests on the Service or Customer Portals.
- Update Service Status
- Request ID - This is an automatic options and should be set to Auto
- Status - Select the Status to set the Request Service's Availability too, or choose No Status if no Status is required to be displayed for the Service.
- Status Message - An optional message to be displayed alongside the Status - this will be visible to both analysts supporting the service, and customers subscribed to the service.
Suspend
Use the Suspend nodes if you wish to suspend the progress of the workflow until a defined action is performed manually on the Request. This could include waiting for a Priority to be set, a Customer added, Ownership set or the Resolution defined. Configuration options include the ability to specify the context (which Action Bar icon) the Request will appear in whilst waiting for the Suspend (manual action) to be performed.
- Await Expiry
Await Expiry
Use this suspend node to suspend a Request's workflow until the expire period has been reached.
Options
- Request Id
- In almost all cases, this should be set to Auto which will take the global variable for the request ID that the BPM is associated and apply all selected options to this request
- Action Focus
- Sets the Action Item on a request that will be in focus.
- Expire Period
- The length of time to wait until the node expires and the workflow will automatically continue. This is based on the Working Time Calendar defined in the setting guest.app.timer.defaultCalendar. If you wish to use a date/time for expiry, set this option to "ignore" and set the'Expire Date/Time' option below instead.
- Expiry Date/Time
- This option determines when the node expires. A date/time value must be supplied (e.g. 2040-01-01T12:00:00Z) which can be injected from the Variable Picker. If the "expire period" option has been set, any value in this 'Expire Date/Time' option will be disregarded.
- Add Notice
- Select Yes to add a notice to the top of the request
- Notice Type
- The type of notice (Alert or Information). The default value is "Information".
- Notice Text
- The text that will be displayed. This has a limit of 255 characters
- Notice Visibility
- The visibility of the notice (Portals
- Wait for List of Request Authorisers
- Wait for Attachment
Wait for Attachment
Use this Hornbill Automation to suspend a Request's workflow until an attachment has been added to the request
Options
- Request Id
- In almost all cases, this should be set to Auto which will take the global variable for the request ID that the BPM is associated and apply all selected options to this request
- Action Focus
- Sets the Action Item on a request that will be in focus.
- Expire Period
- The length of time to wait until the node expires and the workflow will automatically continue. This is based on the Working Time Calendar defined in the setting guest.app.timer.defaultCalendar.
- Add Notice
- Select Yes to add a notice to the top of the request
- Notice Type
- The type of notice (Alert or Information). The default value is "Information".
- Notice Text
- The text that will be displayed. This has a limit of 255 characters
- Notice Visibility
- The visibility of the notice (Portals
- Wait for Request Closure
Wait for Request Closure
Use this Hornbill Automation to suspend a Request's workflow until the request has a status of closed.
Options
- Request Id
- In almost all cases, this should be set to Auto which will take the global variable for the request ID that the BPM is associated and apply all selected options to this request
- Action Focus
- Sets the Action Item on a request that will be in focus.
- Expire Period
- The length of time to wait until the node expires and the workflow will automatically continue. This is based on the Working Time Calendar defined in the setting guest.app.timer.defaultCalendar.
- Add Notice
- Select Yes to add a notice to the top of the request
- Notice Type
- The type of notice (Alert or Information). The default value is "Information".
- Notice Text
- The text that will be displayed. This has a limit of 255 characters
- Notice Visibility
- The visibility of the notice (Portals
- Wait for Request Closure Category
Wait for Request Closure Category
Use this Hornbill Automation to suspend a Request's workflow until the Closure Category has been set.
Options
- Request Id
- In almost all cases, this should be set to Auto which will take the global variable for the request ID that the BPM is associated and apply all selected options to this request
- Action Focus
- Sets the Action Item on a request that will be in focus.
- Expire Period
- The length of time to wait until the node expires and the workflow will automatically continue. This is based on the Working Time Calendar defined in the setting guest.app.timer.defaultCalendar.
- Add Notice
- Select Yes to add a notice to the top of the request
- Notice Type
- The type of notice (Alert or Information). The default value is "Information".
- Notice Text
- The text that will be displayed. This has a limit of 255 characters
- Notice Visibility
- The visibility of the notice (Portals
- Wait for Customer
Wait for Customer
Use this Hornbill Automation to suspend a Request's workflow until the Customer has been set.
Options
- Request Id
- In almost all cases, this should be set to Auto which will take the global variable for the request ID that the BPM is associated and apply all selected options to this request
- Action Focus
- Sets the Action Item on a request that will be in focus.
- Expire Period
- The length of time to wait until the node expires and the workflow will automatically continue. This is based on the Working Time Calendar defined in the setting guest.app.timer.defaultCalendar.
- Add Notice
- Select Yes to add a notice to the top of the request
- Notice Type
- The type of notice (Alert or Information). The default value is "Information".
- Notice Text
- The text that will be displayed. This has a limit of 255 characters
- Notice Visibility
- The visibility of the notice (Portals
- Wait for Feedback
Wait for Feedback
Use this Hornbill Automation to suspend a Request's workflow until the Customer has provided feedback on the request.
Options
- Request Id
- In almost all cases, this should be set to Auto which will take the global variable for the request ID that the BPM is associated and apply all selected options to this request
- Action Focus
- Sets the Action Item on a request that will be in focus.
- Expire Period
- The length of time to wait until the node expires and the workflow will automatically continue. This is based on the Working Time Calendar defined in the setting guest.app.timer.defaultCalendar.
- Add Notice
- Select Yes to add a notice to the top of the request
- Notice Type
- The type of notice (Alert or Information). The default value is "Information".
- Notice Text
- The text that will be displayed. This has a limit of 255 characters
- Notice Visibility
- The visibility of the notice (Portals
- Wait for Request Description
Wait for Request Description
Use this Hornbill Automation to suspend a Request's workflow until a description has been provided on the request.
Options
- Request Id
- In almost all cases, this should be set to Auto which will take the global variable for the request ID that the BPM is associated and apply all selected options to this request
- Action Focus
- Sets the Action Item on a request that will be in focus.
- Expire Period
- The length of time to wait until the node expires and the workflow will automatically continue. This is based on the Working Time Calendar defined in the setting guest.app.timer.defaultCalendar.
- Add Notice
- Select Yes to add a notice to the top of the request
- Notice Type
- The type of notice (Alert or Information). The default value is "Information".
- Notice Text
- The text that will be displayed. This has a limit of 255 characters
- Notice Visibility
- The visibility of the notice (Portals
- Wait for Document
Wait for Document
Use this Hornbill Automation to suspend a Request's workflow until a document from Document Manager has been linked to the request
Options
- Request Id
- In almost all cases, this should be set to Auto which will take the global variable for the request ID that the BPM is associated and apply all selected options to this request
- Action Focus
- Sets the Action Item on a request that will be in focus.
- Expire Period
- The length of time to wait until the node expires and the workflow will automatically continue. This is based on the Working Time Calendar defined in the setting guest.app.timer.defaultCalendar.
- Add Notice
- Select Yes to add a notice to the top of the request
- Notice Type
- The type of notice (Alert or Information). The default value is "Information".
- Notice Text
- The text that will be displayed. This has a limit of 255 characters
- Notice Visibility
- The visibility of the notice (Portals
- Wait for Request Email
Wait for Request Email
Use this Hornbill Automation to suspend a Request's workflow until an email has been sent from the request.
Options
- Request Id
- In almost all cases, this should be set to Auto which will take the global variable for the request ID that the BPM is associated and apply all selected options to this request
- Action Focus
- Sets the Action Item on a request that will be in focus.
- Expire Period
- The length of time to wait until the node expires and the workflow will automatically continue. This is based on the Working Time Calendar defined in the setting guest.app.timer.defaultCalendar.
- Add Notice
- Select Yes to add a notice to the top of the request
- Notice Type
- The type of notice (Alert or Information). The default value is "Information".
- Notice Text
- The text that will be displayed. This has a limit of 255 characters
- Notice Visibility
- The visibility of the notice (Portals
- Wait for External Reference
Wait for External Reference
Use this Hornbill Automation to suspend a Request's workflow until an external reference has been provided.
Options
- Request Id
- In almost all cases, this should be set to Auto which will take the global variable for the request ID that the BPM is associated and apply all selected options to this request
- Action Focus
- Sets the Action Item on a request that will be in focus.
- Expire Period
- The length of time to wait until the node expires and the workflow will automatically continue. This is based on the Working Time Calendar defined in the setting guest.app.timer.defaultCalendar.
- Add Notice
- Select Yes to add a notice to the top of the request
- Notice Type
- The type of notice (Alert or Information). The default value is "Information".
- Notice Text
- The text that will be displayed. This has a limit of 255 characters
- Notice Visibility
- The visibility of the notice (Portals
- Wait for Impact Assessment
Wait for Impact Assessment
Use this Hornbill Automation to suspend a Request's workflow until an Impact Assessment has been completed
Options
- Request Id
- In almost all cases, this should be set to Auto which will take the global variable for the request ID that the BPM is associated and apply all selected options to this request
- Action Focus
- Sets the Action Item on a request that will be in focus.
- Expire Period
- The length of time to wait until the node expires and the workflow will automatically continue. This is based on the Working Time Calendar defined in the setting guest.app.timer.defaultCalendar.
- Add Notice
- Select Yes to add a notice to the top of the request
- Notice Type
- The type of notice (Alert or Information). The default value is "Information".
- Notice Text
- The text that will be displayed. This has a limit of 255 characters
- Notice Visibility
- The visibility of the notice (Portals
- Wait for Linked Assets
Wait for Linked Assets
Use this Hornbill Automation to suspend a Request's workflow until one or more Assets have been linked to the request
Options
- Request Id
- In almost all cases, this should be set to Auto which will take the global variable for the request ID that the BPM is associated and apply all selected options to this request
- Action Focus
- Sets the Action Item on a request that will be in focus.
- Expire Period
- The length of time to wait until the node expires and the workflow will automatically continue. This is based on the Working Time Calendar defined in the setting guest.app.timer.defaultCalendar.
- Add Notice
- Select Yes to add a notice to the top of the request
- Notice Type
- The type of notice (Alert or Information). The default value is "Information".
- Notice Text
- The text that will be displayed. This has a limit of 255 characters
- Notice Visibility
- The visibility of the notice (Portals
- Wait for Linked Request
Wait for Linked Request
Use this Hornbill Automation to suspend a Request's workflow until a linked request has been added
Options
- Request Id
- In almost all cases, this should be set to Auto which will take the global variable for the request ID that the BPM is associated and apply all selected options to this request
- Request Type
- This limits the suspend to only wait for updates from linked requests of the selected type
- Linked Request ID
- This limits the suspend to only wait for updates from a linked request with provided Request ID. This can use variables to automatically populate this information.
- Contains
- Include a string of text which will match the text within the linked request's timeline
- Expire Period
- The length of time to wait until the node expires and the workflow will automatically continue. This is based on the Working Time Calendar defined in the setting guest.app.timer.defaultCalendar.
- Add Notice
- Select Yes to add a notice to the top of the request
- Notice Type
- The type of notice (Alert or Information). The default value is "Information".
- Notice Text
- The text that will be displayed. This has a limit of 255 characters
- Notice Visibility
- The visibility of the notice (Portals
- Wait for Linked Requests Completion
Wait for Linked Requests Completion
This automation suspends the workflow and waits for linked requests to be of a specified status before being allowed to continue.
Options
- Request Id
- In almost all cases, this should be set to Auto which will take the global variable for the request ID that the BPM is associated and apply all selected options to this request
- Resolved linked requests are completed
- (Yes, No) "resolved" request status constitutes the completion of a linked request (Default: Yes).
- Closed linked requests are completed
- (Yes, No) "closed" request status constitutes the completion of a linked request (Default: Yes)
- Cancelled linked requests are completed
- (Yes, No) "cancelled" request status constitutes the completion of a linked request (Default: Yes)
- Action Focus
- This option determines the Action Tab that a Request will focus on while the process is suspended.
- Expire Period
- The length of time to wait until the node expires and the workflow will automatically continue. This is based on the Working Time Calendar defined in the setting guest.app.timer.defaultCalendar.
- Add Notice
- Select Yes to add a notice to the top of the request
- Notice Type
- The type of notice (Alert or Information). The default value is "Information".
- Notice Text
- The text that will be displayed. This has a limit of 255 characters
- Notice Visibility
- The visibility of the notice (Portals
- Wait for Linked Request Update
Wait for Linked Request Update
Use this Hornbill Automation to suspend a Request's workflow until an update has been made on a linked request.
Options
- Request Id
- In almost all cases, this should be set to Auto which will take the global variable for the request ID that the BPM is associated and apply all selected options to this request
- Request Type
- This limits the suspend to only wait for updates from linked requests of the selected type
- Linked Request ID
- This limits the suspend to only wait for updates from a linked request with provided Request ID. This can use variables to automatically populate this information.
- Contains
- Include a string of text which will match the text within the linked request's timeline
- Expire Period
- The length of time to wait until the node expires and the workflow will automatically continue. This is based on the Working Time Calendar defined in the setting guest.app.timer.defaultCalendar.
- Add Notice
- Select Yes to add a notice to the top of the request
- Notice Type
- The type of notice (Alert or Information). The default value is "Information".
- Notice Text
- The text that will be displayed. This has a limit of 255 characters
- Notice Visibility
- The visibility of the notice (Portals
- Wait for Linked Services
Wait for Linked Services
Use this Hornbill Automation to suspend a Request's workflow until an external reference has been provided.
Options
- Request Id
- In almost all cases, this should be set to Auto which will take the global variable for the request ID that the BPM is associated and apply all selected options to this request
- Action Focus
- Sets the Action Item on a request that will be in focus.
- Expire Period
- The length of time to wait until the node expires and the workflow will automatically continue. This is based on the Working Time Calendar defined in the setting guest.app.timer.defaultCalendar.
- Add Notice
- Select Yes to add a notice to the top of the request
- Notice Type
- The type of notice (Alert or Information). The default value is "Information".
- Notice Text
- The text that will be displayed. This has a limit of 255 characters
- Notice Visibility
- The visibility of the notice (Portals
- Wait for New Request Owner
Wait for New Request Owner
Use this Hornbill Automation to suspend a Request's workflow until the ownership of the request has been changed from one owner to another.
Options
- Request Id
- In almost all cases, this should be set to Auto which will take the global variable for the request ID that the BPM is associated and apply all selected options to this request
- Action Focus
- Sets the Action Item on a request that will be in focus.
- Expire Period
- The length of time to wait until the node expires and the workflow will automatically continue. This is based on the Working Time Calendar defined in the setting guest.app.timer.defaultCalendar.
- Add Notice
- Select Yes to add a notice to the top of the request
- Notice Type
- The type of notice (Alert or Information). The default value is "Information".
- Notice Text
- The text that will be displayed. This has a limit of 255 characters
- Notice Visibility
- The visibility of the notice (Portals
- Wait for Request Off Hold
Wait for Request Off Hold
Use this Hornbill Automation to suspend a Request's workflow until the request status has come off hold.
Options
- Request Id
- In almost all cases, this should be set to Auto which will take the global variable for the request ID that the BPM is associated and apply all selected options to this request
- Action Focus
- Sets the Action Item on a request that will be in focus.
- Expire Period
- The length of time to wait until the node expires and the workflow will automatically continue. This is based on the Working Time Calendar defined in the setting guest.app.timer.defaultCalendar.
- Add Notice
- Select Yes to add a notice to the top of the request
- Notice Type
- The type of notice (Alert or Information). The default value is "Information".
- Notice Text
- The text that will be displayed. This has a limit of 255 characters
- Notice Visibility
- The visibility of the notice (Portals
- Wait for Request Owner
Wait for Request Owner
Use this Hornbill Automation to suspend a Request's workflow until an owner has been assigned to the request.
Options
- Request Id
- In almost all cases, this should be set to Auto which will take the global variable for the request ID that the BPM is associated and apply all selected options to this request
- Action Focus
- Sets the Action Item on a request that will be in focus.
- Expire Period
- The length of time to wait until the node expires and the workflow will automatically continue. This is based on the Working Time Calendar defined in the setting guest.app.timer.defaultCalendar.
- Add Notice
- Select Yes to add a notice to the top of the request
- Notice Type
- The type of notice (Alert or Information). The default value is "Information".
- Notice Text
- The text that will be displayed. This has a limit of 255 characters
- Notice Visibility
- The visibility of the notice (Portals
- Wait for Request Priority
Wait for Request Priority
Use this Hornbill Automation to suspend a Request's workflow until a priority has been set on the request.
Options
- Request Id
- In almost all cases, this should be set to Auto which will take the global variable for the request ID that the BPM is associated and apply all selected options to this request
- Action Focus
- Sets the Action Item on a request that will be in focus.
- Expire Period
- The length of time to wait until the node expires and the workflow will automatically continue. This is based on the Working Time Calendar defined in the setting guest.app.timer.defaultCalendar.
- Add Notice
- Select Yes to add a notice to the top of the request
- Notice Type
- The type of notice (Alert or Information). The default value is "Information".
- Notice Text
- The text that will be displayed. This has a limit of 255 characters
- Notice Visibility
- The visibility of the notice (Portals
- Wait for Request Category
Wait for Request Category
Use this Hornbill Automation to suspend a Request's workflow until a category has been set on the request.
Options
- Request Id
- In almost all cases, this should be set to Auto which will take the global variable for the request ID that the BPM is associated and apply all selected options to this request
- Action Focus
- Sets the Action Item on a request that will be in focus.
- Expire Period
- The length of time to wait until the node expires and the workflow will automatically continue. This is based on the Working Time Calendar defined in the setting guest.app.timer.defaultCalendar.
- Add Notice
- Select Yes to add a notice to the top of the request
- Notice Type
- The type of notice (Alert or Information). The default value is "Information".
- Notice Text
- The text that will be displayed. This has a limit of 255 characters
- Notice Visibility
- The visibility of the notice (Portals
- Wait for Request Resolution
Wait for Request Resolution
Use this Hornbill Automation to suspend a Request's workflow until the request status has been set to resolved.
Options
- Request Id
- In almost all cases, this should be set to Auto which will take the global variable for the request ID that the BPM is associated and apply all selected options to this request
- Action Focus
- Sets the Action Item on a request that will be in focus.
- Expire Period
- The length of time to wait until the node expires and the workflow will automatically continue. This is based on the Working Time Calendar defined in the setting guest.app.timer.defaultCalendar.
- Add Notice
- Select Yes to add a notice to the top of the request
- Notice Type
- The type of notice (Alert or Information). The default value is "Information".
- Notice Text
- The text that will be displayed. This has a limit of 255 characters
- Notice Visibility
- The visibility of the notice (Portals
- Wait for Request Site
Wait for Request Site
Use this Hornbill Automation to suspend a Request's workflow until a site has been linked to the request.
Options
- Request Id
- In almost all cases, this should be set to Auto which will take the global variable for the request ID that the BPM is associated and apply all selected options to this request
- Action Focus
- Sets the Action Item on a request that will be in focus.
- Expire Period
- The length of time to wait until the node expires and the workflow will automatically continue. This is based on the Working Time Calendar defined in the setting guest.app.timer.defaultCalendar.
- Add Notice
- Select Yes to add a notice to the top of the request
- Notice Type
- The type of notice (Alert or Information). The default value is "Information".
- Notice Text
- The text that will be displayed. This has a limit of 255 characters
- Notice Visibility
- The visibility of the notice (Portals
- Wait for Status Change
Wait for Status Change
Use this Hornbill Automation to suspend a Request's workflow until the status of the request has changed from one status to another.
Options
- Request Id
- In almost all cases, this should be set to Auto which will take the global variable for the request ID that the BPM is associated and apply all selected options to this request
- Action Focus
- Sets the Action Item on a request that will be in focus.
- From Status
- The workflow will only continue when the request is changed from this status
- Expire Period
- The length of time to wait until the node expires and the workflow will automatically continue. This is based on the Working Time Calendar defined in the setting guest.app.timer.defaultCalendar.
- Add Notice
- Select Yes to add a notice to the top of the request
- Notice Type
- The type of notice (Alert or Information). The default value is "Information".
- Notice Text
- The text that will be displayed. This has a limit of 255 characters
- Notice Visibility
- The visibility of the notice (Portals
- Wait for Request Summary
Wait for Request Summary
Use this Hornbill Automation to suspend a Request's workflow until the summary has bee set against the request
Options
- Request Id
- In almost all cases, this should be set to Auto which will take the global variable for the request ID that the BPM is associated and apply all selected options to this request
- Action Focus
- Sets the Action Item on a request that will be in focus.
- Expire Period
- The length of time to wait until the node expires and the workflow will automatically continue. This is based on the Working Time Calendar defined in the setting guest.app.timer.defaultCalendar.
- Add Notice
- Select Yes to add a notice to the top of the request
- Notice Type
- The type of notice (Alert or Information). The default value is "Information".
- Notice Text
- The text that will be displayed. This has a limit of 255 characters
- Notice Visibility
- The visibility of the notice (Portals
- Wait for Request Team
Wait for Request Team
Use this Hornbill Automation to suspend a Request's workflow until an team has been assigned to the request.
Options
- Request Id
- In almost all cases, this should be set to Auto which will take the global variable for the request ID that the BPM is associated and apply all selected options to this request
- Action Focus
- Sets the Action Item on a request that will be in focus.
- Expire Period
- The length of time to wait until the node expires and the workflow will automatically continue. This is based on the Working Time Calendar defined in the setting guest.app.timer.defaultCalendar.
- Add Notice
- Select Yes to add a notice to the top of the request
- Notice Type
- The type of notice (Alert or Information). The default value is "Information".
- Notice Text
- The text that will be displayed. This has a limit of 255 characters
- Notice Visibility
- The visibility of the notice (Portals
- Wait for Request Update
Wait for Request Update
Use this Hornbill Automation to suspend a Request's workflow until an update, using the Update Action has been added to the request.
Options
- Request Id
- In almost all cases, this should be set to Auto which will take the global variable for the request ID that the BPM is associated and apply all selected options to this request
- Action Focus
- Sets the Action Item on a request that will be in focus.
- Expire Period
- The length of time to wait until the node expires and the workflow will automatically continue. This is based on the Working Time Calendar defined in the setting guest.app.timer.defaultCalendar.
- Add Notice
- Select Yes to add a notice to the top of the request
- Notice Type
- The type of notice (Alert or Information). The default value is "Information".
- Notice Text
- The text that will be displayed. This has a limit of 255 characters
- Notice Visibility
- The visibility of the notice (Portals
Update Request
Use the Update Request node to automatically update the values of specific Request attributes at any stage in the process. Examples being updating the Logging or Closing Categories of a Request.
- Logging Category
- Requests > Update Request > Logging Category
Specify the logging category which will associated to the request. This is typically used where the category of the request is known based on the business process being associated against a specific request catalog item, and as such the analyst is not required to make a manual assessment and categorisation.
- Category - This option will prompt you to select a Category. If supplied, "Category (From Variable)" option will be ignored.
- Category (From Variable) - This option requires you to provide the Id of a Category (Value of h_id column in h_sys_profiles table). This can be used when a field that is driven by a Simple List made up of Categories is set up in a Progressive Capture. This option should only be supplied if "Category" option is not set.
- System Timeline Update - Select if the default system text will be added to the timeline for this action
- Manual Timeline Update - Select Yes to override the default System timeline Text, and add your own text which will appear in the timeline update for this action
- Visibility - Choose what level of visibility will be automatically applied to this update. Choosing anything other than Customer will result in the customer not seeing the update in the timeline of their requests on the Service or Customer Portals.
- Closure Category
- Requests > Update Request > Closure Category
Specify the closure category which will be associated to the request. This is typically used where the business process is set to automatically resolve or close and the analyst is not required to manually resolve and specify a closure category.
- Category - This option will prompt you to select a Category. If supplied, "Category (From Variable)" option will be ignored.
- Category (From Variable) - This option requires you to provide the Id of a Category (Value of h_id column in h_sys_profiles table). This can be used when a field that is driven by a Simple List made up of Categories is set up in a Progressive Capture. This option should only be supplied if "Category" option is not set.
- System Timeline Update - Select if the default system text will be added to the timeline for this action
- Manual Timeline Update - Select Yes to override the default System timeline Text, and add your own text which will appear in the timeline update for this action
- Visibility - Choose what level of visibility will be automatically applied to this update. Choosing anything other than Customer will result in the customer not seeing the update in the timeline of their requests on the Service or Customer Portals.
- Update Customer
Update Customer
Use this node to automatically add or update a request with a Customer
Options
- Request ID
- This is a mandatory setting that uses a variable to hold the Request Id of the request that is using this BPM. This should be set to Auto
- Co-Worker
- Select a Co-worker that will be used as the customer of the request
- Contact
- Select a Contact that will be used as the customer of the request
- Co-worker (From Variable)
- Use a variable to populated the customer, based on a Co-worker ID
- Contact (From Variable)
- Use a variable to populate the customer, based on a contact ID
- System Timeline Update
- Select if the default system text will be added to the timeline for this action
- Manual Timeline Update
- Select Yes to override the default System timeline Text, and add your own text which will appear in the timeline update for this action
- Visibility
- Choose what level of visibility will be automatically applied to this update. Choosing anything other than Customer will result in the customer not seeing the update in the timeline of their requests on the Service or Customer Portals.
- Update Custom Fields
Update Custom Fields
This provides the ability to update any or all of the custom fields of a request. The input box is single line only and values should be restricted to 255 characters which is the defined max length for all custom fields. When populating custom fields please pay attention to the type of value you are populating, and ensure this is compatible with the type of field you have specified for the corresponding custom field in the request type and service form designer in the user interface.
Options
- Custom Field A - T & Custom Field 21 to 40
- Populate the required custom field(s) with the value(s) that you wish to update the custom field(s) with. This can be text and/or attributes from the Variable Picker.
- Append Text
- This determines if the supplied value of the custom field, should append any existing value of the custom field. By default this is set to replace any existing value, with the value defined here.
- Format Checkbox Value
- This option determines whether the value from a checkbox (i.e. Outcome Field from a Human Task) is formatted to remove the square brackets and double quotes. By default, this option is set to "No".
- System Timeline Update
- Select if the default system text will be added to the timeline for this action.
- Manual Timeline Update
- Select Yes to override the default System timeline Text, and add your own text which will appear in the timeline update for this action.
- Visibility
- Choose what level of visibility will be automatically applied to this update. Choosing anything other than Customer will result in the customer not seeing the update in the timeline of their requests on the Service or Customer Portals.
- Details
Use this operation to update the Summary and Description of a request. You can either add a new summary or description or append to the existing values. - Request Id
- This is a mandatory setting that uses a variable to hold the Request Id of the request that is using this BPM. This should be set to Auto.
- Summary
- Set to Auto if you want to use an output variable from a previous BPM operation where that variable is named summary. If the variable summary does not exist, no action will be taken. Set to Manual to provide the information to be used to update the summary. This can include the use of Request Variables. Set to Ignore if no action is required.
- Description
- Set to Auto if you want to use an output variable from a previous BPM operation where that variable is named description. If the variable description does not exist, no action will be taken. Set to Manual to provide the information to be used to update the Description. This can include the use of Request Variables. Set to Ignore if no action is required.
- Append Text
- Set to Auto if the update is to replace the existing text. Set to Manual and select Yes to append the update to the end of the existing text
- System Timeline Update
- Select if the default system text will be added to the timeline for this action
- Manual Timeline Update
- Select Yes to override the default System timeline Text, and add your own text which will appear in the timeline update for this action
- Visibility
- Choose what level of visibility will be automatically applied to this update. Choosing anything other than Customer will result in the customer not seeing the update in the timeline of their requests on the Service or Customer Portals.
- External Reference
- Use this operation to update the External Reference field that is held against the requests.
- External Reference
- Either enter an external reference number or use the variable picker to take the External Reference held in a variable
- System Timeline Update
- Select Yesif the default system text will be added to the timeline for this action
- Manual Timeline Update
- Select Yes to override the default System timeline Text, and add your own text which will appear in the timeline update for this action
- Visibility
- Choose what level of visibility will be automatically applied to this update. Choosing anything other than Customer will result in the customer not seeing the update in the timeline of their requests on the Service or Customer Portals.
- First Time Fix
Use this operation to update the First Time Fix flag on a request. You can apply the rules to set the requirements for a first time fix. This operation should be added at point within the workflow when the request has reached a resolved state. - Request Id
- This is a mandatory setting that uses a variable to hold the Request Id of the request that is using this BPM. This should be set to Auto.
- No Team Reassignments
- Set to Yes If you wish to include the rule that there must not be any team reassignments in order to be classed as a first time fix. Set to Auto or No to exclude this rule.
- No Owner Reassignments
- Set to Yes If you wish to include the rule that there must not be any owner reassignments in order to be classed as a first time fix. Set to Auto or No to exclude this rule.
- No Hold Time
- Set to Yes If you wish to include the rule that there must not be any point at which this request was placed on hold. Set to Auto or No to exclude this rule.
- Max Open Time
- Set to Manual and add an amount of time to include the rule that the request must be resolved within this time frame to count as a first time fix. Set to Auto to exclude this rule. Putting a request on-hold does not extend the Max Open Time.
- Include Working Time Calendar
- Set to Manual and chose a Working Time Calendar to include the use of a Working Time Calendar when calculating the Max Open Time. Set to Auto to exclude this rule
- System Timeline Update
- Select if the default system text will be added to the timeline for this action
- Manual Timeline Update
- Select Yes to override the default System timeline Text, and add your own text which will appear in the timeline update for this action
- Visibility
- Choose what level of visibility will be automatically applied to this update. Choosing anything other than Customer will result in the customer not seeing the update in the timeline of their requests on the Service or Customer Portals.
- Place On Hold
Use this operation to automatically put a request on-hold when a point within the workflow has been reached. - Request Id
- This is a mandatory setting that uses a variable to hold the Request Id of the request that is using this BPM. This should be set to Auto.
- On Hold Period
- Enter the number of Years, Months, Days, Hours, and Minutes that the request will be on hold for.
- On Hold Period Apply Working Time Calendar
- Set this to Yes to apply the WTC that is associated to the request to be used. This will ensure that the request comes off hold during work hours.
- Reason
- Include information that describes the reason for the request being placed on-hold.
- System Timeline Update
- Select if the default system text will be added to the timeline for this action
- Manual Timeline Update
- Select Yes to override the default System timeline Text, and add your own text which will appear in the timeline update for this action
- Visibility
- Choose what level of visibility will be automatically applied to this update. Choosing anything other than Customer will result in the customer not seeing the update in the timeline of their requests on the Service or Customer Portals.
- Sub-Status
- Set the sub-status of the request when the request is placed on-hold
- Priority
- Requests > Update Request > Priority
Use this node to set the Priority' of the request. This can be useful when your business process is supporting a specific request catalog item, and the Priority for such items can be predetermined and therefore can be set. It is also useful to use within a process where a decision node may branch and different Priorities are possible depending on the path followed. Decide if the setting of the Priority should also mark the request timeline.
- System Timeline Update - Select if the default system text will be added to the timeline for this action
- Manual Timeline Update - Select Yes to override the default System timeline Text, and add your own text which will appear in the timeline update for this action
- Visibility - Choose what level of visibility will be automatically applied to this update. Choosing anything other than Customer will result in the customer not seeing the update in the timeline of their requests on the Service or Customer Portals.
- Resolution Text
- Requests > Update Request > Resolution Text
Use this node to set the Resolution Text' of the request. This can be useful when your business process is supporting a specific request catalog item, and the Resolution for such items can be predetermined and therefore can be set.
- Resolution Text - The text which will appear in the resolution text box (this can include the use of request variables)
- Overwrite Resolution Text - Decide if this option should overwrite and replace any existing text in the resolution field - by default this is set to No
- System Timeline Update - Select if the default system text will be added to the timeline for this action
- Manual Timeline Update - Select Yes to override the default System timeline Text, and add your own text which will appear in the timeline update for this action
- Visibility - Choose what level of visibility will be automatically applied to this update. Choosing anything other than Customer will result in the customer not seeing the update in the timeline of their requests on the Service or Customer Portals.
- Service
Service
Use this Hornbill Automation to change the currently assigned Service and Request Catalog Item. This can be used in conjunction with assign operations to move a request that has been raised under the wrong service and team.
Options
- Request Id
- This is a mandatory setting that uses a variable to hold the Request Id of the request that is using this BPM. This should be set to Auto
- Service
- Select the Service that will be associated to the request
- Catalog Item
- Select the Request Catalog Item that will be associated to the request
- Assess BPM
- When set to 'Yes', the Request's process will be cancelled and a new instance of the new Service's or Catalog's process will be spawned. The process will not be cancelled if the new Service or Catalog's process is the same as the Request's current process.
- Update Timeline
- Include a Timeline update on the request when this automation has completed
- Manual Timeline Update
- Select Yes to override the default System timeline Text, and add your own text which will appear in the timeline update for this action
- Visibility
- Choose what level of visibility will be automatically applied to this update. Choosing anything other than Customer will result in the customer not seeing the update in the timeline of their requests on the Service or Customer Portals
- Service Level
- Requests > Update Request > Service Level
Use this node to update the Service Level that has been applied to the request. This can be used to apply a Service Level if one has not been allocated or if at a point in your workflow you would like to automatically re-assess the applied Service Level, this will use your Service Level Rules and check for any changes to the request to determine if a change is Service Level is required.
- There are no options required for this operation.
- Because of how this operation works there are no options to select from. It simply executes the operation.
- Site
Site
Use this node to set the Site of the request. The configuration options include pre-defining the Site from the full list of Sites, which have been created in Organisational structure or from a variable.
Options
- Request ID
- In almost all cases, this should be set to Auto which will take the global variable for the request ID that the BPM is associated and apply all selected options to this request.
- Site
- Select from the list of available sites as defined under the Organizational Data in Administration
- Site ID (From Variable)
- Use a variable that has been populated from Progressive Capture to set the Site. The Group Picker option on the Custom Progressive Capture form will be the most common way of providing the Site ID in a variable.
- System Timeline Update
- Select if the default system text will be added to the timeline for this action
- Manual Timeline Update
- Select Yes to override the default System timeline Text, and add your own text which will appear in the timeline update for this action
- Visibility
- Choose what level of visibility will be automatically applied to this update. Choosing anything other than Customer will result in the customer not seeing the update in the timeline of their requests on the Service or Customer Portals.
- Site (Customer' Site)
- Requests > Update Request > Site (Customer's Site)
Use this node to set the Site of the request to that of the site defined against the customer of the request. Decide if the setting of the Site should be marked on the requests timeline.
- System Timeline Update - Select if the default system text will be added to the timeline for this action
- Manual Timeline Update - Select Yes to override the default System timeline Text, and add your own text which will appear in the timeline update for this action
- Visibility - Choose what level of visibility will be automatically applied to this update. Choosing anything other than Customer will result in the customer not seeing the update in the timeline of their requests on the Service or Customer Portals.
- Source
The Update Request Source operation allows you to automatically set the source of the request. A number of default sources such as Email, Analyst, Self Service, and Post are added and based on the how the request was raised. This BPM Operation lets you over-ride these source names and allows you to add your own. - Request Id
- This is a mandatory setting that uses a variable to hold the Request Id of the request that is using this BPM. This should be set to Auto.
- Source
- Either enter the text that you would like to use to represent the source or you can have this automatically provided by using the variable option.
- System Timeline Update
- Select if the default system text will be added to the timeline for this action
- Manual Timeline Update
- Select Yes to override the default System timeline Text, and add your own text which will appear in the timeline update for this action
- Visibility
- Choose what level of visibility will be automatically applied to this update. Choosing anything other than Customer will result in the customer not seeing the update in the timeline of their requests on the Service or Customer Portals.
- Status / Sub-status
- Requests > Update Request > Status
Use this node to set the Status and or Sub-Status at one or multiple points in a process. It can be useful to automate the changing of the status based on other process actions, without the need for human intervention.
- Status - Optionally select the Status you wish the Request to be set too
- Sub-Status - Optionally select the Sub-Status you wish the Request to be set too
- System Timeline Update - Select if the default system text will be added to the timeline for this action
- Manual Timeline Update - Select Yes to override the default System timeline Text, and add your own text which will appear in the timeline update for this action
- Visibility - Choose what level of visibility will be automatically applied to this update. Choosing anything other than Customer will result in the customer not seeing the update in the timeline of their requests on the Service or Customer Portals.
- Timeline
- Requests > Update Request > Timeline
Use this node to update the Timeline of a request with a predefined comment. This can be useful when it is important to post information to or an update onto a request based on a prior process action.
- Update Text - Define the text to appear in the timeline update, this can include variables from the request or related entities using the variable picker
- URL - Include a URL which will be embedded into the timeline update of the request.
- Visibility - Choose what level of visibility will be automatically applied to this update. Choosing anything other than Customer will result in the customer not seeing the update in the timeline of their requests on the Service or Customer Portals.
Request Timers
Use the Request Timer nodes at any stage in the process to either start or stop the Response and or Resolution timers. It is not a perquisite to have to use any timers within processes or to have to use both Response and Resolution timers when timers are used.
There are some settings that control the default behaviour of the Service Level Timers. The settings provided to pause or stop the resolution timer when resolving a request are as follows:
- app.request.pauseResolutionTimerOnResolve (Default OFF)
- app.request.resumeResolutionTimerOnReopen (Default OFF)
- app.request.stopResolutionTimerOnResolve (Default ON)
- app.request.stopResolutionTimerOnClose (Default OFF)
- Using settings to control resolution timers
- You should choose the relevant settings to meet your needs, but note that app.request.stopResolutionTimerOnResolve will take precedence over app.request.pauseResolutionTimerOnResolve so ensure only the one you want to use is enabled.
- Using BPM nodes to control resolution timers
- If you are using this BPM node to control resolution timers the four settings above should all be turned off; If any settings are enabled then they will take precedence over BPM actions. To enable pause/resume of a resolved request you can add the Timer > Pause Resolution Timer or Timer > Resume Resolution Timer BPM nodes as required in your BPM process.
- Start Resolver Timer
- Application > Timer > Start Resolver Timer
Use this node at the required point in the process to start the resolution timer. When selecting this option, the resolution timer will be based on the Priority associated to the request. The target and any required escalation actions for the resolution timer can be configured in the Service Manager application > Services > Service Levels > Resolve Times.
- Stop Resolution Timer
- Start Response Timer
- Application > Timer > Start Response Timer
Use this node at the required point in the process to start the response timer. The response timer to use can be selected on the node, and will use the response target and any associated escalation actions which can be configured in the Service Manager application > Services > Service Levels > Response Times.
- Stop Response Timer
- Pause Resolution Timer
Pause Resolution Timer
Use this Hornbill Automation to pause the currently running Resolution Timer. This is particularly useful in 2 stage closers where the timer can be paused during the resolution stage and then resumed if the request is reopened
Options
- Request Id
- This is a mandatory setting that uses a variable to hold the Request Id of the request that is using this BPM. This should be set to Auto
- Resume Resolution Timer
Resume Resolution Timer
Use this Hornbill Automation to resume Resolution Timer that has been paused. This is particularly useful in 2 stage closers where the timer can be paused during the resolution stage and then resumed if the request is reopened
Options
- Request Id
- This is a mandatory setting that uses a variable to hold the Request Id of the request that is using this BPM. This should be set to Auto
Services
Operations specific to services related to the request service
- Update Related Services
Update Related Services
Use this node to update the status of services related to a request at the required stage in a process, this is different from the service the request is logged against
Options
- RequestId
- This is an automatic option and should be set to Auto
- Relationship Type
- Select which services to update the status of, based on their relationship type to the request service
- Status
- The Status to set the related services too
- Status Message
- Any message to be visible alongside the Status of the related services
- System Timeline Update
- Select if the default system text will be added to the timeline for this action
- Manual Timeline Update
- Select Yes to override the default System timeline Text, and add your own text which will appear in the timeline update for this action
- Visibility
- Choose what level of visibility will be automatically applied to this update. Choosing anything other than Customer will result in the customer not seeing the update in the timeline of their requests on the Service or Customer Portals.
Assets
Automations specific to an asset entity which can be used as part of Auto Tasks on an asset.
