Difference between revisions of "My Boards"
(→Setup) |
|||
| Line 7: | Line 7: | ||
==Setup== | ==Setup== | ||
| − | + | === Administration === | |
| + | Access to the boards feature is controlled through a Service Manager role. This role can be assigned to the users that require access to use the boards. | ||
| + | |||
| + | === Create a Board === | ||
| + | The ''My Boards''option is accessed from Service Manager menu in the Application bar on the left hand side. Selecting this will take you to the ''My Boards'' landing page which lists all of the boards that you have access to. | ||
| + | |||
| + | |||
| + | # Click on the ''Create Board'' button | ||
| + | # Add a title for your board. The name is used as the title when viewing this board. This title is also used when assigning a request to the board. | ||
| + | # Add a description. The description is displayed as the sub-title when viewing this board. | ||
| + | # Set an Owner. By default this will be the name of the person creating the board, but it is possible to assign ownership to another person. If you assign ownership to someone else, you will no longer be able to manage the board once it has been saved. | ||
| + | # Share with a team. If left blank, the board will only be visible by you. Otherwise, you can select a single team that you wish to share the board with. | ||
| + | # Click ''Create Board'' to save your board. This will now be visible from your board's landing page and available for requests to be added. | ||
| + | |||
| + | |||
| + | === Edit a Board === | ||
| + | |||
| + | # Launch My Boards for the Service Desk icon. | ||
| + | # Select the board that you wish to edit | ||
| + | # Select the ''Edit Board'' button | ||
| − | |||
:* To '''Add requests to board''' - You can do this by :- | :* To '''Add requests to board''' - You can do this by :- | ||
Revision as of 11:58, 30 June 2015
Home > Service Manager > My Boards
Introduction
My Boards is a feature of Service Manager which provides an alternative way to view and manage requests. Each board consists of a number of definable lists which can contain request cards. These request cards can either be manually added and moved between lists or they can be added and moved automatically through the use of BPM workflows.
A user can create a board for their own personal management of requests, or it can be shared with a team where all team members can view and update the board.
Setup
Administration
Access to the boards feature is controlled through a Service Manager role. This role can be assigned to the users that require access to use the boards.
Create a Board
The My Boardsoption is accessed from Service Manager menu in the Application bar on the left hand side. Selecting this will take you to the My Boards landing page which lists all of the boards that you have access to.
- Click on the Create Board button
- Add a title for your board. The name is used as the title when viewing this board. This title is also used when assigning a request to the board.
- Add a description. The description is displayed as the sub-title when viewing this board.
- Set an Owner. By default this will be the name of the person creating the board, but it is possible to assign ownership to another person. If you assign ownership to someone else, you will no longer be able to manage the board once it has been saved.
- Share with a team. If left blank, the board will only be visible by you. Otherwise, you can select a single team that you wish to share the board with.
- Click Create Board to save your board. This will now be visible from your board's landing page and available for requests to be added.
Edit a Board
- Launch My Boards for the Service Desk icon.
- Select the board that you wish to edit
- Select the Edit Board button
- To Add requests to board - You can do this by :-
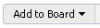
- - Add manually from a request list by selecting the check boxes for the requests and then 'Add to Board' on the request list toolbar
- - Selecting
 within a request
 - - Automatically by using a Business Process workflow
- To Move requests from one list to another - Simply drag and drop as needed
![]() - An audit trail of changes is available by selecting the 'View Log' option
- An audit trail of changes is available by selecting the 'View Log' option
![]() - You can add a comment card to the board using 'Add Comment' to breakup lists into sub-groups
- You can add a comment card to the board using 'Add Comment' to breakup lists into sub-groups
![]() - Resolved requests automatically turn green
- Resolved requests automatically turn green