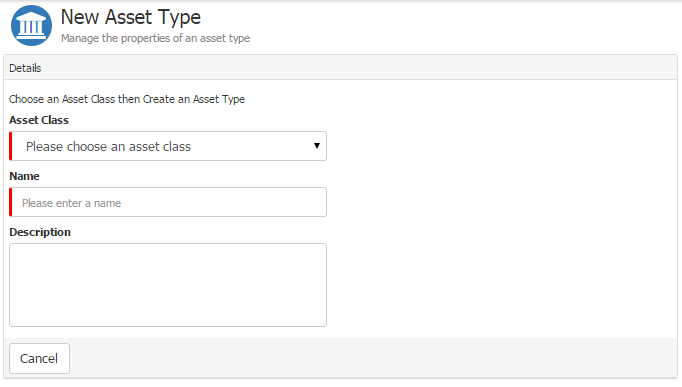
Asset Types

From Hornbill
Revision as of 10:44, 3 April 2023 by Stevenb (talk | contribs)
Jump to navigation Jump to search
Home > Home > Service Manager > Asset Management > Asset Types Index

Introduction

Asset Types allow you to define a grouping of particular types of assets that fall under the same Class. Creating an Asset Type allows you to select the fields that will be available for that Asset Type. During the creation of an Asset, you will select the Asset Type to apply the defined fields against that asset.

Default Asset Types

A number of Asset Types have been provided with Service Manager in order to allow you to quickly start adding your assets. Asset Types are available to select from when manually adding an individual asset or they can be specified as part of an import. These default Asset Types can be edited or deleted as necessary.

The default Asset Types include the following:

  • Desktop
  • Laptop
  • Server
  • Virtual Machine
  • Headset
  • Keyboard
  • Monitor
  • Mouse
  • Web Cam
  • Smart Phone
  • Tablet
  • Printer
  • Scanner
  • Desktop App
  • Mobile App
  • Desk Phone


(Top of Page)

Managing Asset Types

Adding a New Asset Type

A new Type can be added by clicking the "+ New Asset Type" button located at the top right of the Asset Types page.


This will take you to the New Asset Type form. The first step in creating a new Asset Type is to select an Asset Class and specify the name and description of your new Asset Type.

First select a Class and Specify a Name


Asset Type Fields

  • Class
The Asset Class influences the availability of additional asset properties. The additional properties are specific to the Asset Class selected.
  • Name
A short descriptive name which is displayed in lists and used for searches, reports, and applied to assets created under this Asset Type.
  • Prefix
This is a 3 character prefix that is automatically added to the Asset ID
  • Auto Generate Name
When enabled, any asset that is created under this Asset Type, the name will be automatically created and based on the Asset ID. This will include the Prefix if set.
  • Description
A high level description to help users understand more about the type and how it should be used
  • Image
An image can be added to provide a nice visual identifier of the asset type. Any asset created using this type will also use this image.

Asset Type Attributes

Upon selecting an Asset Class, you will be presented with the attributes that will be available when adding your individual Assets later.

Selecting a Class exposes the Properties


The General Properties are common to all Asset Types. The Additional Properties are specific to the Asset Class specified when creating your New Asset Type.
Clicking on one of the sections beneath the General or Additional Properties will expand the section to expose the attributes (fields) within that section. There are two settings against each attribute "Visible" and "Mandatory".

Clicking a section exposes the attributes for configuration


  • Visible
Controls whether the field is visible when viewing the details of an individual Asset. This setting can be used to hide fields that are not used.
  • Mandatory
Controls whether information must be provided in the field when adding or editing an individual Asset via the Hornbill Service Manager Application.


Once you are happy with the configuration of your Asset Type, click "Create" to finish.


Deleting an Asset Type

If you wish to delete an Asset Type, hovering over the Type will present the Trash Can icon over to the right hand side. Clicking on this will delete the Asset Type. However, if there are assets associated to this Type you will be prevented from deleting it.

The Trash Can Icon appears to the right of the Asset Type on hover


(Top of Page)

Asset Substates

Additional substates can be added in order to provide a more detailed description of the state of your asset. These are managed through the substate configuration button on the top of the Asset Types list in the toolbar. The substates are available to all Asset Types but they can be made visible or hidden for each Asset Type.

Adding a Substate

  1. Click on the Manage Substates button on the top of the Asset Types page in the tool bar
  2. Select one of the existing States of either Current, Active, Archived
  3. Enter the name of the new name of your sub state

Making Substates Visible

  1. Open an Asset Type from the Manage Asset Types option
  2. Click on the Edit button
  3. Expend the section General Asset Information
  4. Select options Visible and Mandatory as desired


Asset Type Settings

Each Asset Type will contain a variety of fields based on the Class that was selected when the Asset Type was created. These fields are contained within a number of sections which are determined by the Class type. When each section is expanded, there are three options available to configure each field.

  • Summary
Selecting this will display the information stored in this field on a Summary section of the Asset form. This is useful to present key information of the asset and also provides easy access for editing.
  • Visible
All the the provided field are part of the selected class. It might be that some of these fields are not required for the Asset Type. These can have the visibility turned off.
  • Mandatory
Making a field mandatory ensures that it is populated by a user. If there is a field that has been set to mandatory but has not yet been populated, a user will be forced to enter a value for that field before any other changes can be saved.

(Top of Page)