Difference between revisions of "Google Forms"
Jump to navigation
Jump to search
| (12 intermediate revisions by the same user not shown) | |||
| Line 25: | Line 25: | ||
{{Section| | {{Section| | ||
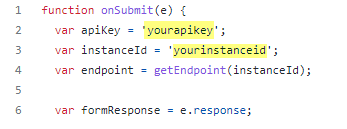
== Setup an API Key == | == Setup an API Key == | ||
| + | |||
The creation of an API Key allows for secure authentication for the Google Forms to interact with Hornbill. The API Key will be used within the Integration Script | The creation of an API Key allows for secure authentication for the Google Forms to interact with Hornbill. The API Key will be used within the Integration Script | ||
# Open the Admin Portal | # Open the Admin Portal | ||
| Line 32: | Line 33: | ||
# Create a new API Key using the name Google Forms | # Create a new API Key using the name Google Forms | ||
# Keep this page available to you as you will need to copy the API Key into the Integration Script. | # Keep this page available to you as you will need to copy the API Key into the Integration Script. | ||
| − | |}} | + | | |
| + | {{RightBox|Watch Me| | ||
| + | ::[[File:GFAPIKey.mp4]] | ||
| + | }} | ||
| + | }} | ||
{{TOP}} | {{TOP}} | ||
{{Section| | {{Section| | ||
| Line 46: | Line 51: | ||
# At this point you can optionally add more questions, but it is not required. Additional questions will be covered in Map Questions to Custom Fields | # At this point you can optionally add more questions, but it is not required. Additional questions will be covered in Map Questions to Custom Fields | ||
# Keep this browser tab open as you need it in the next step | # Keep this browser tab open as you need it in the next step | ||
| − | |}} | + | | |
| + | {{RightBox|Watch Me| | ||
| + | ::[[File:Create Google Form.mp4]] | ||
| + | }} | ||
| + | }} | ||
{{TOP}} | {{TOP}} | ||
{{Section| | {{Section| | ||
| Line 79: | Line 88: | ||
<br> | <br> | ||
===Questions and Custom Fields=== | ===Questions and Custom Fields=== | ||
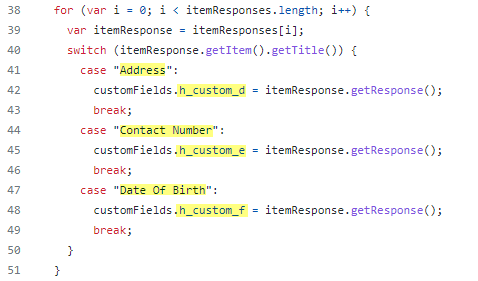
| − | + | Each question that you add to a Google Form can be mapped to a request's custom field. The script uses a case statement to identify the Form question using its title and then maps it to custom field where the response will be stored.[[File:ScriptCustomFields.png|right|border|link=]] | |
| − | Each question that you add to a Google Form can be mapped to a request's custom field. The script uses a case statement to identify the Form question using its title and then maps it to custom field where the response will be stored. | ||
In this example there are three questions | In this example there are three questions | ||
{{bullet1|Address|A question that has the title '''''Address''''' will be added to the custom field '''''h_custom_d'''''}} | {{bullet1|Address|A question that has the title '''''Address''''' will be added to the custom field '''''h_custom_d'''''}} | ||
| Line 114: | Line 122: | ||
{{Section| | {{Section| | ||
== Create a Pre-filled Link == | == Create a Pre-filled Link == | ||
| + | Google Forms are generally accessed by sending a link to the person that you want to complete the form. A ''Pre-filled Link'' not only provides the link, but it also contains answers to one or more questions that automatically get populated on the form. This will be used to populate the ''Request Reference'' question in order to link the Form with an existing Service Manager Request. | ||
| + | # On the Form Designer page, click on the ''More'' menu (vertical ellipse button) located in the top right | ||
| + | # Select the menu item labled ''Get Pre-filled Link'' | ||
| + | # Add a random Request Reference to the Request Reference question | ||
| + | # Click on the ''Get Link'' button | ||
| + | # On the bottom left of your screen you will be presented with an option to '''COPY LINK''' | ||
| + | # Click on '''COPY LINK''' to copy the link to your clipboard | ||
| + | # Test the link by opening a new browser tab and pasting the link in the URL. This will take you to the form with the first answer pre-filled with the request reference. | ||
| + | # You will notice that within the link, the request reference is clearly visible. Save and store this link for later use within your BPMs or Auto Tasks. | ||
|}} | |}} | ||
| Line 119: | Line 136: | ||
{{Section| | {{Section| | ||
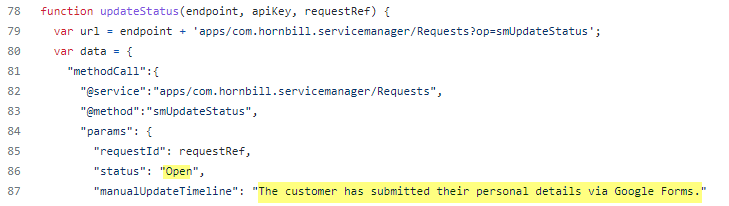
== Add the Pre-filled Link to an Automated Email == | == Add the Pre-filled Link to an Automated Email == | ||
| + | Once you have your Pre-filled Link, you are ready to send it to your users. This is typically done using a Hornbill Automation in either a BPM Workflow or an Auto Task using an email template. | ||
| + | # Locate the Request Reference within your Pre-filled Link | ||
| + | # Create or edit an email template that you wish to use to distribute the Google Form to your users | ||
| + | # Add the Pre-filled Link to the body of the template or as a link on some existing text | ||
| + | # Replace the Request Reference with the Request ID variable. For example, change <nowiki>...usp=pp_url&entry.59323096=IN00000001</nowiki> to <nowiki>...usp=pp_url&entry.59323096={{.H_pk_reference}</nowiki> | ||
|}} | |}} | ||
{{TOP}} | {{TOP}} | ||
| − | [[Category: | + | [[Category:Integration]] |