Hornbill How To: View the Hornbill Table Structure
Home > How To > Admin Tool > View the Hornbill Table Structure
IntroductionData in Hornbill is stored in many tables, and as an Administrator there may be occasions when you need to understand and interrogate the data structure on your instance. Typically, this is for reporting purposes – either using Hornbills provided Reporting and Analytics features, or an Integration such as Microsoft Power BI. But there can also be other occasions when a better understand of how the data sits in Hornbill is required. This article will show you a few techniques you can use to take a closer look. |
Related Articles |
Application Entity Viewer
Each Hornbill application is delivered with access to its database schema and entity relationships. This is useful when trying to understand where to identify tables, table columns, primary keys, and suitable fields for making your table joins. This functionality is intended to make your quest for information that little bit easier when constructing those all important analytics and management reports. Accessing the Entity Viewer for any application requires the role Advanced Reporting Admin
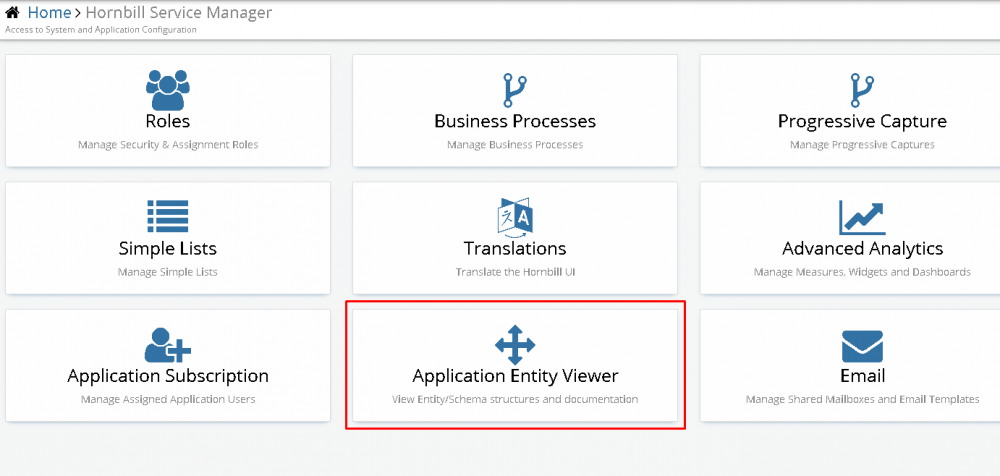
The Entity Viewer can be accessed via the Admin Tool – and under each application installed, the “Application Entity Viewer” tile will be displayed
There are two key features selectable from the Entity Viewer:
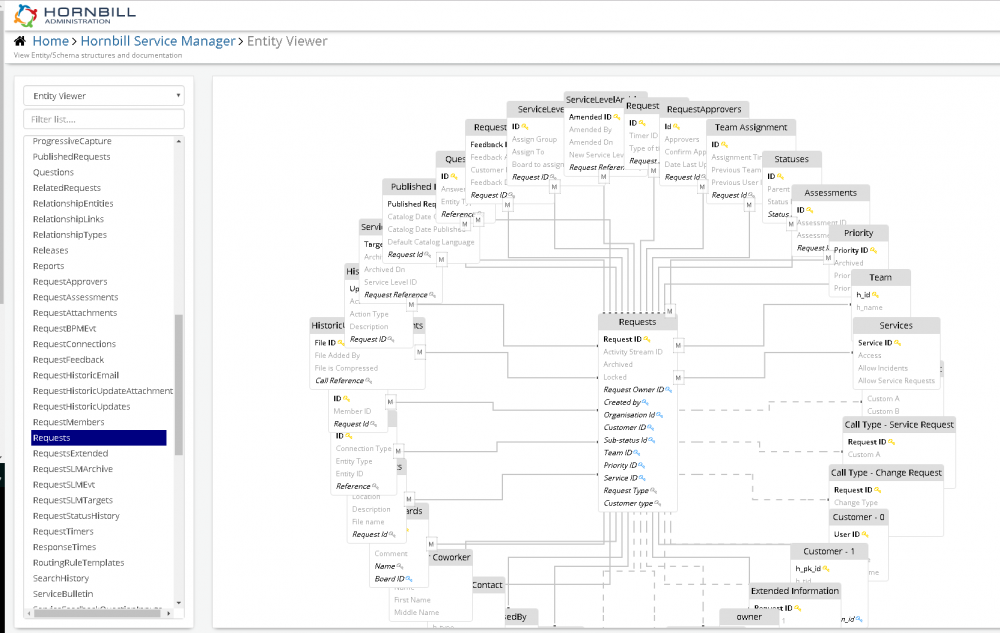
Entity Information- Provides a visual interface to explore the application tables and how they relate to each other. A quick way to identify extended tables and the columns that create table links. Click on a table and use the "Description" and "Information" buttons to the top right of the graphical user interface to explore each table in more detail.
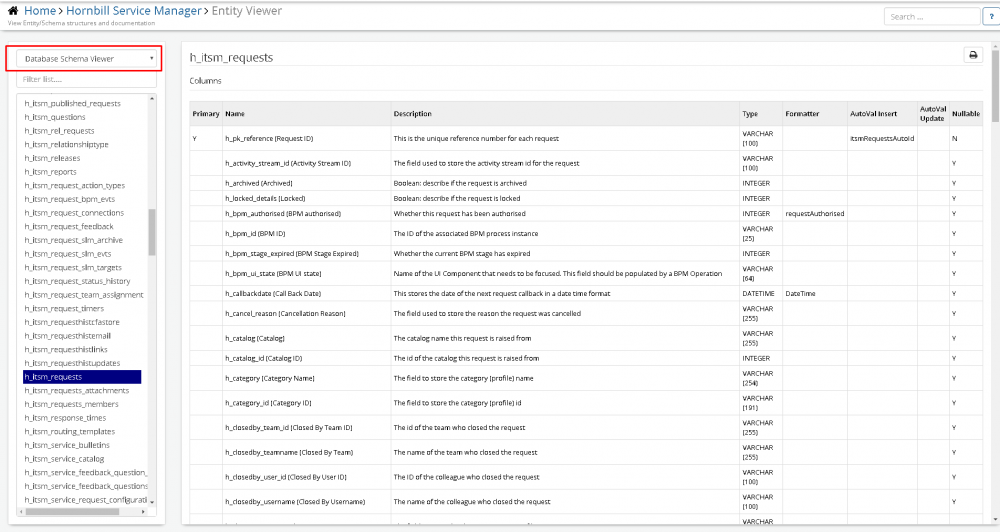
Database Schema Information - a simple description of each application table. Understand more about the columns contained in the tables including a supporting description, type, and information on which columns are indexed.
Database Direct
Database Direct allows you to interrogate the database tables directly to view the data stored in each of the tables within Hornbill. The role “Superuser” provides access to this function – though careful consideration should be given to who has this role, as it provides full Admin Privileges as well as access to ALL data within Hornbill.
A few things to consider when using Database Direct: • MySQL is used to query the Database so a level before using this feature, it would be recommended to have knowledge of MySQL, statements and how to run them.
• It is vital to only run SELECT statements when using this feature. This feature is designed to query the database rather than to updates or change data. If you require updates to data that cannot be performed the UI, then Hornbills API Library should be used for this purpose. Running any Updates via Database Direct can cause large problems on your instance and may result in the loss of data.
• It is not possible to backup and restore the Database via this feature. This function is only possible via Hornbills Cloud Team
• Be wary if running large, complex statements with multiple joins as it may affect the performance of your instance.
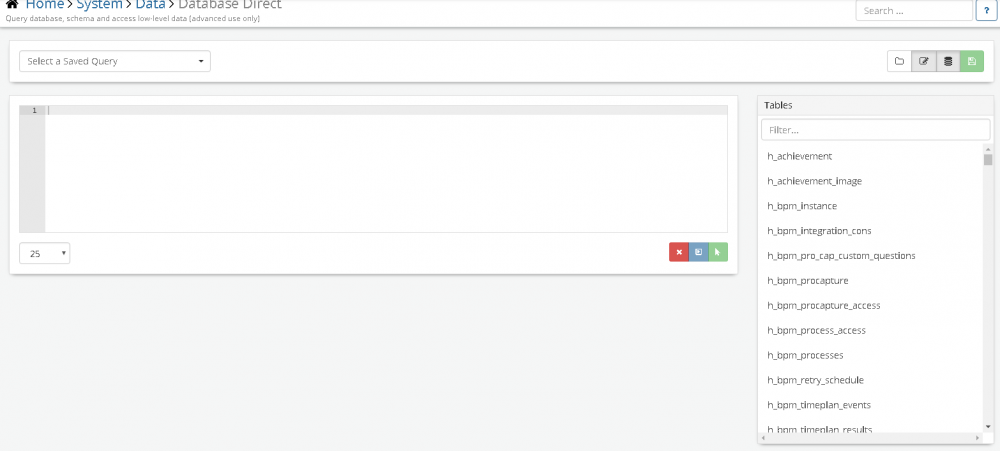
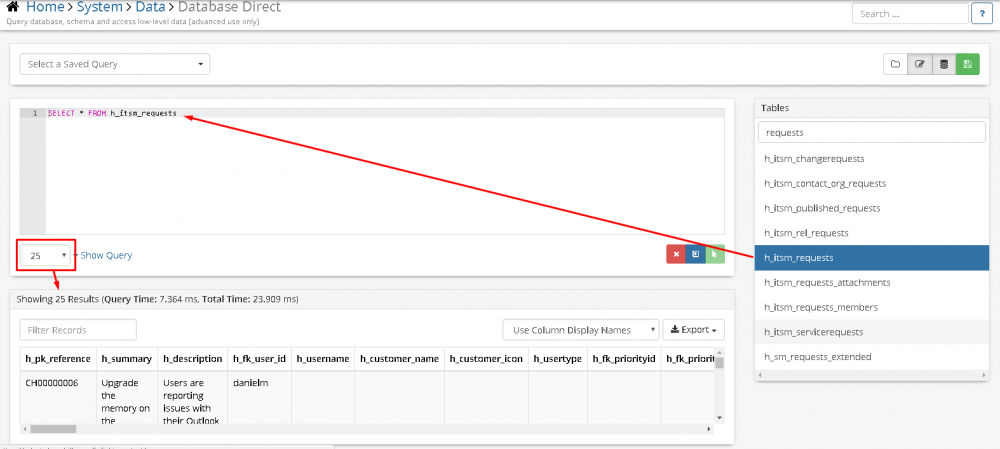
To access Database Direct, navigate to the Admin Tool and through to Home > System > Data > Database Direct
In the Center of your screen if the Statement Window to write the MySQL statements, and on the right hand side there is a list of all tables on your Hornbill Instance. To quickly find a table, there is a quick filter option at the top
Clicking on a table will perform a default “Select All” query for that table, but will limit the results returned based on the Limit Dropdown
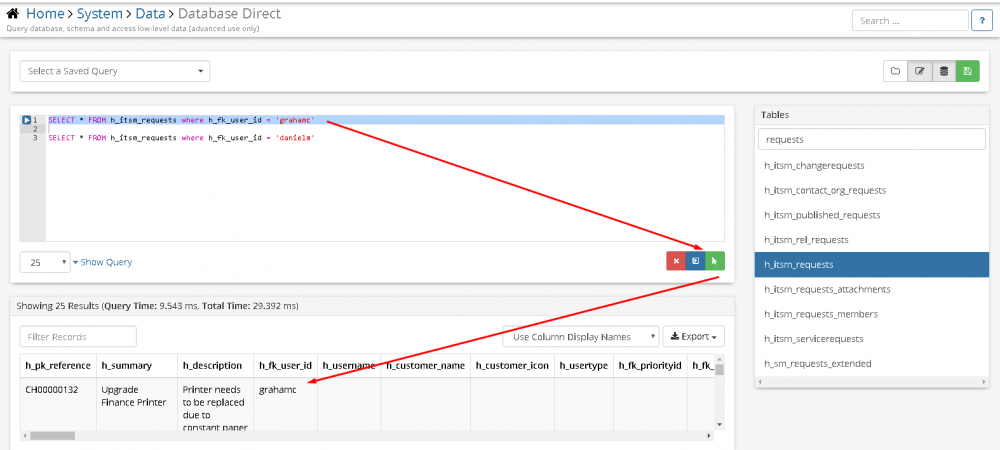
When writing your own statements, you have two ways of executing them:
• The Blue Arrow Button will execute all text in the statement window • The Green Arrow Button will execute only Highlighted Text, allowing you to have multiple lines and execute on the statements required
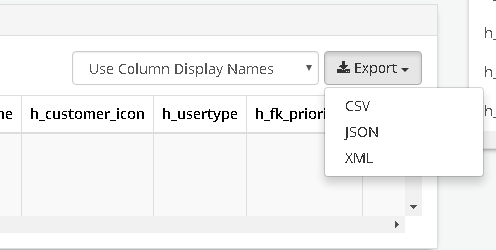
You have the option to export the results by using the “Export Button” to the following formats:
You can also save your queries using the Green Save button. These will then appear in the “Saved Query” dropdown box to be run again in the future
