Difference between revisions of "Updating SSO SAML Metadata Configuration"
| Line 13: | Line 13: | ||
# Navigate to the following page: '''Home > System > Security > SSO Profiles | # Navigate to the following page: '''Home > System > Security > SSO Profiles | ||
===View the Metadata=== | ===View the Metadata=== | ||
| + | You can view the SAML metadata and the values displayed used to update your SSO IDP manually. | ||
::[[File:SAMLUserMetaData.png|800px]] | ::[[File:SAMLUserMetaData.png|800px]] | ||
# Click on the Metadata Button | # Click on the Metadata Button | ||
Revision as of 13:04, 18 October 2021
Updating SSO SAML Metadata Configuration
Customers who have configured their SAML metadata before March 2021 are required to update their SAML configuration due to changes made to Hornbills SAML metadata and service endpoints. This necessary change to the redirect endpoint that your SSO service provider uses to authenticate SSO requests for Hornbill users is due to changes in the technology stack. These changes remove reliance on legacy PHP code, favouring a modern front end architecture providing better performance and security.
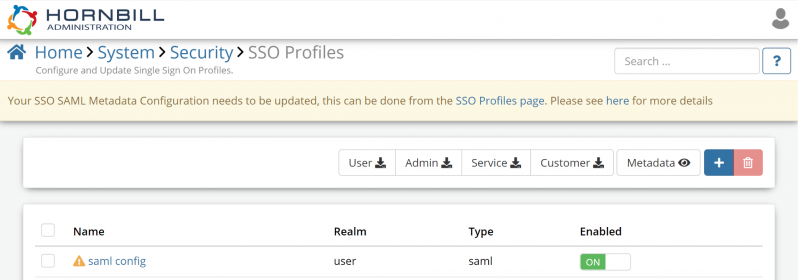
A banner will appear within the Hornbill Admin tool for all customers required to make the change; no further action is necessary for those who do not receive the banner.
An exclamation mark in a yellow triangle highlights each affected SSO configuration identified using legacy SAML metadata endpoints. Users can still log in successfully as we currently redirect the legacy endpoint to the new endpoint automatically. However, updating the configuration will speed up the user login process for end-users and provide excellent reliability and security.
Updating the SSO Configuration
- Open the Hornbill Admin Tool
- Navigate to the following page: Home > System > Security > SSO Profiles
View the Metadata
You can view the SAML metadata and the values displayed used to update your SSO IDP manually.
- Click on the Metadata Button
- Select the tab for the service you are using SAML for in Hornbill
- Make a note of the Entity ID and Reply URL
Download the Metadata
- Click on the Download button for the service you are using SAML for in Hornbill
- You can now manually update the Entity ID and Reply URL on your entity provider, or if supported, You can import the metadata data file.
To apply the metadata, you must refer to your Identity Providers documentation for the steps required. Further details can be found [here]

