Service Manager Priorities
| Home > Applications > Service Manager > Service Portfolio > Priorities | Index |
IntroductionHornbill Service Manager is delivered with four out-of-the-box Priorities; High, Medium, Low, and None. If you find these are not suitable for your needs, it is possible to add and delete them as required. At present, there is just one set of Priorities used across all Services, Teams, and Request Types. |
Related Articles |
Accessing Priorities
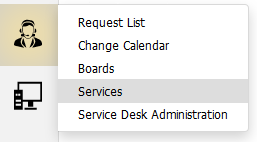
Priorities are accessed via the "Services" menu item under the Hornbill Service Manager Menu. The "Services" menu item is only exposed if you have the "Services Manager" role associated to your User account.
Click on the Priorities tab to see the list of the existing Priorities
Creating a new Priority
- Click the "+ Create Priority" button located towards the right hand side of the screen.
- Provide a name for your new Priority and confirm by clicking "Create Priority"
- The new Priority will now appear in the Priority list
Priority Order
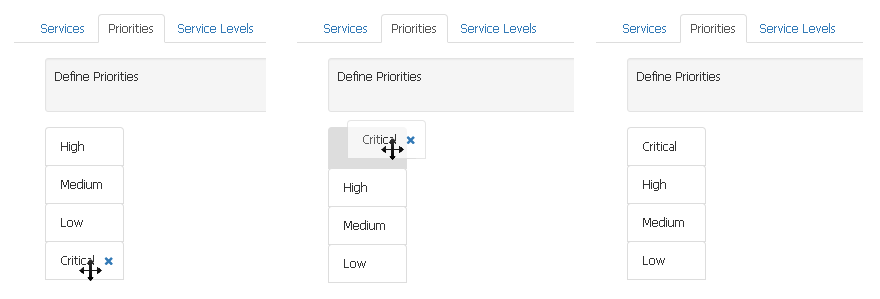
As you can see, any new priority is appended to the bottom of the list. To adjust the order, hover your mouse cursor over the priority until the cursor changes. Click and hold while dragging the priority to the desired location in the list and release.
Priority Colour
Each priority can have one of 4 colour options applied to it. These colours allow the priority to stand out within the request list. Colours include None, Green, Orange, and Red.
Deleting a Priority
To delete a priority, click the 'x' that appears when hovering your mouse pointer over the Priority.


