Difference between revisions of "Service Manager Business Process Workflow"
| Line 274: | Line 274: | ||
==== Access Control ==== | ==== Access Control ==== | ||
| − | Use the Access Control to lock or unlock the Details section of a request. Only users with the appropriate application right (update locked requests) will be able to modify the details once locked. This right has been added to the following roles: Incident Management Full Access, Change Management Full Access, Problem Management Full Access, | + | Use the Access Control to lock or unlock the Details section of a request. Only users with the appropriate application right (update locked requests) will be able to modify the details once locked. This right has been added to the following roles: Incident Management Full Access, Change Management Full Access, Problem Management Full Access, Release Management Full Access and Service Request Full Access. |
<div class="mw-collapsible mw-collapsed" data-collapsetext="Show Less" data-expandtext="Read More" style="width:700px"> | <div class="mw-collapsible mw-collapsed" data-collapsetext="Show Less" data-expandtext="Read More" style="width:700px"> | ||
Revision as of 12:26, 13 April 2017
Home > Administration > Service Manager > Business Process Workflow
IntroductionThe Service Manager Business Process Workflow is used to automate the processing of the requests that have been raised. This page contains information on the Service Manager specific automated tasks that can be used in the Business Process Designer to build unique and powerful processes for your requests. |
Related Articles |
Boards
Use the Boards nodes to automatically add, move or remove a Request from an existing Board. Requests can be added to one or multiple Boards in Service Manager, and can be moved between Lists on specified Boards automatically.
- Add Comment to Board
- Boards > Add to Board > Add Comment to Board
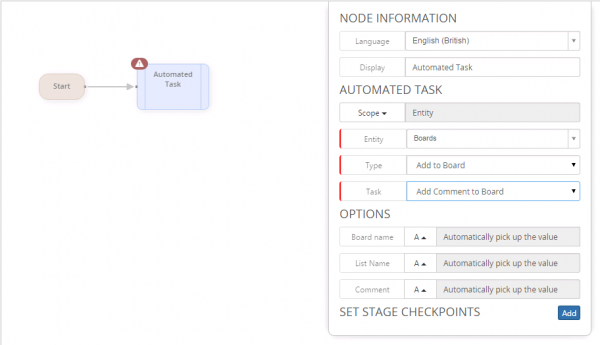
Use this node to manually add a Comment card to a board at the required stage in a process. The configuration options are:
- Board - The name of the board on which the Comment card will be added
- List - The name of the list from the above specified board to which the Comment card will be added
- Comment - The actual comment, as it will appear on the card on the Board.
- Add Request to Board
- Boards > Add to Board > Add Request to Board
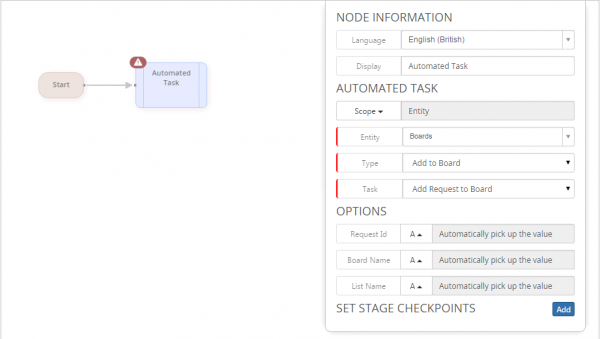
Use this node to automatically add the request which a process is supported to a Board in Service Manager. The configuration options are:
- Board - The name of the board on which the Request card will be added
- List - The name of the list from the above specified board to which the Request card will be added
Adding Requests to boards, allows Service Manager users with access to the boards, the ability to visualise where the Request currently sits in it's process. This will be a real time view, based on the process moving the request from list to list on a board, as the process progresses and the tasks / steps of the process are completed. These options compliment the Checkpoints options, where they help visualise on a single request the progress through a process, the boards provide a view across all requests which are running the same process and where they sit across the lifecycle stages for the process, so a Helicopter view without the need to open each request to views is Head's Up Display.
- Remove Request from Board
- Boards > Remove from Board > Remove Request from Board
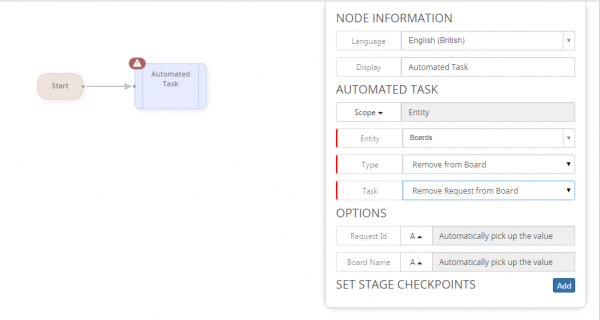
Use this option to remove a Request from a board at a specific stage in a process. The configuration options are:
- Board - The name of the board on which the Request card will be removed.
It may be useful to have added a Request to a board earlier in the process, but on the request completing it's process it may also be relevant to remove the Request from the board.
Change Requests
Use this node at any stage in a process to automate Change Request specific actions.
- Add to Change Calendar
- ChangeRequests > Update > Add to Change Calendar
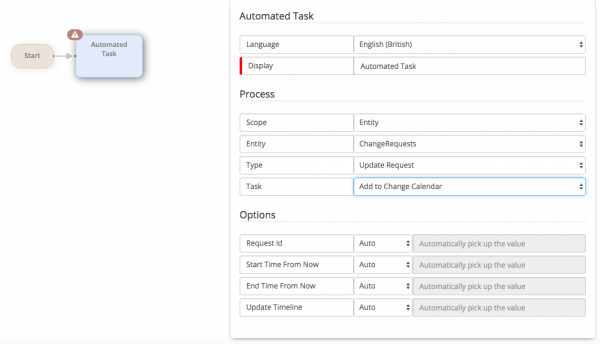
Use this node to automatically add the Change to the Change Calendar.
- Use the configuration settings to set the start and end times for the change based on the time this node is invoked in the process. As an example if this node is the first action in a process, then it will use the log time as the Now time, and the Start and End times you configure will be based off that time.
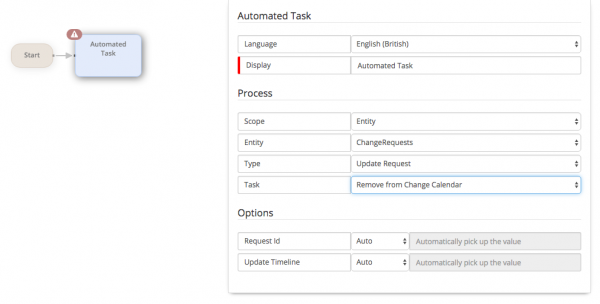
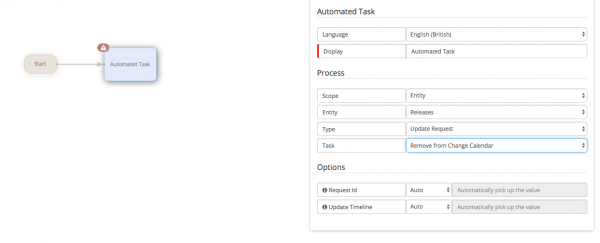
- Remove from Change Calendar
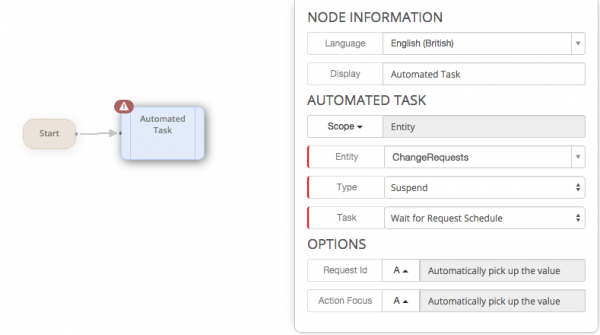
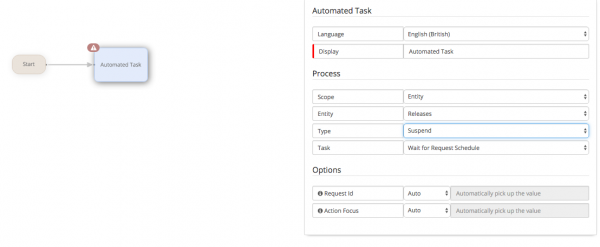
- Wait for Request Schedule
Releases
Use this node at any stage in a process to automate Release specific actions.
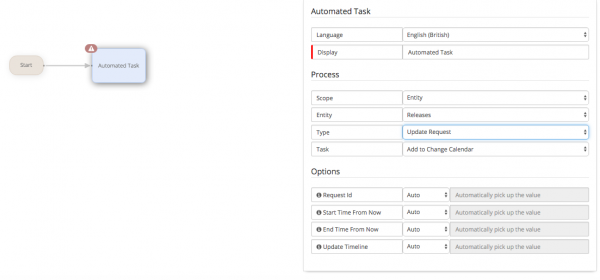
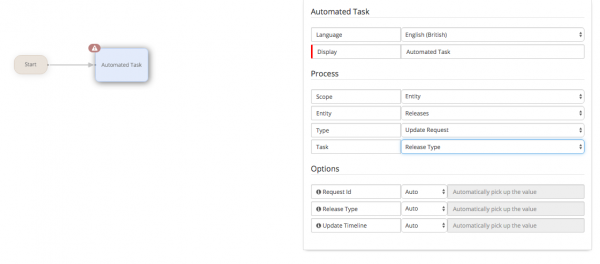
- Add to Change Calendar
- Releases > Update > Add to Change Calendar
Use this node to automatically add the Release to the Change Calendar.
- Use the configuration settings to set the start and end times for the release based on the time this node is invoked in the process. As an example if this node is the first action in a process, then it will use the log time as the Now time, and the Start and End times you configure will be based off that time.
- Remove from Change Calendar
- Wait for Request Schedule
Request Connections
Use the Request Connections node at any stage in a process to automatically add additional contact's and or co-worker's to a request and define their connection type to the request. Other options include automatically emailing connections of different types, and removing one or all connections at any stage.
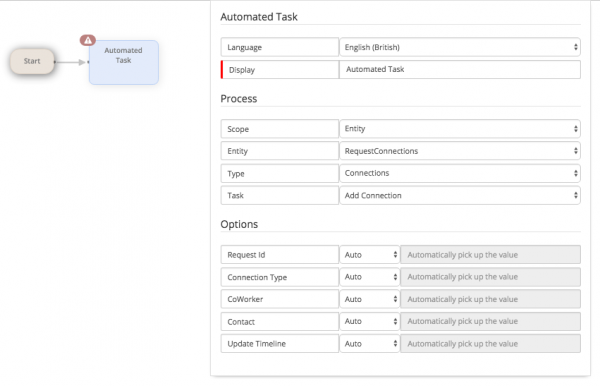
- Add Connection
- RequestConnections> Connections > Add Connection
Use this node to add a new connection to the request.
Configuration options include:
- Connection Type - By Default this will include interested and Impacted but will also show any custom Connection Types which have been defined in the Simple Lists, and requestConnectionType option. Use this option to define what relationship the Connection will have to the request.
- Co-worker - Choose which internal user will be added as a connection to the request
- Contact - Choose which external user will be added to a connection to the request
It is possible to add a single Co-Worker and Contact to a request in a single node, but it is not mandatory to do so.
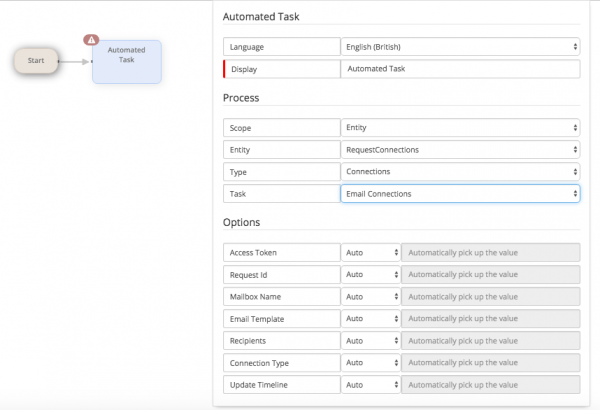
- Email Connections
- RequestConnections> Connections > Email Connections
Use this node to email connections of the request.
Configuration options include:
- Mailbox Name - Specify the mailbox from which the email will be sent
- Email Template - Specify the email template which will be sent
- Recipients - Specify if the email should be sent to All users, Internal users only, or External users only of the following Connection Type
- Connection Type - Specify which connection types should receive the email notification
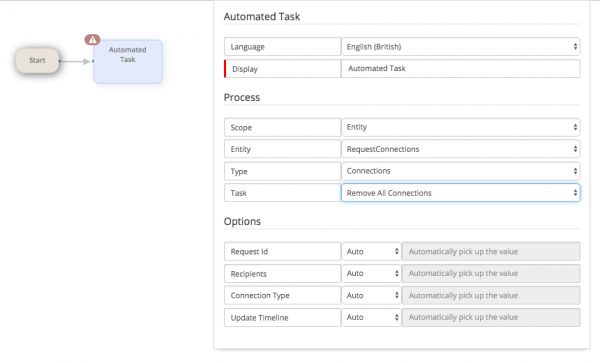
- Remove All Connections
- RequestConnections> Connections > Remove All Connections
Use this node to remove connections from the request.
Configuration options include:
- Recipients - Specify if the connections to be removed should be All users, Internal users only, or External users only of the following Connection Type
- Connection Type - Specify which connection types should be removed from the request
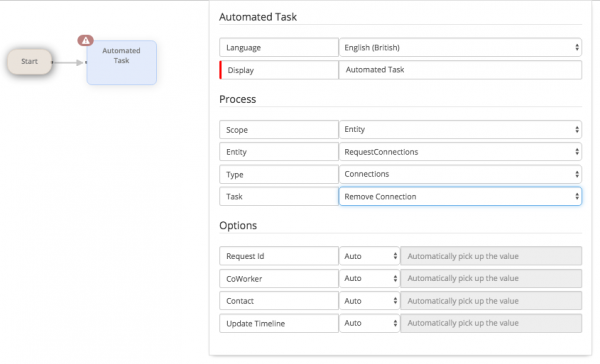
- Remove Connection
- RequestConnections> Connections > Remove Connection
Use this node to remove specific connections from the request.
Configuration options include:
- Co-worker - Choose which internal user will be removed from the request
- Contact - Choose which external user will be removed from the request
It is possible to remove a single Co-Worker and Contact from a request in a single node, but it is not mandatory to do so.
Request Members
Use the Request Members node at any stage in a process to automatically add or remove another analyst or subject matter expert into a Request.
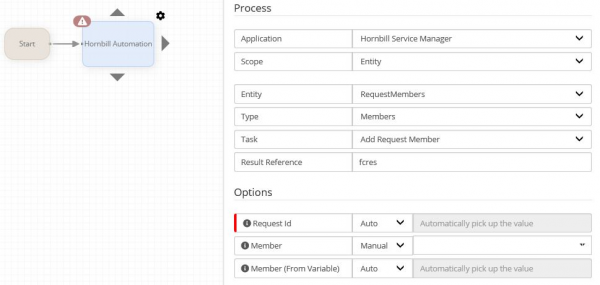
- Add Request Member
- Members > Add Request Member
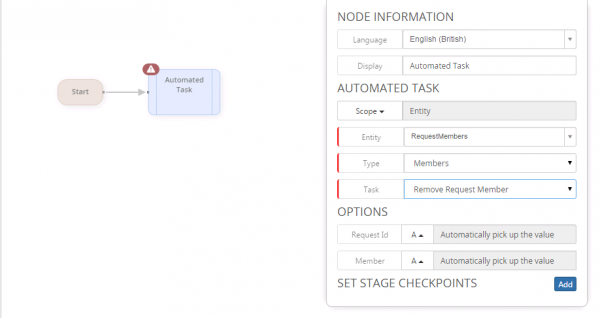
Use this node to add Service Manager analysts to the request. This option allows you to automatically add additional analysts to the request to assist with the resolution or as interested parties.
- Members can be added even if they do not have the rights to view the request type, nor the requests which belong to the team against which the request belongs. The added Member's rights will be elevated just for the specific request.
- Members can be notified about being added via Hornbill Notifications, and or email depending on the following Service Manager system setting: guest.app.requests.notification.notificationType.members
Specify which Analyst to add
- Remove Request Member
Requests
Access Control
Use the Access Control to lock or unlock the Details section of a request. Only users with the appropriate application right (update locked requests) will be able to modify the details once locked. This right has been added to the following roles: Incident Management Full Access, Change Management Full Access, Problem Management Full Access, Release Management Full Access and Service Request Full Access.
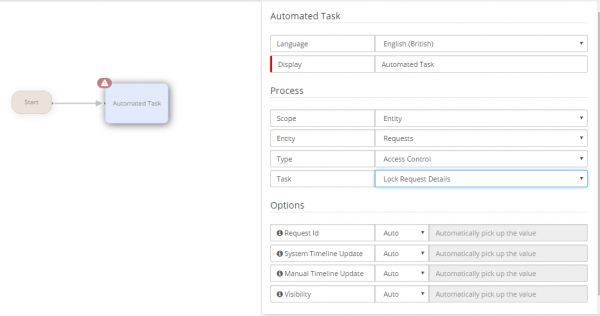
- Lock Request Details
- Requests > Access Control > Lock Request Details
Locks the Details section of a request from this point on in the workflow. Only users that have the update locked requests application right assigned to one of their roles will be able to update the request details.
- System Timeline Update - Select if the default system text will be added to the timeline for this action
- Manual Timeline Update - Select Yes to override the default System timeline Text, and add your own text which will appear in the timeline update for this action
- Visibility - Choose what level of visibility will be automatically applied to this update. Choosing anything other than Customer will result in the customer not seeing the update in the timeline of their requests on the Service or Customer Portals.
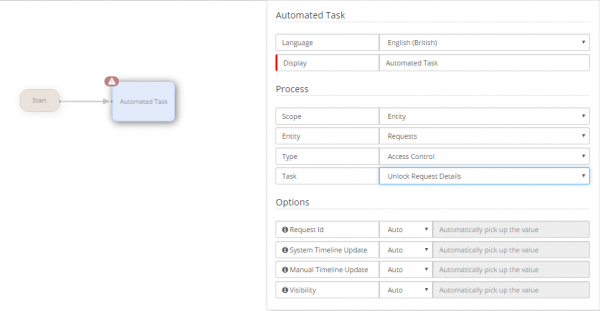
- Unlock Request Details
- Requests > Access Control > Unlock Request Details
Unlocks the Details section of a request from this point on in the workflow. All users that have access to the request will be able to edit the Details section of the request.
- System Timeline Update - Select if the default system text will be added to the timeline for this action
- Manual Timeline Update - Select Yes to override the default System timeline Text, and add your own text which will appear in the timeline update for this action
- Visibility - Choose what level of visibility will be automatically applied to this update. Choosing anything other than Customer will result in the customer not seeing the update in the timeline of their requests on the Service or Customer Portals.
Assignment
Use the Assignment node to automatically assign a request to different request stakeholders or teams.
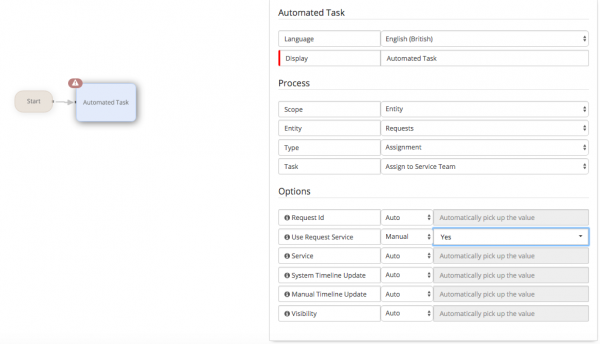
- Assign to Service Team
- Requests > Assignment > Assign to Service Team
Assign to Service Team assigns the request to the team that supports the service. If no team supports the service that the request is logged against then the request is not assigned. If more than one team supports the service, the request is assigned to the team that has supported the service the longest. This automated task does not assign the request to an individual within the team(s) supported by the service.
- System Timeline Update - Select if the default system text will be added to the timeline for this action
- Manual Timeline Update - Select Yes to override the default System timeline Text, and add your own text which will appear in the timeline update for this action
- Visibility - Choose what level of visibility will be automatically applied to this update. Choosing anything other than Customer will result in the customer not seeing the update in the timeline of their requests on the Service or Customer Portals.
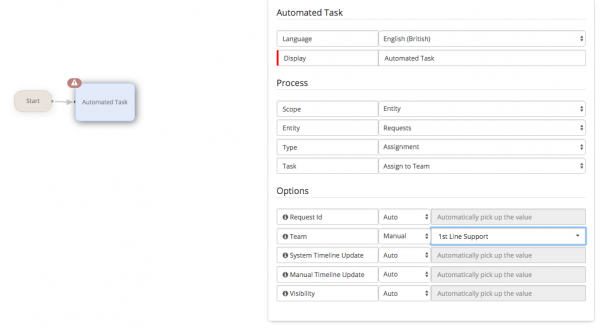
- Assign to Team
- Requests > Assignment > Assign to Team
Use this option to assign the request to a specific team.
- System Timeline Update - Select if the default system text will be added to the timeline for this action
- Manual Timeline Update - Select Yes to override the default System timeline Text, and add your own text which will appear in the timeline update for this action
- Visibility - Choose what level of visibility will be automatically applied to this update. Choosing anything other than Customer will result in the customer not seeing the update in the timeline of their requests on the Service or Customer Portals.
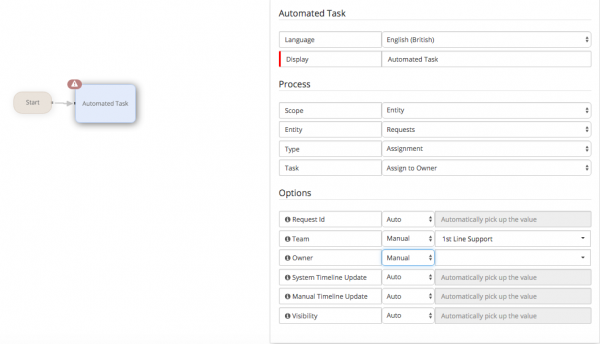
- Assign to Owner
- Requests > Assignment > Assign to Owner
Use this option to assign the request to a specific Service Manager analyst.
- Define which team the request will be assigned to
- Define which analyst within the above team, the request will be assigned to
- System Timeline Update - Select if the default system text will be added to the timeline for this action
- Manual Timeline Update - Select Yes to override the default System timeline Text, and add your own text which will appear in the timeline update for this action
- Visibility - Choose what level of visibility will be automatically applied to this update. Choosing anything other than Customer will result in the customer not seeing the update in the timeline of their requests on the Service or Customer Portals.
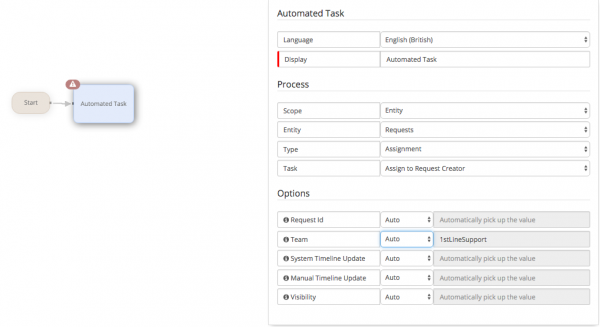
- Assign to Request Creator
- Requests > Assignment > Assign to Request Creator
Use this option to automatically assign the request to the Service Manager analyst who created / raised the request via Progressive Capture
- System Timeline Update - Select if the default system text will be added to the timeline for this action
- Manual Timeline Update - Select Yes to override the default System timeline Text, and add your own text which will appear in the timeline update for this action
- Visibility - Choose what level of visibility will be automatically applied to this update. Choosing anything other than Customer will result in the customer not seeing the update in the timeline of their requests on the Service or Customer Portals.
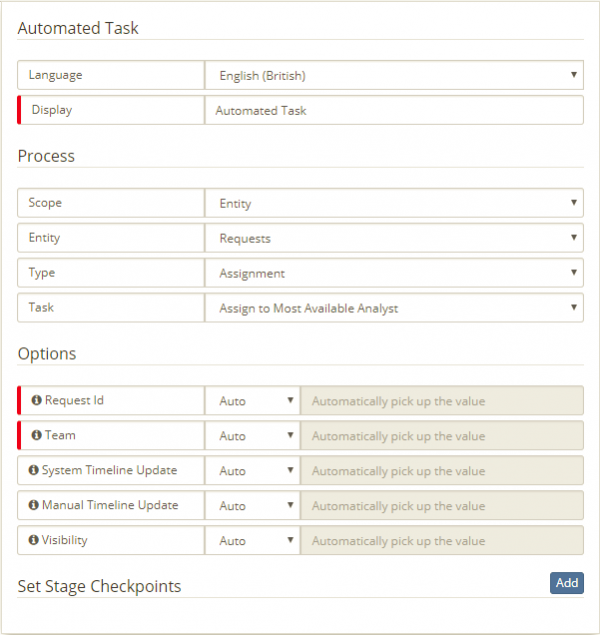
- Assign to Most Available Analyst
- Requests > Assignment > Assign to Most Available Analyst
Assign to Most Available Analyst works on the basis of capacity. It also requires a team to be provided as an input parameter. The system will look through the members of this team and will assign the request to the member of the team who has the least amount of open requests (for that team). If there is more than one team member on the same least amount of open requests, the system will allocate the request to the team member that was last assigned a request the longest amount of time ago.
The system will take into account the user status which is found on their profile. If the user status is set to anything other than 'Available' that user/analyst/team member will not be considered as a request owner
- System Timeline Update - Select if the default system text will be added to the timeline for this action
- Manual Timeline Update - Select Yes to override the default System timeline Text, and add your own text which will appear in the timeline update for this action
- Visibility - Choose what level of visibility will be automatically applied to this update. Choosing anything other than Customer will result in the customer not seeing the update in the timeline of their requests on the Service or Customer Portals.
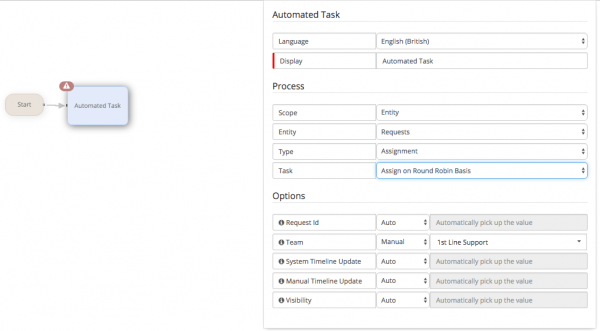
- Assign on Round Robin Basis
- Requests > Assignment > Assign on Round Robin Basis
Assign Round Robin requires a team to be provided as an input parameter. The system will look through the members of this team and will assign the request to the member of the team that was last assigned a request the longest amount of time ago. It does not take into account each analyst's workload and simply assigns the request based on time.
The system will take into account the user status which is found on their profile. If the user status is set to anything other than 'Available' that user/analyst/team member will not be considered as a request owner
- System Timeline Update - Select if the default system text will be added to the timeline for this action
- Manual Timeline Update - Select Yes to override the default System timeline Text, and add your own text which will appear in the timeline update for this action
- Visibility - Choose what level of visibility will be automatically applied to this update. Choosing anything other than Customer will result in the customer not seeing the update in the timeline of their requests on the Service or Customer Portals.
Authorisation Decision
Use the Authorisation Decision node to mark on a Change or Service Request form if an authorisation decision has been made.
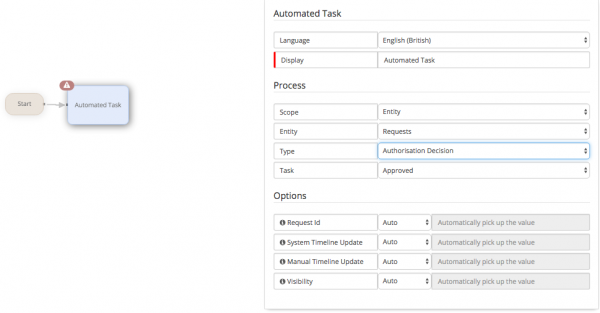
- Approved
- Requests > Authorisation Decision > Approved
- System Timeline Update - Select if the default system text will be added to the timeline for this action
- Manual Timeline Update - Select Yes to override the default System timeline Text, and add your own text which will appear in the timeline update for this action
- Visibility - Choose what level of visibility will be automatically applied to this update. Choosing anything other than Customer will result in the customer not seeing the update in the timeline of their requests on the Service or Customer Portals.
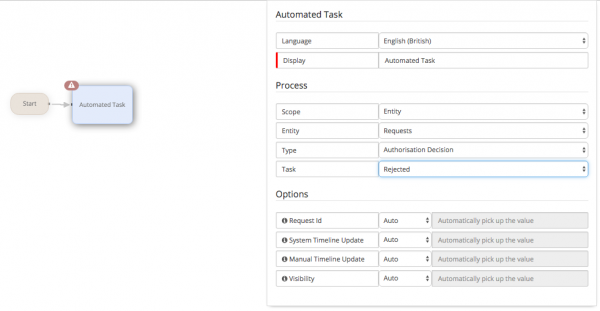
- Rejected
- Requests > Authorisation Decision > Rejected
- System Timeline Update - Select if the default system text will be added to the timeline for this action
- Manual Timeline Update - Select Yes to override the default System timeline Text, and add your own text which will appear in the timeline update for this action
- Visibility - Choose what level of visibility will be automatically applied to this update. Choosing anything other than Customer will result in the customer not seeing the update in the timeline of their requests on the Service or Customer Portals.
Collaboration
Use the Collaboration node to post an automated update onto a public workspace at any stage in a process. This will be visible to members of the specified workspace, on the timeline of the workspace and their Newsfeeds.
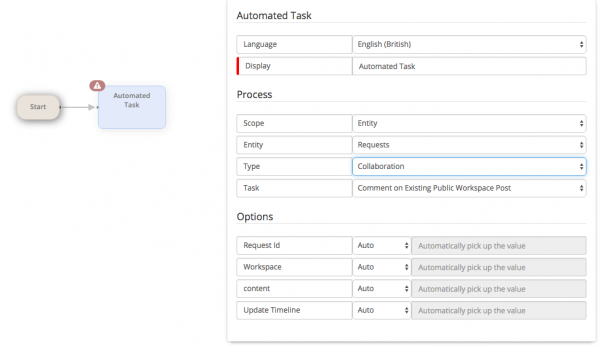
- Comment on Existing Public Workspace Post
- Requests > Collaboration > Comment on Existing Public Workspace Post
Use this node should you wish to automate the adding of a comment to an existing Post in a workspace.
- Using this node will always look to add the comment to the Most recent Post from the Request in the workspace.
An example use case for this node, is to include the Comment Update after key milestones for a request > Logged, In progress, Resolved, Closed or Change Accepted, Scheduled, Implemented, Reviewed. This will allow members of the workspace to stay informed about request progress without the need to monitor lists or queues.
- This node will only be applicable if the Post to Public Workspace Node has been used and a Post already exists from the request in a Workspace.
- Specify the name of the Workspace to post to
- Define the content for the post
- Define if the timeline of the Request should be updated
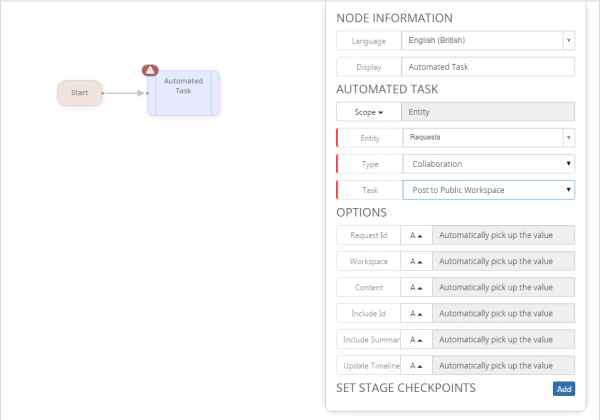
- Post to Public Workspace
- Requests > Collaboration > Post to Public Workspace
Use this node should you wish to automate the Posting to a specific workspace, and to it's members at one or multiple points in your business process. This will allow you to post important information to Collaboration users pertaining to the request against which your business process is running.
One example of it's use would be during a Change Request, to let interested parties / stakeholders (Workspace Members) know that the Change had been accepted, scheduled and would therefore be being deployed. The member's of the workspace may not be Service Manager subscribed users, but their Collaboration subscription would enable them to be kept informed about Change, Problem, or Major Incident notifications by receiving notifications about the automated Posting from this node to their workspaces.
- Specify the name of the Workspace to post to
- Define the content for the post
- Define if the request id will be included in the post
- Define if the request Summary will be included in the post
- Define if the post to the Workspace will be appended to the timeline of the request
Email Notifications
Use the Email Notification nodes to send email templates to different Request stakeholders. Configuration options include recipient, which email template to use and which mailbox to send the email from.
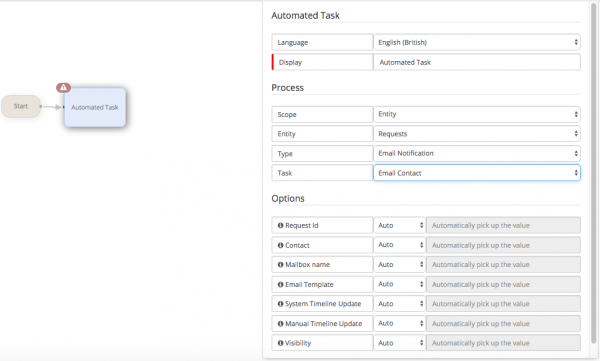
- Email Contact
- Requests > Email Notification > Email Contact
- System Timeline Update - Select if the default system text will be added to the timeline for this action
- Manual Timeline Update - Select Yes to override the default System timeline Text, and add your own text which will appear in the timeline update for this action
- Visibility - Choose what level of visibility will be automatically applied to this update. Choosing anything other than Customer will result in the customer not seeing the update in the timeline of their requests on the Service or Customer Portals.
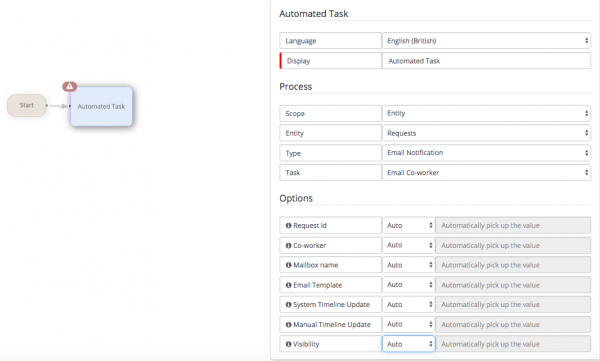
- Email Co-worker
- Requests > Email Notification > Email Co-worker
- System Timeline Update - Select if the default system text will be added to the timeline for this action
- Manual Timeline Update - Select Yes to override the default System timeline Text, and add your own text which will appear in the timeline update for this action
- Visibility - Choose what level of visibility will be automatically applied to this update. Choosing anything other than Customer will result in the customer not seeing the update in the timeline of their requests on the Service or Customer Portals.
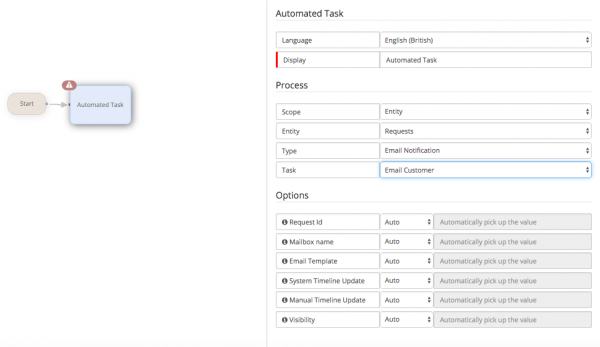
- Email Customer
- Requests > Email Notification > Email Customer
- System Timeline Update - Select if the default system text will be added to the timeline for this action
- Manual Timeline Update - Select Yes to override the default System timeline Text, and add your own text which will appear in the timeline update for this action
- Visibility - Choose what level of visibility will be automatically applied to this update. Choosing anything other than Customer will result in the customer not seeing the update in the timeline of their requests on the Service or Customer Portals.
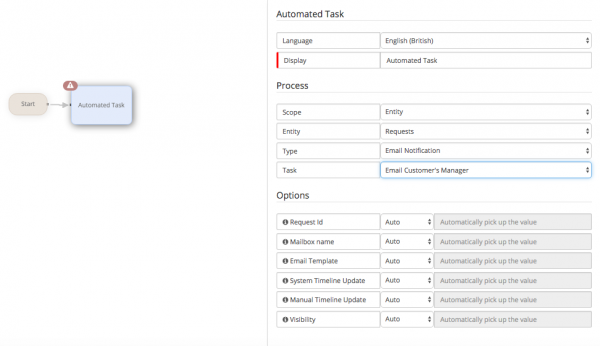
- Email Customer's Manager
- Requests > Email Notification > Email Customer's Manager
- System Timeline Update - Select if the default system text will be added to the timeline for this action
- Manual Timeline Update - Select Yes to override the default System timeline Text, and add your own text which will appear in the timeline update for this action
- Visibility - Choose what level of visibility will be automatically applied to this update. Choosing anything other than Customer will result in the customer not seeing the update in the timeline of their requests on the Service or Customer Portals.
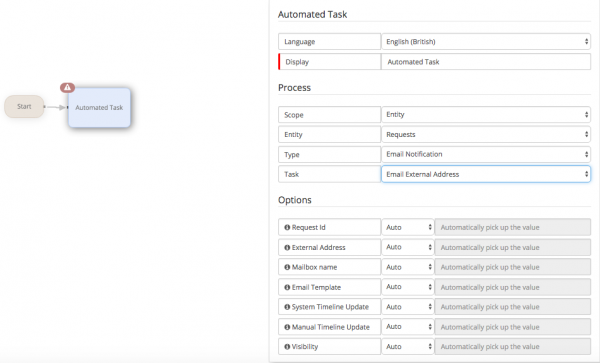
- Email External Address
- Requests > Email Notification > Email External Address
- System Timeline Update - Select if the default system text will be added to the timeline for this action
- Manual Timeline Update - Select Yes to override the default System timeline Text, and add your own text which will appear in the timeline update for this action
- Visibility - Choose what level of visibility will be automatically applied to this update. Choosing anything other than Customer will result in the customer not seeing the update in the timeline of their requests on the Service or Customer Portals.
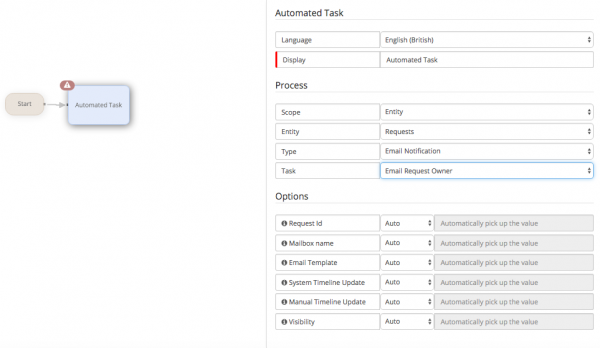
- Email Request Owner
- Requests > Email Notification > Email Request Owner
- System Timeline Update - Select if the default system text will be added to the timeline for this action
- Manual Timeline Update - Select Yes to override the default System timeline Text, and add your own text which will appear in the timeline update for this action
- Visibility - Choose what level of visibility will be automatically applied to this update. Choosing anything other than Customer will result in the customer not seeing the update in the timeline of their requests on the Service or Customer Portals.
Get Request Information
Use the Get Request Information node at any stage in a process and preceding another process node when you want to make the variables of the Request available. Variables may include Customer, Status, Site, Priority, or any Answers to Customer defined questions from different Progressive capture forms or attributes of the customer or organisation of the request the business process is running against.
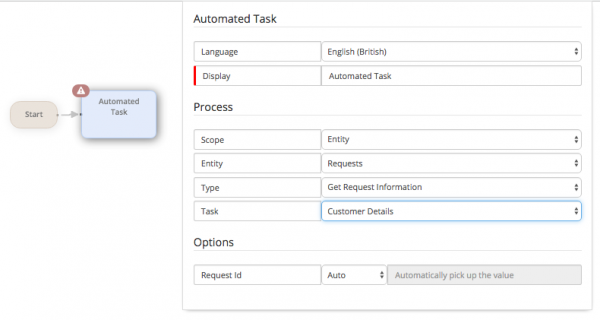
- Customer Details
- Requests > Get Request Information > Customer Details
Use this option at the start of a stage or preceding a task / authorisation / decision node to load the Customer's organisations details (variables) into the stage, and to make them available to other node operations where you may wish to specify or refer to Variable values from the customer of the request.
- If you are using the decision node, and want to branch the process based on the Customers department, site, job title or any of the custom fields for the customer, you will need to use the Get Request Information > Customer Details node at the beginning of the stage, or before the decision node in order to see any variable values be available to evaluate against in the Custom Expression builder.
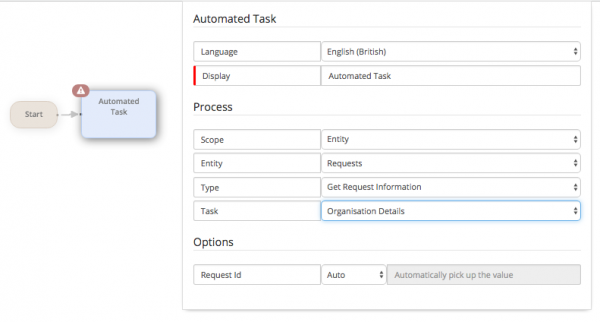
- Organisation Details
- Requests > Get Request Information > Organisation Details
Use this option at the start of a stage or preceding a task / authorisation / decision node to load the Customer's Organisations details (variables) into the stage, and to make them available to other node operations where you may wish to specify or refer to Variable values from the customer's organisation of the request.
- If you are using the decision node, and want to branch the process based on the Industry of the Customers Organisations, or their address, or any customer fields for the customers Organisations you will need to use the Get Request Information > Organisation Details node at the beginning of the stage, or before the decision node in order to see any variable values be available to evaluate against in the Custom Expression builder.
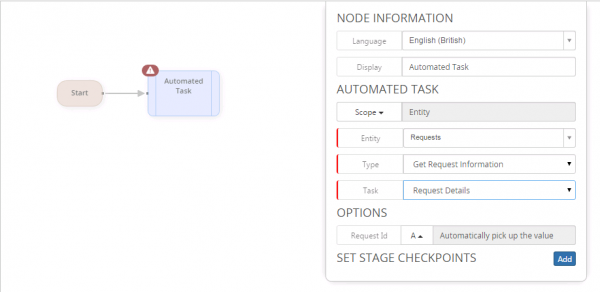
- Request Details
- Requests > Get Request Information > Request Details
Use this option at the start of a stage or preceding a task / authorisation / decision node to load the request details (variables) into the stage, and to make them available to other node operations where you may wish to specify or refer to Variable values from the request.
- If you are using an Authorisation node, and want the approver to be set as a variable, and for example to use the requestors manager variable, you will need to use the Get Request Information node and Request Details option at the beginning of the stage, in order to see any variable values be populated in the approvers drop down list when you use the Variables option for setting an approver.
- If you are using the Human Task node, and want the Owner or Assignee to be set as a variable, and for example what to use the option 'Owner (For tasks), you will need to use the Get Request Information node and Request Details option at the beginning of the stage, in order to see any variable values be populated in the Owner or Assignee drop down lists when you use the Variables option.
You only need to use this option once in a stage to load the variables for other node operations.
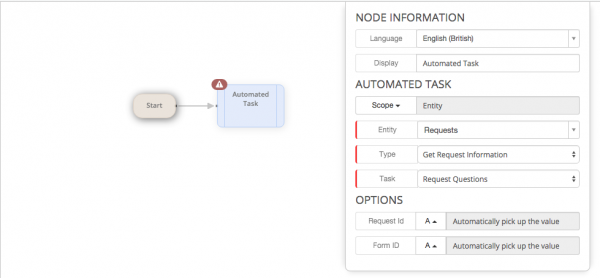
- Request Questions
- Requests > Get Request Information > Request Questions
Use this option before a Decision node, if you want to load into the process the Answers from a specific Progressive Capture Custom Form. By selecting this option, you can specify the custom form id and it's answers will be loaded and available to evaluate by the following Decision node.
- Specify the form_id from the Progressive Capture you wish to use.
An example of the use of this node could be if you have created a custom form which asked questions about a new start, and one of these questions was to determine which Department they would be joining, it is feasible in your business process that you may wish to check the answer value, and if it was Sales then branch in one direction, and if it was Accounts you may want to branch in another direction. Using the Get Request Information > Request Questions and defining the specific form will allow these answers to be evaluated.
Integration
Use the Integration node at any stage of a process, where you wish to invoke specific actions against a 3rd party application from the available list of applications.
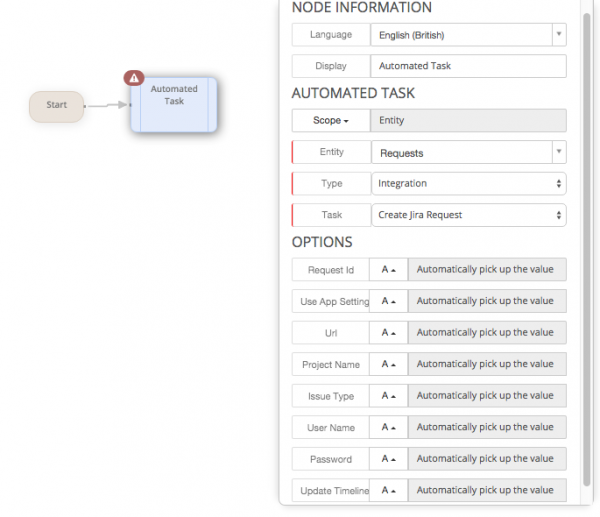
- Create Jira Request
- Requests > Integration > Create Jira Request
Create a new request in a specific Jira instance and against a parent project. Using this option will create a new request in Jira, of the required type.
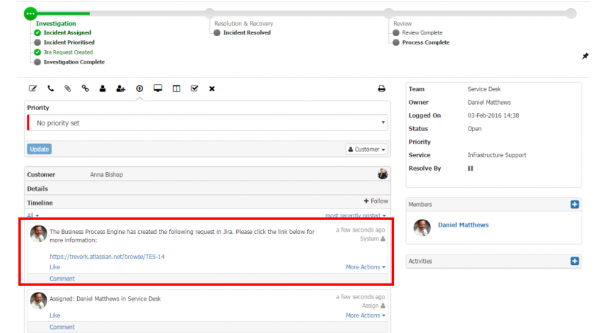
- This will pass the summary and description of the Service Manager request to the newly created request in Jira, and then pass back the Jira request id into the External Reference field on the Service Manager request if successful, as well as include an update in the request timeline if required, with a hyperlink to the request in Jira. If the request to raise a request fails, this will also be written to the Service Manager Timeline with the reason for the failure to create.
The following options need to be Configured:
- Request id: Leave as Auto to pick up on the Request id against which the process is running.
- Use App Settings: Set to Yes if you want to use the global values you can define in the system settings for Service Manager (Home > Service Manager > Application), select No if you want to manually set the values to use for this specific node.
If selecting Yes, the following system settings will need to have been set and will be used:
- guest.ui.app.com.hornbill.servicemanager.integration.jira.issueType: This is the Jira Issue type which will be created - Bug, Improvement, New Feature, Task or custom created on your Jira instance.
- guest.ui.app.com.hornbill.servicemanager.integration.jira.userName: The Username of the account in Jira which the new request will be created under.
- guest.ui.app.com.hornbill.servicemanager.integration.jira.password: The Password for the user account in Jira which the new request will be created under.
- guest.ui.app.com.hornbill.servicemanager.integration.jira.projectName: The Parent Project to which the new request will belong.
- guest.ui.app.com.hornbill.servicemanager.integration.jira.url: The full URL for the Jira instance against which the new request will be created.
If selecting No the following options will need to be manually set
- URL: The full URL for the Jira instance against which the new request will be created.
- Project Name: The Parent Project to which the new request will belong.
- Issue Type: This is the Jira Issue type which will be created - Bug, Improvement, New Feature, Task or custom created on your Jira instance.
- Username: The Username of the account in Jira which the new request will be created under.
- Password: The Password for the user account in Jira which the new request will be created under.
In either case the following can also be configured manually.
- Update Timeline: Leave this as Auto if you want the Service Manager Request Timeline to be updated to record the fact that a Request has been created in Jira, and for the update to contain a hyperlink to the newly created request in Jira (as shown below)
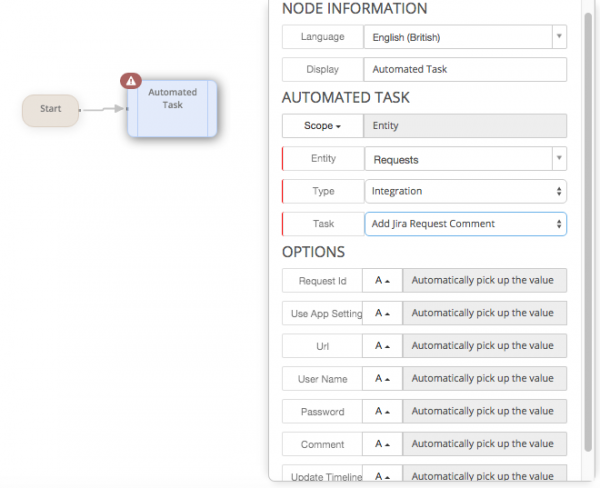
- Add Jira Request Comment
- Requests > Integration > Add Jira Request Comment
Add a comment to an existing Jira request.
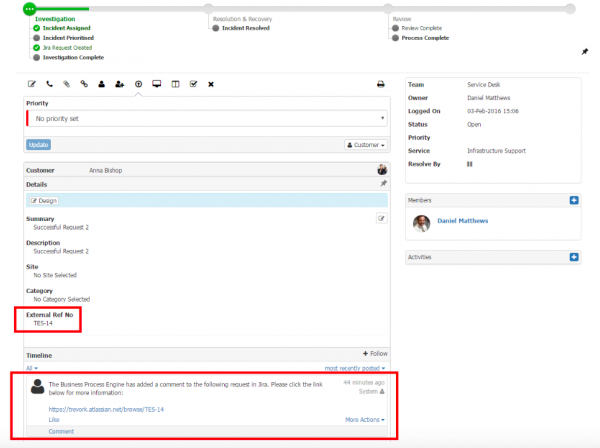
- This option will allow for a predefined comment to be added to a specific Jira Request. The configured comment will be added to the Jira request id, which is held in the External Reference field of the Service Manager request, against which this node is invoked from it's underlying business process. In most cases this will have been created automatically by using the Create Jira Request earlier in the same business process, but the Jira Request id can have been added manually to the Service Manager request External Reference field as well.
The following options need to be Configured:
- Request id: Leave as Auto to pick up on the Request id against which the process is running.
- Use App Settings: Set to Yes if you want to use the global values you can define in the system settings for Service Manager (Home > Service Manager > Application), select No if you want to manually set the values to use for this specific node.
If selecting Yes, the following system settings will need to have been set and will be used:
- guest.ui.app.com.hornbill.servicemanager.integration.jira.userName: The Username of the account in Jira which the new comment will be created under.
- guest.ui.app.com.hornbill.servicemanager.integration.jira.password: The Password for the user account in Jira which the new comment will be created under.
- guest.ui.app.com.hornbill.servicemanager.integration.jira.url: The full URL for the Jira instance against which the new request comment will be added.
If selecting No the following options will need to be manually set
- URL: The full URL for the Jira instance against which the new request will be created.
- Username: The Username of the account in Jira which the new comment will be created under.
- Password: The Password for the user account in Jira which the new request comment will be added.
In either case the following will also need to be configured manually.
- Comment: Configure the message content which will be added to the Jira Request
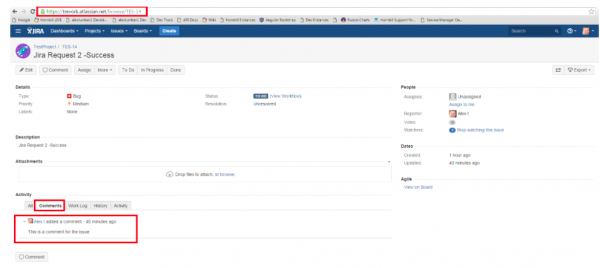
- Update Timeline: Leave this as Auto if you want the Service Manager Request Timeline to be updated to record the fact that a comment has been added to a request in Jira, and for the timeline update to contain a hyperlink to the newly created comment in the Jira request (as shown below)
This will add the Comment into the Comments tab of the Activity section on the Jira request as shown below.
Linked Requests
Use the Linked Requests node to automatically post updates and resolve linked Requests. Linked requests are those that have been linked using the Link Action Item on a request form.
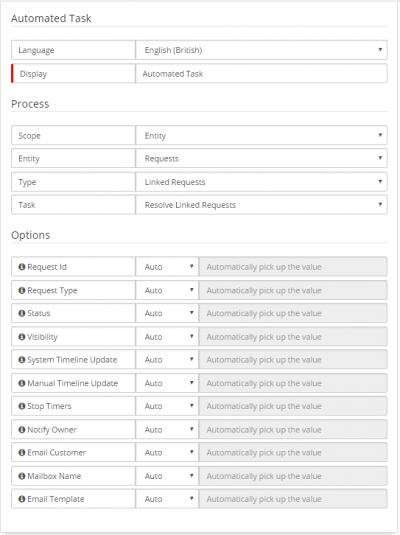
- Resolve Linked Requests
- This option allows you at specific times in a process to resolve linked requests. The options include defining the update text which will be added to the linked requests, as well as setting granular options to decide which linked request types should be updated. For example you may only want the Incidents from the Problem to receive the update, and not the Change, which the Problem is also linked too.
- Request ID
- This value is automatically applied. Leave this setting as Auto
- Request Type
- When set, only the request type that is selected will be resolved. When not set, all linked requests will be resolved
- Status
- Select the status that you wish to set the linked requests to. Either Resolve or Close
- Visibility
- Choose what level of visibility will be automatically applied to this update. Choosing anything other than Customer will result in the customer not seeing the update in the timeline of their requests on the Service or Customer Portals.
- System Timeline Update
- Select if the default system text will be added to the timeline for this action
- Manual Timeline Update
- Select Yes to override the default System timeline Text, and add your own text which will appear in the timeline update for this action
- Stop Timers
- If there are Service Level Target Timers (Response or Resolution) on the linked request, these timers will be stopped and the Target marked
- Notify Owner
- Notify the owner of any linked request when resolved. The type of notification will be based on the Service Manager application setting guest.app.requests.notification.notificationType.teamLinkedRequestResolveAction and guest.app.requests.notification.notificationType.teamLinkedRequestResolveAction
- Email Customer
- Send an email to Customer of the linked requests. Requires that the Mailbox Name and Email Template are selected
- Mailbox Name
- Name of the mailbox from which to send a customer email when the Email Customer option is set to Yes
- Email Template
- Name of the Email Template to use when the Email Customer option is set to Yes
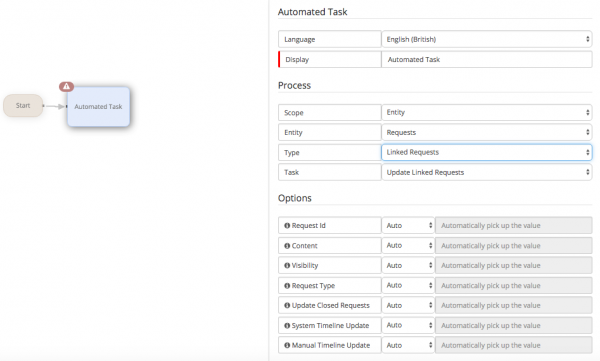
- Update Linked Requests
- Requests > Linked Requests > Update Linked Requests
This option allows you at specific times in a process to update linked requests. The options include defining the update text which will be added to the linked requests, as well as setting granular options to decide which linked request types should be updated. For example you may only want the Incidents from the Problem to receive the update, and not the Change, which the Problem is also linked too.
- Set if the update should also be applied to any linked requests which are in a closed status.
- Set the visibility level for the update, so decide if this is only for the team, or if it should be a customer facing update which the customer can view via the timeline of the requests on the portals.
- Set if the linked update should also appear on the timeline of the request from which the update originated.
- System Timeline Update - Select if the default system text will be added to the timeline for this action
- Manual Timeline Update - Select Yes to override the default System timeline Text, and add your own text which will appear in the timeline update for this action
- Visibility - Choose what level of visibility will be automatically applied to this update. Choosing anything other than Customer will result in the customer not seeing the update in the timeline of their requests on the Service or Customer Portals.
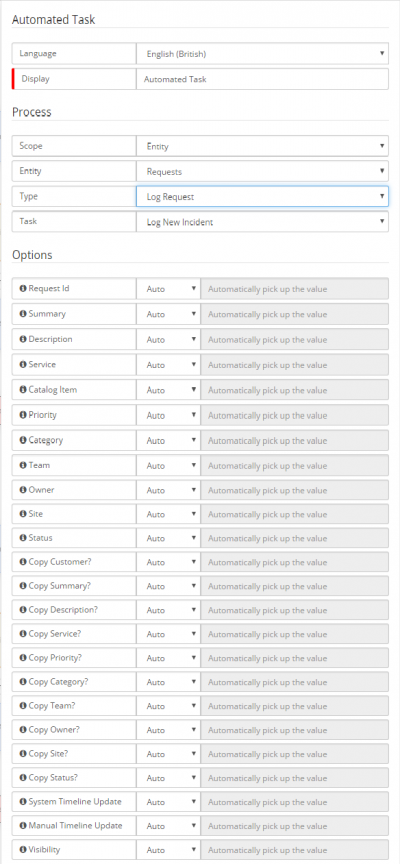
Log Requests
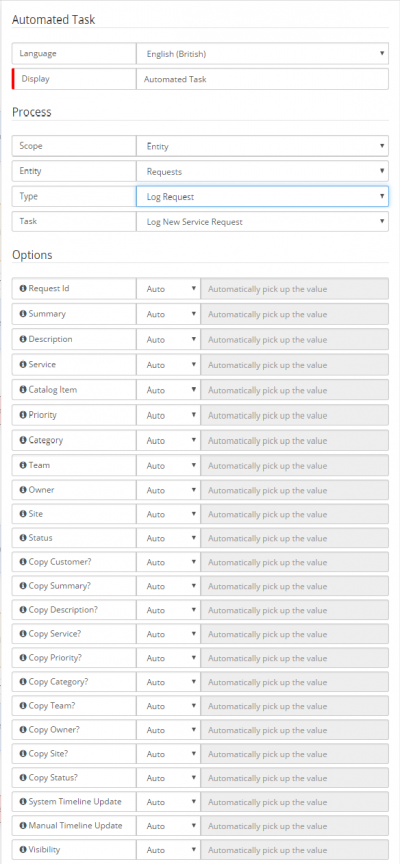
Use the Log Request to automatically raise another request at a particular point in the workflow.
- Log New Incident
- Request ID
- This is an automatic options and should be set to Auto
- Summary
- To add a summary to the new request, set to Manual and provide the required text for the summary
- Description
- To add a description to the new request, set to Manual and provide the required text for the description
- Service
- To add a Service to the new request, set to Manual and select a Service from the pick list
- Catalog Item
- To add a Catalog Item to the new request, set to Manual and provide the name of the Catalog Item
- Priority
- To add a Priority to the new request, set to Manual and select a Priority from the pick list
- Category
- To add a Request Category to the new request, set to Manual and click on the edit button to open the Category selector.
- Team
- To add a Team to the new request, set to Manual and select a team from the pick list
- Owner
- To add an Owner to the new request, set to Manual and select start typing the name of the user and then select them from the pick list
- Site
- To add a Site to the new request, set to Manual and select a Site from the pick list
- Status
- To set the status on the new request, set to Manual and select a status from the pick list
- Copy Customer?
- To use the same Customer as the originating request, set to Manual and select Yes
- Copy Summary?
- To use the same Summary as the originating request, set to Manual and select Yes
- Copy Description?
- To use the same Description as the originating request, set to Manual and select Yes
- Copy Service?
- To use the same Service as the originating request, set to Manual and select Yes
- Copy Priority?
- To use the same Priority as the originating request, set to Manual and select Yes
- Copy Category?
- To use the same Category as the originating request, set to Manual and select Yes
- Copy Team?
- To use the same Team as the originating request, set to Manual and select Yes
- Copy Owner?
- To use the same Owner as the originating request, set to Manual and select Yes
- Copy Site?
- To use the same Site as the originating request, set to Manual and select Yes
- Copy Status?
- To use the same Status as the originating request, set to Manual and select Yes
- System Timeline Update
- To include a Timeline entry in the new request to record the raising of the new request, set to Manual and select Yes
- Manual Timeline Update
- To provide a unique Timeline Update in the new request, set to Manual and click on the edit button to open the text window to add your unique timeline entry.
- Visibility
- Set the Visibility of the Timeline Entry if one is provided.
- Log New Service Request
- Request ID
- This is an automatic options and should be set to Auto
- Summary
- To add a summary to the new request, set to Manual and provide the required text for the summary
- Description
- To add a description to the new request, set to Manual and provide the required text for the description
- Service
- To add a Service to the new request, set to Manual and select a Service from the pick list
- Catalog Item
- To add a Catalog Item to the new request, set to Manual and provide the name of the Catalog Item
- Priority
- To add a Priority to the new request, set to Manual and select a Priority from the pick list
- Category
- To add a Request Category to the new request, set to Manual and click on the edit button to open the Category selector.
- Team
- To add a Team to the new request, set to Manual and select a team from the pick list
- Owner
- To add an Owner to the new request, set to Manual and select start typing the name of the user and then select them from the pick list
- Site
- To add a Site to the new request, set to Manual and select a Site from the pick list
- Status
- To set the status on the new request, set to Manual and select a status from the pick list
- Copy Customer?
- To use the same Customer as the originating request, set to Manual and select Yes
- Copy Summary?
- To use the same Summary as the originating request, set to Manual and select Yes
- Copy Description?
- To use the same Description as the originating request, set to Manual and select Yes
- Copy Service?
- To use the same Service as the originating request, set to Manual and select Yes
- Copy Priority?
- To use the same Priority as the originating request, set to Manual and select Yes
- Copy Category?
- To use the same Category as the originating request, set to Manual and select Yes
- Copy Team?
- To use the same Team as the originating request, set to Manual and select Yes
- Copy Owner?
- To use the same Owner as the originating request, set to Manual and select Yes
- Copy Site?
- To use the same Site as the originating request, set to Manual and select Yes
- Copy Status?
- To use the same Status as the originating request, set to Manual and select Yes
- System Timeline Update
- To include a Timeline entry in the new request to record the raising of the new request, set to Manual and select Yes
- Manual Timeline Update
- To provide a unique Timeline Update in the new request, set to Manual and click on the edit button to open the text window to add your unique timeline entry.
- Visibility
- Set the Visibility of the Timeline Entry if one is provided.
![]() Using these options in your business processes, please be aware of where you are invoking them / placing them in the workflow, and in turn which business processes are going to be invoked against the new Incident or Service Request raised. Please avoid scenario's where one business process may invoke the logging of a new request, where the new request's business process immediately is configured to log a new request which again has a business process which again logs another request immediately creating a loop. The result of which may be a lot of unwanted requests. In the event this occurs, disable the causing business process and resolve the issue.
Using these options in your business processes, please be aware of where you are invoking them / placing them in the workflow, and in turn which business processes are going to be invoked against the new Incident or Service Request raised. Please avoid scenario's where one business process may invoke the logging of a new request, where the new request's business process immediately is configured to log a new request which again has a business process which again logs another request immediately creating a loop. The result of which may be a lot of unwanted requests. In the event this occurs, disable the causing business process and resolve the issue.
Request Service
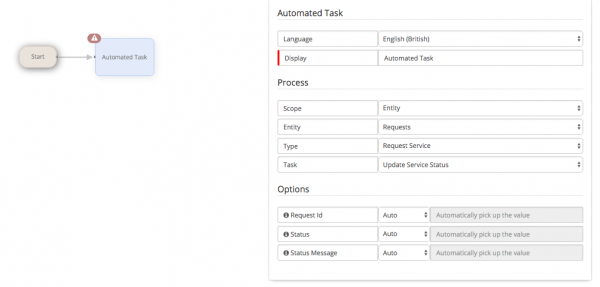
Use the Request Service node, if you wish to automate the availability status setting of the service associated to a request. It can be useful to automate the settings of of a services availability status to both the support community and the subscribed customers of a service, both when a request has been raised and or when it has been resolved, and normal service and availability is resumed.
- Update Service Status
- Request ID - This is an automatic options and should be set to Auto
- Status - Select the Status to set the Service's Availability too, or choose No Status if no Status is required to be displayed for the Service.
- Status Message - An optional message to be displayed alongside the Status - this will be visible to both analysts supporting the service, and customers subscribed to the service.
Suspend
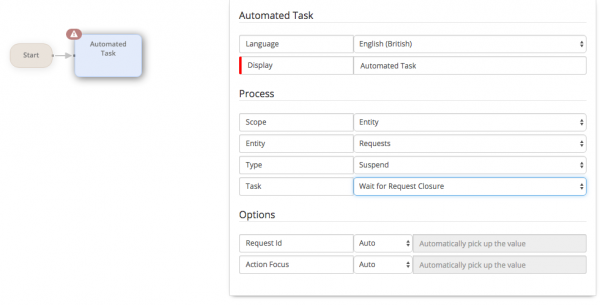
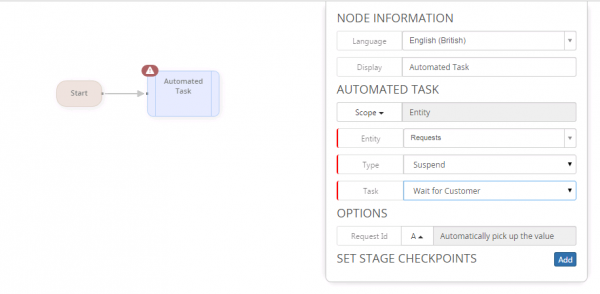
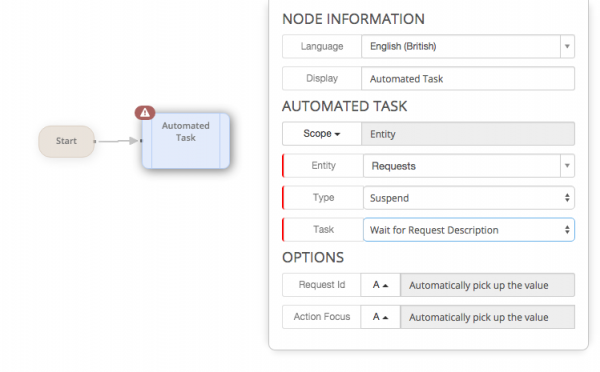
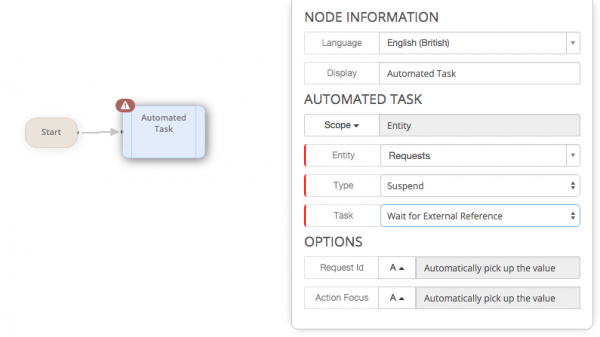
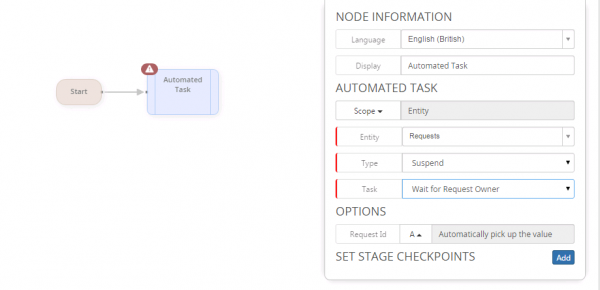
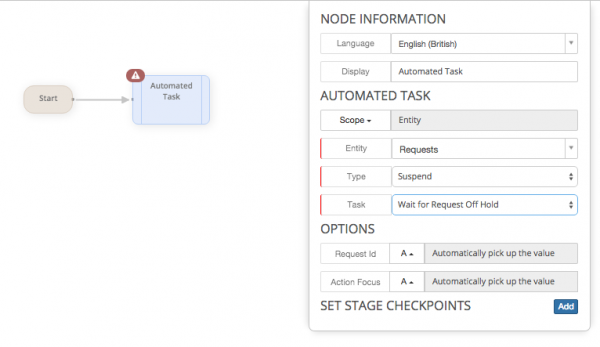
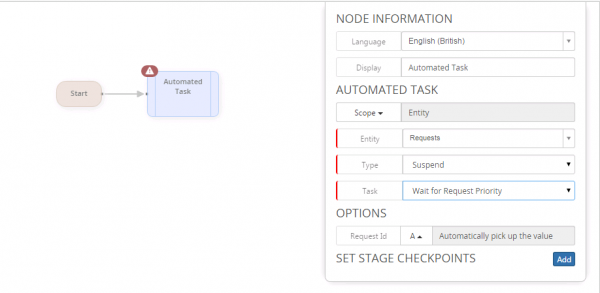
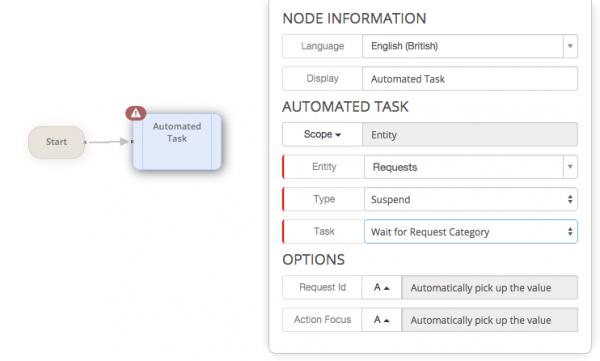
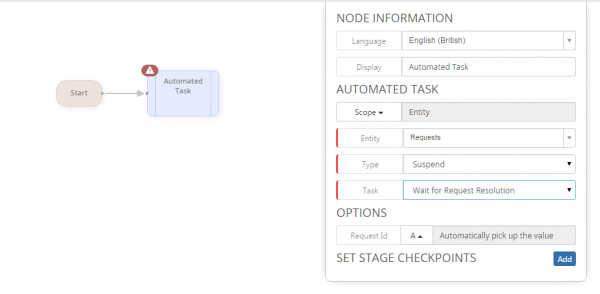
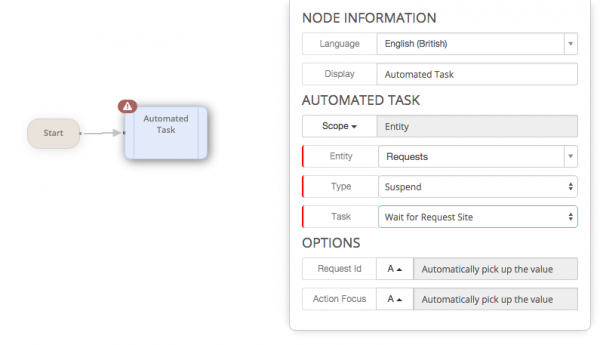
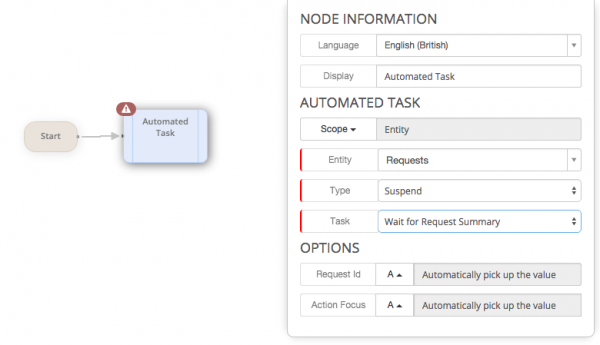
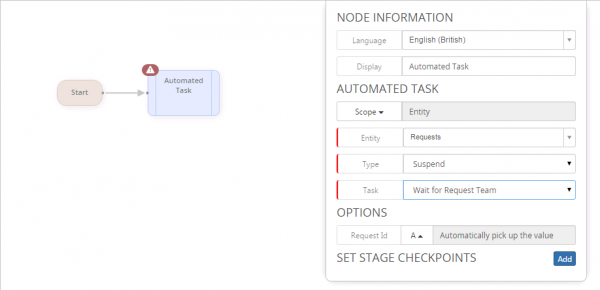
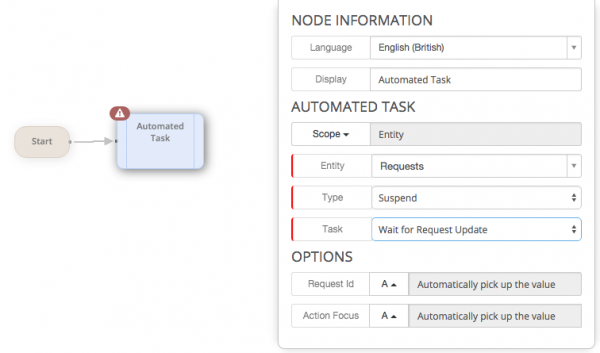
Use the Suspend node if you wish to suspend the progress of the process until a defined action is performed manually on the Request. This could include waiting for a Priority to be set, a Customer added, Ownership set or the Resolution defined. Configuration options include the ability to specify the context (which Action Bar icon) the Request will appear in whilst waiting for the Suspend (manual action) to be performed.
- Wait for Request Owner
- Wait for New Request Owner
Update Request
Use the Update Request node to automatically update the values of specific Request attributes at any stage in the process. Examples being updating the Logging or Closing Categories of a Request.
- Logging Category
- Requests > Update Request > Logging Category
Specify the logging category which will associated to the request. This is typically used where the category of the request is known based on the business process being associated against a specific request catalog item, and as such the analyst is not required to make a manual assessment and categorisation.
- System Timeline Update - Select if the default system text will be added to the timeline for this action
- Manual Timeline Update - Select Yes to override the default System timeline Text, and add your own text which will appear in the timeline update for this action
- Visibility - Choose what level of visibility will be automatically applied to this update. Choosing anything other than Customer will result in the customer not seeing the update in the timeline of their requests on the Service or Customer Portals.
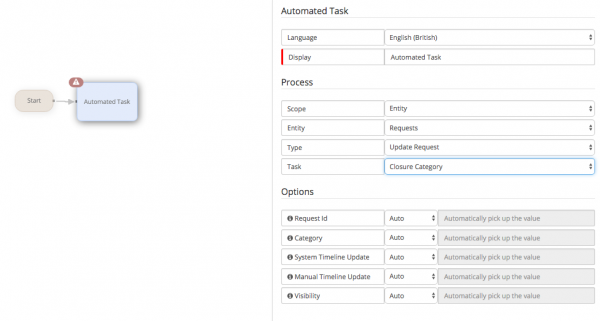
- Closure Category
- Requests > Update Request > Closure Category
Specify the closure category which will be associated to the request. This is typically used where the business process is set to automatically resolve or close and the analyst is not required to manually resolve and specify a closure category.
- System Timeline Update - Select if the default system text will be added to the timeline for this action
- Manual Timeline Update - Select Yes to override the default System timeline Text, and add your own text which will appear in the timeline update for this action
- Visibility - Choose what level of visibility will be automatically applied to this update. Choosing anything other than Customer will result in the customer not seeing the update in the timeline of their requests on the Service or Customer Portals.
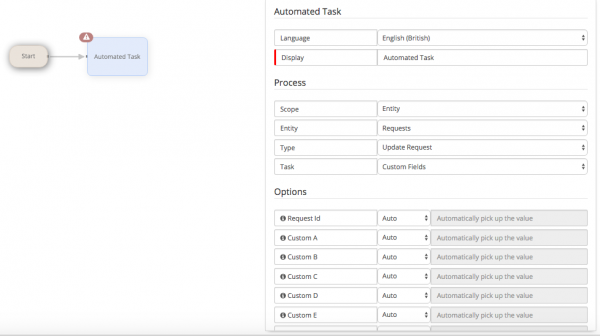
- Custom Fields
- Requests > Update Request > Custom Fields
This provides the ability to update any or all of the custom fields of a request. The input box is single line only and values should be restricted to 255 characters which is the defined max length for all custom fields. When populating custom fields please pay attention to the type of value you are populating, and ensure this is compatible with the type of field you have specified for the corresponding custom field in the request type and service form designer in the user interface.
- Custom Field a - q - populate the required custom fields with the values you wish to update the custom fields with. This can be with both text, and or request / question / task variables.
- Append Text - This determines if the supplied value of the custom field, should append any existing value of the custom field. By default this is set to replace any existing value, with the value defined here.
- System Timeline Update - Select if the default system text will be added to the timeline for this action
- Manual Timeline Update - Select Yes to override the default System timeline Text, and add your own text which will appear in the timeline update for this action
- Visibility - Choose what level of visibility will be automatically applied to this update. Choosing anything other than Customer will result in the customer not seeing the update in the timeline of their requests on the Service or Customer Portals.
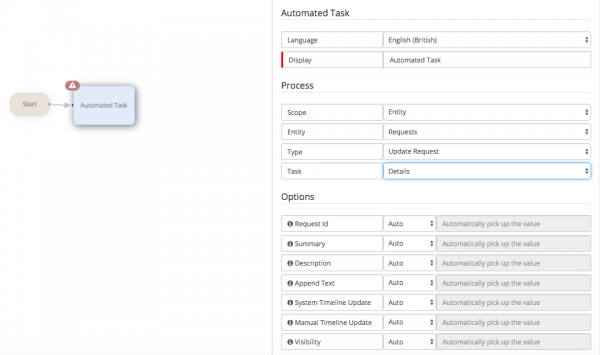
- Details
- Requests > Update Request > Details
Choose to manually set the values of the Summary and or Description fields of the request, or set these from a request variable like an answer from a custom form in progressive capture. Read more about using Request Variables
- System Timeline Update - Select if the default system text will be added to the timeline for this action
- Manual Timeline Update - Select Yes to override the default System timeline Text, and add your own text which will appear in the timeline update for this action
- Visibility - Choose what level of visibility will be automatically applied to this update. Choosing anything other than Customer will result in the customer not seeing the update in the timeline of their requests on the Service or Customer Portals.
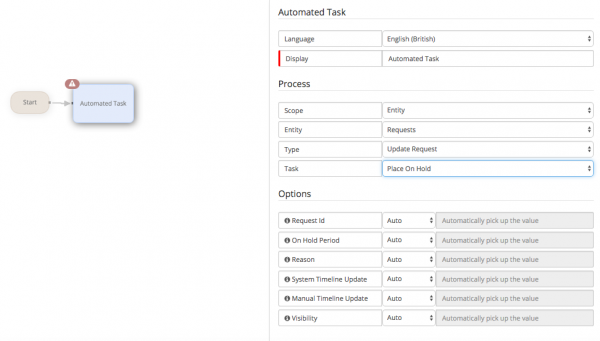
- Place On Hold
- Requests > Update Request > Place On Hold
- System Timeline Update - Select if the default system text will be added to the timeline for this action
- Manual Timeline Update - Select Yes to override the default System timeline Text, and add your own text which will appear in the timeline update for this action
- Visibility - Choose what level of visibility will be automatically applied to this update. Choosing anything other than Customer will result in the customer not seeing the update in the timeline of their requests on the Service or Customer Portals.
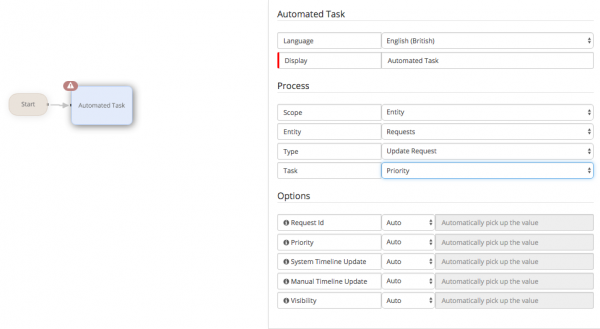
- Priority
- Requests > Update Request > Priority
Use this node to set the Priority' of the request. This can be useful when your business process is supporting a specific request catalog item, and the Priority for such items can be predetermined and therefore can be set. It is also useful to use within a process where a decision node may branch and different Priorities are possible depending on the path followed. Decide if the setting of the Priority should also mark the request timeline.
- System Timeline Update - Select if the default system text will be added to the timeline for this action
- Manual Timeline Update - Select Yes to override the default System timeline Text, and add your own text which will appear in the timeline update for this action
- Visibility - Choose what level of visibility will be automatically applied to this update. Choosing anything other than Customer will result in the customer not seeing the update in the timeline of their requests on the Service or Customer Portals.
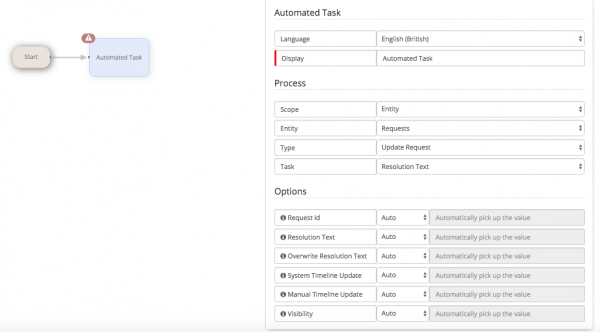
- Resolution Text
- Requests > Update Request > Resolution Text
Use this node to set the Resolution Text' of the request. This can be useful when your business process is supporting a specific request catalog item, and the Resolution for such items can be predetermined and therefore can be set.
- Resolution Text - The text which will appear in the resolution text box (this can include the use of request variables)
- Overwrite Resolution Text - Decide if this option should overwrite and replace any existing text in the resolution field - by default this is set to No
- System Timeline Update - Select if the default system text will be added to the timeline for this action
- Manual Timeline Update - Select Yes to override the default System timeline Text, and add your own text which will appear in the timeline update for this action
- Visibility - Choose what level of visibility will be automatically applied to this update. Choosing anything other than Customer will result in the customer not seeing the update in the timeline of their requests on the Service or Customer Portals.
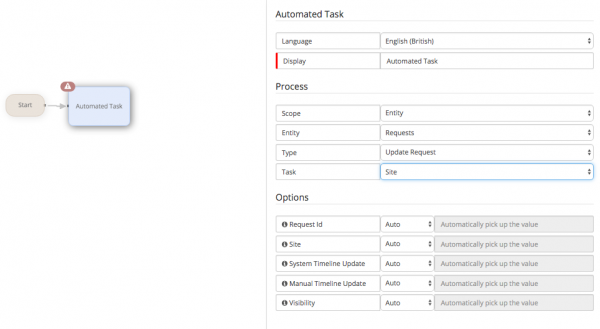
- Site
- Requests > Update Request > Site
Use this node to set the Site of the request. The configuration options include predefining the Site from the full list of Sites, which have been created in Organisational structure, and if the setting of the Site should be marked on the timeline of the request.
- System Timeline Update - Select if the default system text will be added to the timeline for this action
- Manual Timeline Update - Select Yes to override the default System timeline Text, and add your own text which will appear in the timeline update for this action
- Visibility - Choose what level of visibility will be automatically applied to this update. Choosing anything other than Customer will result in the customer not seeing the update in the timeline of their requests on the Service or Customer Portals.
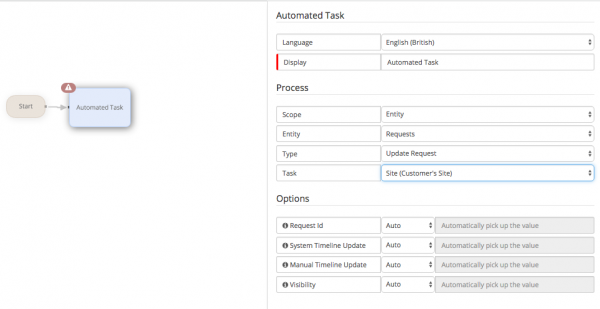
- Site (Customer' Site)
- Requests > Update Request > Site (Customer's Site)
Use this node to set the Site of the request to that of the site defined against the customer of the request. Decide if the setting of the Site should be marked on the requests timeline.
- System Timeline Update - Select if the default system text will be added to the timeline for this action
- Manual Timeline Update - Select Yes to override the default System timeline Text, and add your own text which will appear in the timeline update for this action
- Visibility - Choose what level of visibility will be automatically applied to this update. Choosing anything other than Customer will result in the customer not seeing the update in the timeline of their requests on the Service or Customer Portals.
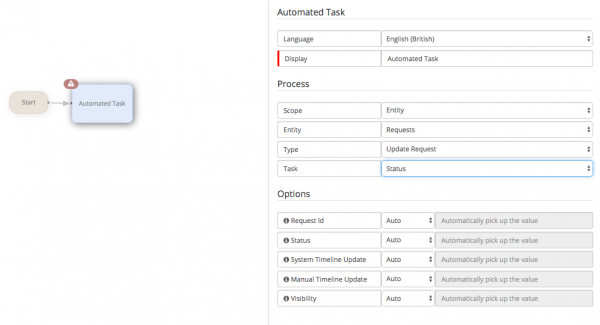
- Status
- Requests > Update Request > Status
Use this node to set the Status at one or multiple points in a process. It can be useful to automate the changing of the status based on other process actions, without the need for human intervention.
- System Timeline Update - Select if the default system text will be added to the timeline for this action
- Manual Timeline Update - Select Yes to override the default System timeline Text, and add your own text which will appear in the timeline update for this action
- Visibility - Choose what level of visibility will be automatically applied to this update. Choosing anything other than Customer will result in the customer not seeing the update in the timeline of their requests on the Service or Customer Portals.
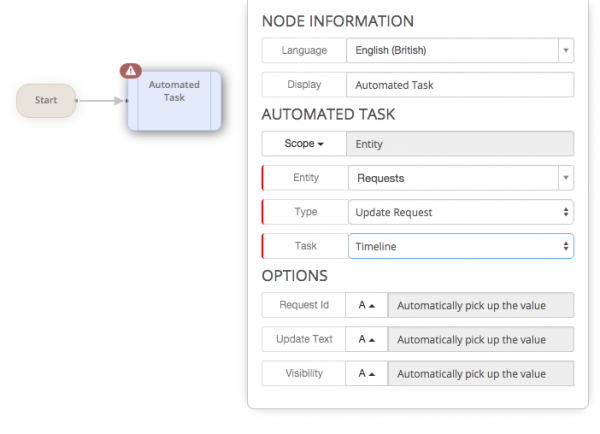
- Timeline
Request Timers
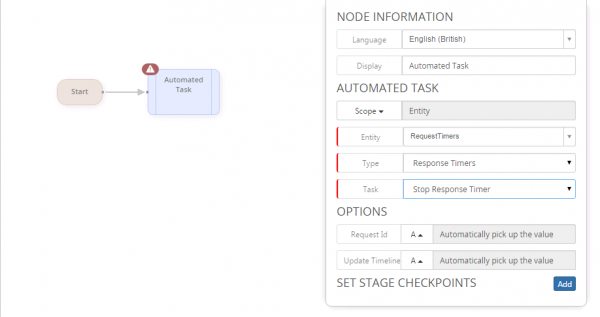
Use the Request Timer nodes at any stage in the process to either start or stop the Response and or Resolution timers. It is not a perquisite to have to use any timers within processes or to have to use both Response and Resolution timers when timers are used.
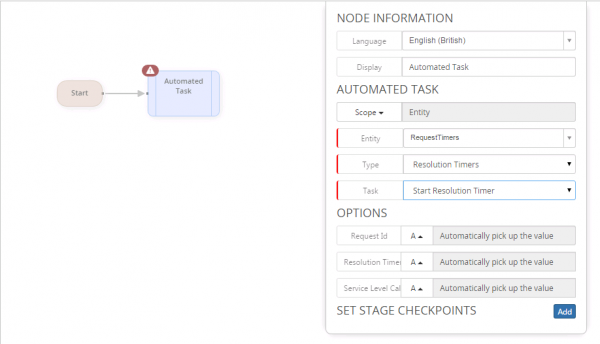
- Start Resolver Timer
- Application > Timer > Start Resolver Timer
Use this node at the required point in the process to start the resolution timer. When selecting this option, the resolution timer will be based on the Priority associated to the request. The target and any required escalation actions for the resolution timer can be configured in the Service Manager application > Services > Service Levels > Resolve Times.
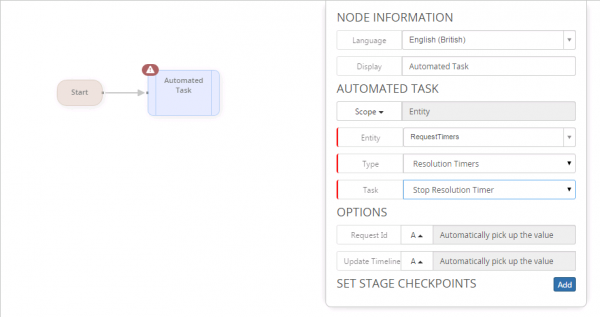
- Stop Resolution Timer
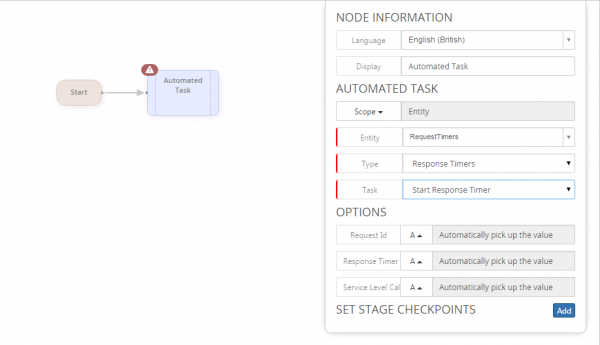
- Start Response Timer
- Application > Timer > Start Response Timer
Use this node at the required point in the process to start the response timer. The response timer to use can be selected on the node, and will use the response target and any associated escalation actions which can be configured in the Service Manager application > Services > Service Levels > Response Times.
