Manage Activity Templates
| Home > Collaboration > My Activities > Manage Activity Templates | Index |
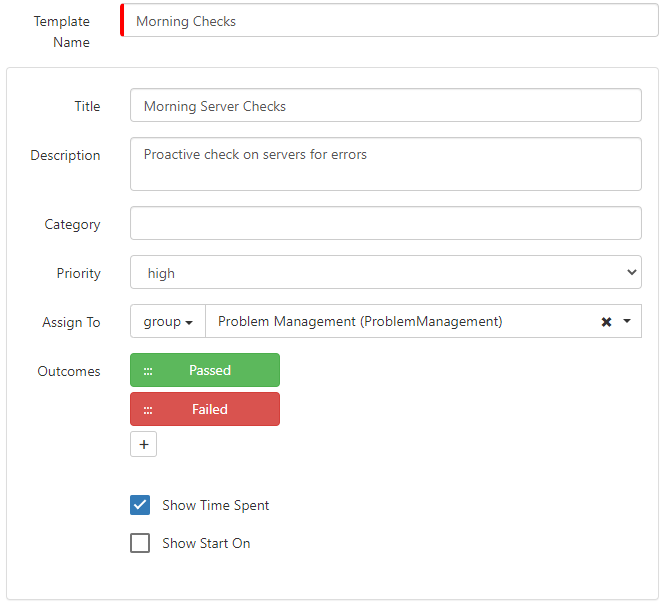
Use the ![]() icon to add a new template, give the template a name
icon to add a new template, give the template a name
- Add in the Activity Template Title and Description which will be added to the activity when this template is used
- Once a Template has been created it will be available to use when creating manual activities (these templates do not apply to business process created activities)
Outcomes
Each Template will have a default outcome of Done
- Click on the Done button to edit it's display name, code or to change the colour of the button and to select if a reason is mandatory when the user selects this outcome when completing the activity.
Add additional outcomes to a template by clicking on + icon and giving each outcome a name, code, colour and choose if they require a reason to be given if the outcome is chosen.
Once a new outcome has been created click on the outcome name to be able to configure it's attributes
- Label: The display name for the outcome which will be seen by the user when completing the activity
- Code: The code which will be attributed to the outcome and could be used for reporting purposes
- Colour: Choose a colour which will be used for the outcome when the user is completing the activity
- Require Reason: Tick if you want to make it mandatory for the user completing the activity to have to provide a note when choosing this outcome for the activity.
Remove an outcome, including the default Done outcome by clicking on the outcome and using the remove option
(Top of Page)
Checklists

Optionally add one or multiple checklists to the activity template.
- Each checklist can have multiple items added to it
Select the Add Checklist option and give the checklist a name
- Add one or multiple checklist items to the checklist by using the + Add Item icon and giving each item a name - repeat for as many items as needed in the each checklist
Remove checklist items or checklists by selecting the Trash Can next to each checklist or checklist item
- Enforce Completion - Mark if the checklist must be complete before the activity can be completed
Use the Create option to create the Activity Template
Managing Existing Template
A list of all existing Activity Templates is displayed under the Activity Templates view, select a template to do the following:
- Use the Remove button to remove the activity template - this will delete the activity template and mean it is not available to use when creating new activities, it will not effect existing activities which are already using the template
- Edit the content of an existing activity template and then use the Update button to apply the changes. The Changes will only apply to new activities which use the template from that point forward
- Copy an existing activity template by using the Save as New button and giving the new template a different name