Difference between revisions of "Mailbox Rights and Roles"
Jump to navigation
Jump to search
| Line 7: | Line 7: | ||
Your new [[What_is_Hornbill? |Hornbill]] instance is equipped with a pre-configured mailbox which will allow you to get up and running more quickly. To make use of this you must complete 3 steps :- | Your new [[What_is_Hornbill? |Hornbill]] instance is equipped with a pre-configured mailbox which will allow you to get up and running more quickly. To make use of this you must complete 3 steps :- | ||
| − | :# '''Enable the email client''' - Go to [[ | + | :# '''Enable the email client''' - Go to [[Administration|Hornbill Administration]], and then to your list of Installed Applications. Click on ''Service Manager'' and then view the Settings Tab. In the filter type ''webapp.ui.emailclient.enabled'', set the parameter to true. |
| − | :# '''Create a Mailbox Role''' - Go to [[ | + | :# '''Create a Mailbox Role''' - Go to [[Administration|Hornbill Administration]], and then ''Users and Groups'' then ''Roles''. Click 'Create New Role' and populate the fields as follows:- |
:::* Role ID: Mailbox – Helpdesk | :::* Role ID: Mailbox – Helpdesk | ||
:::* Privilege Level: User | :::* Privilege Level: User | ||
| Line 22: | Line 22: | ||
:::* 'Save changes' | :::* 'Save changes' | ||
::3. [[How_do_I_assign_or_remove_roles_from_Co-Workers? |'''Associate the Role to a User''']] who will require access to this mailbox | ::3. [[How_do_I_assign_or_remove_roles_from_Co-Workers? |'''Associate the Role to a User''']] who will require access to this mailbox | ||
| − | |||
| − | |||
| − | |||
| − | |||
Revision as of 15:52, 13 January 2015
Email is used by the Service Manager application in various processes. For example, in Incident management it can be used to both receive requests to create a call or to communicate progress or resolution of a request.
By default you will have a temporary mailbox set up as part of your instance. You will have received an email with details of this when your new instance was set up.
Using the Pre-configured Mailbox
Your new Hornbill instance is equipped with a pre-configured mailbox which will allow you to get up and running more quickly. To make use of this you must complete 3 steps :-
- Enable the email client - Go to Hornbill Administration, and then to your list of Installed Applications. Click on Service Manager and then view the Settings Tab. In the filter type webapp.ui.emailclient.enabled, set the parameter to true.
- Create a Mailbox Role - Go to Hornbill Administration, and then Users and Groups then Roles. Click 'Create New Role' and populate the fields as follows:-
- Role ID: Mailbox – Helpdesk
- Privilege Level: User
- Application: Hornbill Service Manager
- Description: Role to manage Mailbox Access
- Applications: Hornbill Service Manager
- Groups: Leave Blank
- Shared Mailboxes: helpdesk
- Click 'create role'
- Click the “Shared Mailbox rights” Tab
- Then set the following rights...
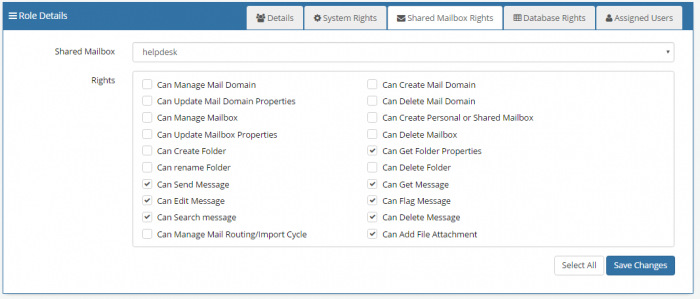
- 'Save changes'
- 3. Associate the Role to a User who will require access to this mailbox
