Custom Buttons
| Home > Collaboration > Custom Buttons | Index |
IntroductionCustom Buttons can be added to entity views such as documents, requests, organizations and assets in Hornbill, they can be configured to allow one of three options
Custom Buttons can be personalised with descriptions, icons, tooltips, and optionally be set to only display on views if configurable conditions are met. |
Related Articles |
Configuring Custom Buttons
Roles
- Form Designer
- A user will need this role to be able to configure and manage custom buttons.
- Admin Role
- A user will need this role to be able to link an iBridge Operation to a Custom Button (not needed for Auto Task Processes)
- Business Process Manager
- A user will need this role to be able to link an Auto Task Process to a Custom Button
Creating a Custom Button
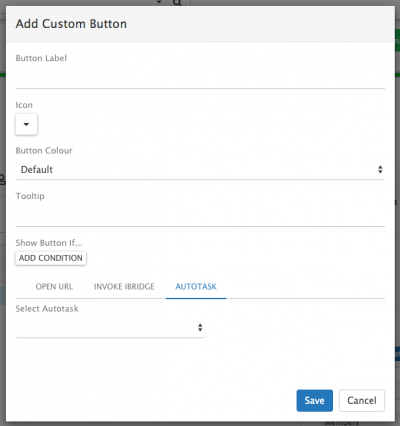
Click on the Cog Icon to add a new custom button
- Label
- Provide a label for the new custom button
- Icon
- Optional choose an icon to represent and sit alongside the custom button label on the entity form
- Colour
- Choose a background colour for the custom button
- Tooltip
- Optionally provide a more detailed explanation for the purpose of the custom button. This will be displayed when a user hovers over the custom button
Conditions
By default the custom button will appear on all forms used by the entity - i.e all Request type forms, all asset type forms. However if you use the Conditions option you can configure the conditions which must be met in order for the custom button to be visible to users when viewing the relevant entity form.
- The available conditions will be relevant to the entity against which you are adding the custom button
Condition Values
Service Manager
Request Entity
- Request Status: values need to entered in the following format: status.new, status.open, status.closed etc
- Request Type: Values need to be entered in lower case so incident instead of Incident for example
Custom Button Actions
Each custom button can be configured to be one of the following:
- Open URL
- Invoke a specific iBridge operation
- Run an Auto Task process
Open URL
- Add a URL which you wish to launch from the custom button.
- Include variables from the entity in the URL.
Invoke iBridge
- Deprecated - Please use Auto Tasks. Whilst existing iBridge configurations will continue to work, we would encourage the use of the Auto Task option for invoking single or multiple iBridge operations.
Clicking on the iBridge text, will switch the custom button from the standard Open URL and will allow for the invoking of an iBridge Method when the custom Button is selected by a user.
![]() You will need the MANAGEKEYSAFE in group C in order to configure iBridge methods
You will need the MANAGEKEYSAFE in group C in order to configure iBridge methods
![]() You will need an iBridge subscription to utilise Premium iBridge methods
You will need an iBridge subscription to utilise Premium iBridge methods
Click Method to display the list of available iBridge Methods
- Choose the cloud service you wish to call
- Drill down into the method you wish to use
- If required select the Keysafefrom the drop down list for the chosen method, the Keysafe credentials which will be used when the custom button is used and the iBridge Method is invoked. If none have been configured you can follow the link to set these up before proceeding further.
- Complete the Context input values for the chosen method
- Optionally inject variables from the entity into the input values for the chosen method
Response
- Tick if you wish the user to be presented with a pop-up and response from the service you have integrated with once the custom button is clicked
- Tick if you would like a post to be written to the entity timeline when the custom button is clicked
- Configure the text which will be displayed in the message and optionally include any output values from the integration with the 3rd party service and chosen method.
Auto Task
- A Custom Button Administrator will also need the Business Process Manager role, in order to be able to link an Auto Task Process to a Custom Button
- Select the Auto Task Process which you wish to be invoked and executed when the custom button is selected
Response
- Display Autotask progress in timeline - tick this option if you want a post to be added to the entity timeline to audit the running of the Auto Task process and it's progress and success
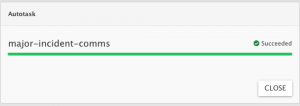
- Open popup with Autotask progress - tick this option if you want a pop up to display when the custom buttons is selected, and to show the user the progress of the executed Auto Task process
Manage Custom Buttons
- Click on the edit option next to a custom button in order to edit it's attributes
- Click on the Trash Can icon next to a custom button in order to delete it
Using Custom Buttons
Once a custom button has been configured, users will be able to use the custom button from the entity view it has been configured against. Visibility of the custom button will also depend on any conditions which may have been set when configuring the button.


