Azure Service Bus
Home > Integration > Business Process Automation & Orchestration > Hornbill iBridge > Azure Service Bus
IntroductionMicrosoft develops, manufactures, licenses, supports and sells computer software, consumer electronics, personal computers, and services. Azure Service Bus is a cloud messaging system for connecting apps and devices across public and private clouds. Azure Service Bus is a Premium Integration |
Related Articles |
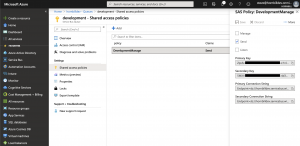
In order to integrate with Azure Service Bus, you will first need to configure, and securely store a Service Bus Shared Access Policy for the Queue you want to interact with. From the Azure Portal, to configure a new or existing Shared Access Policy for use in Hornbill:
- Open the Service Bus blade;
- Click on the Service Bus you wish to integrate with;
- Under Entities, click Queues;
- Click on the queue you wish to add messages to;
- Click Shared Access Policies;
- If a Shared Access Policy already exists that allows the Send permission against the queue, then click the policy and copy either the Primary Connection String or Secondary Connection String to the clipboard;
- If a Shared Access Policy doesn't already exist, then click Add to create a new one, making sure that it has the Send permission set, then copy either the Primary Connection String or Secondary Connection String to the clipboard;
Now you have the Connection String in your clipboard ready for pasting into a new KeySafe Key, below:
KeySafe Configuration
Configure your Azure Service Bus account authentication in KeySafe in order to use the Azure Service Bus options.
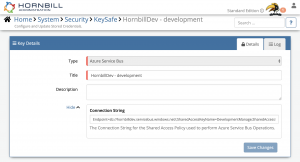
In the admin console > System > Security > KeySafe
- Select on + and choose Azure Service Bus
- Give the Azure Service Bus key a Title (this is the name/identifier for the Azure Service Bus shared access policy account as you will see it when using the Integration Call node in your business process)
- Optionally add a description
- Paste the Connection String copied from the Shared Access Policy (above) into the Connection String field.
- Select Create Key to save
Managing Azure Service Bus Configurations
- Use KeySafe to create, store and enable integrations with multiple Azure Service Bus shared access policies for use in your business processes
- From the Keysafe List, select an Azure Service Bus account, and use the Trash Can to delete it
- Note, this will remove the rights of any existing Azure Service Bus Integration Calls in your business processes, which are using the now-deleted Azure Service Bus account, so you will need to edit your business processes accordingly.
Business Process
Options (Methods)
Once you have your Service Bus Account Authorised, you're all set to use it with the Integration Call in your business processes. The following options are now available for you to use with Service Bus :
Microsoft > Azure
- Service Bus
- Send Message - allows you to send messages to a message queue
Read more about using the Integration Call from the Related Articles section, and learn how to work with input and output parameters for each of the Service Bus options.


